Proj 13: Exodus Wallet (10 pts.)
What You Need
- A computer with any OS. I used a Mac.
- Someone to send you some Ether. If you have already done project X1, you can send Ether to yourself. If not, you can get some from another student, or from your instructor.
Purpose
To set up an local Ethereum wallet, so you can send and
receive Ether without entrusting anyone else with your
private keys.
Go to:
https://www.exodus.io/
At the top right, click DOWNLOAD.
On the next page, click the link to get the
version for your OS.
Install it on your system.
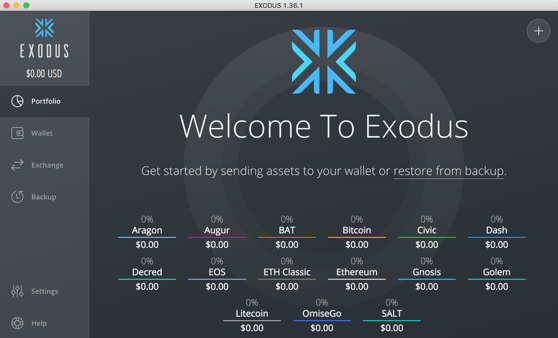
Launch Exodus. You see the Welcome
screen, as shown below.
Getting a Receive Address
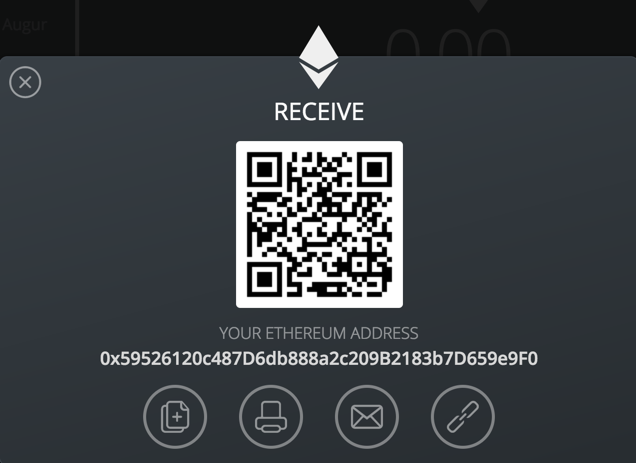
In the Exodus window, on the left,
click Wallet. In the list
of currencies, click
Ethereum, as shown below.

On the right, click
RECEIVE.
An address appears,
as shown below.
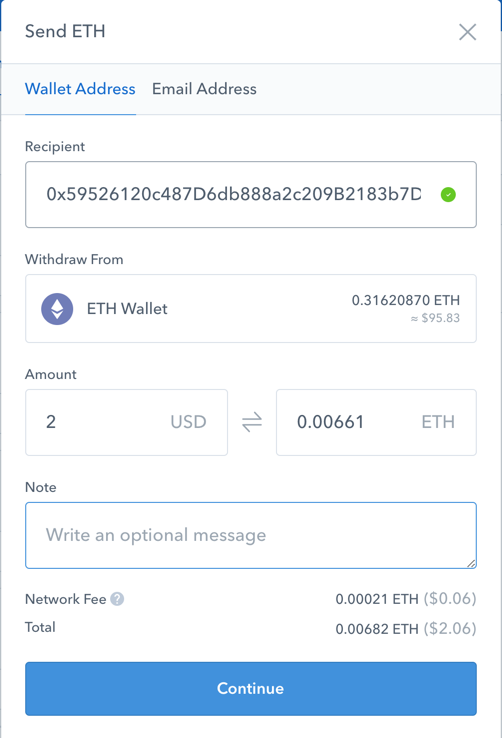
Getting some Ether
Get someone to send some Ether to that
address. If you have done project X1,
you can send it yourself from Coinbase,
as shown below.
Notice that the network fee is very
low for Ether--just 6 cents when I
did it (10-24-17).
In Exodus,
the transaction appear at first as
"PENDING",
as shown below.

Saving a Screen Image
Make sure you can see
a transaction in Exodus,
as shown above.
Capture a full-screen image.
YOU MUST SUBMIT A FULL-SCREEN IMAGE FOR FULL CREDIT!
Save the image with the filename "YOUR NAME Proj 13", replacing "YOUR NAME" with your real name.
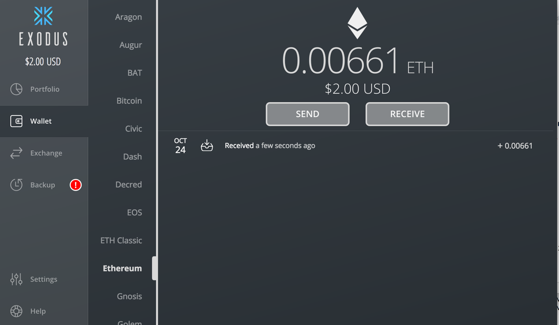
Confirmed Transaction
It will take about 2 minutes
to be confirmed.
When that happens, your wallet will
look like the image below.
Turning in your Project
Email the images
to cnit.141@gmail.com with the subject line:
Proj 13 from YOUR NAME.
Posted 10-24-17 by Sam Bowne