Proj 15: Making an Ethereum Contract with Truffle (10 pts.)

What You Need

I did this project successfully on a Mac running Mac OS X El Capitan and on Ubuntu 16.04 server.

Purpose

To set up an Ethereum Smart Contract. The ability to run programs like this is the main feature that distinguishes Ethereum from Bitcoin.

We'll use TestRPC, which makes it fast and easy to develop contracts on a simulated test blockchain.

Source

After much struggling, I found this wonderful Truffle tutorial and this project follows it closely:

The Hitchhiker's Guide to Smart Contracts in Ethereum

Mac or Ubuntu?

The first step is different for Mac and Ubuntu. All the other steps are the same.

1. Installing Node.js and npm on a Mac

Go here:

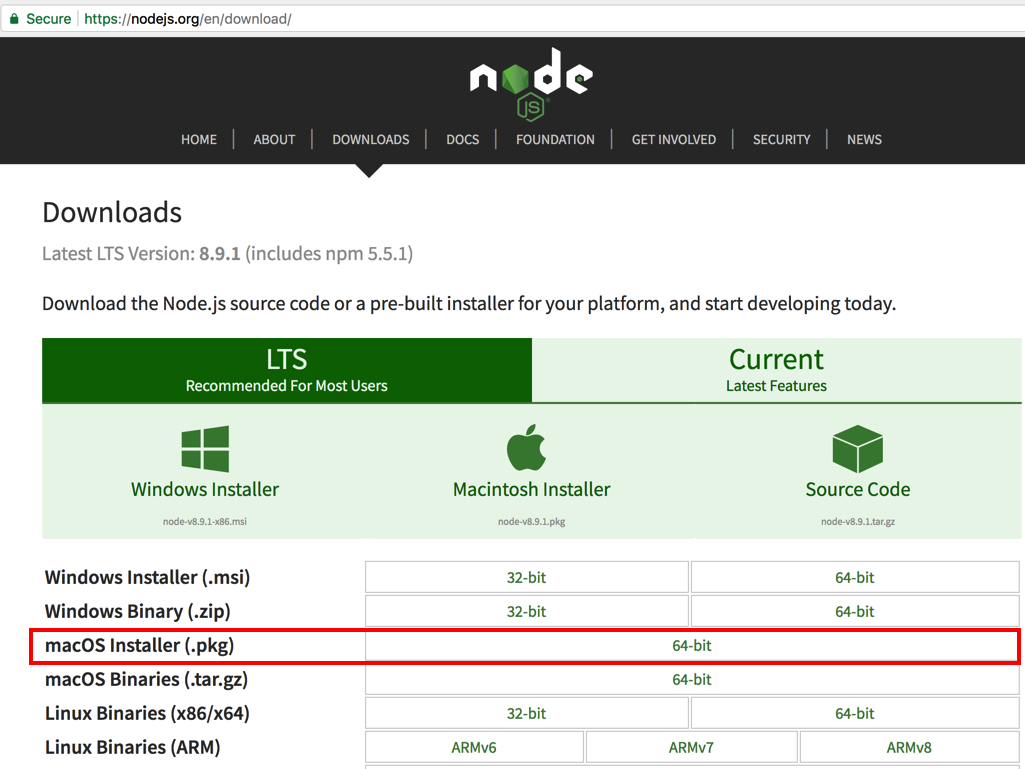
https://nodejs.org/en/download/

Download the installer for your OS, as shown below.

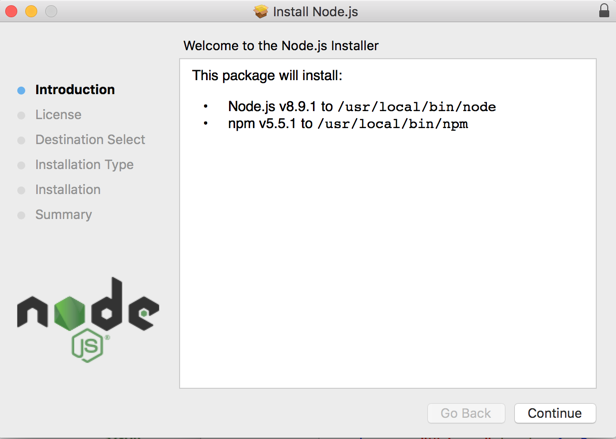
Install it. as shown below.

To update it, in a Terminal window, execute this command:

sudo npm install npm@latest -g
Enter your password when you are prompted to. The software installs, as shown below.

1. Installing Node.js and npm on Ubuntu 16.04

In a Terminal window, execute this command:
sudo apt install -y curl
Enter your password when you are prompted to.

In the same Terminal window, execute these commands:

curl -sL https://deb.nodesource.com/setup_8.x | sudo -E bash -
sudo apt-get install -y nodejs
Enter your password when you are prompted to. The software installs, ending with a long list of "Setting up" messages, as shown below.

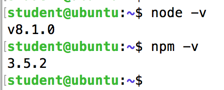
In a Terminal window, execute these commands:

node -v
npm -v
You should see version numbers, as shown below.

(When I re-did the project on Apr 15, 2019, the versions were v8.15.1 and 6.4.1.)

In a Terminal window, execute this command:

sudo npm install npm@latest -g
Enter your password when you are prompted to. The software installs, as shown below.

2. Installing Truffle

Truffle is a development framework for smart contracts.

To install it, open a new Terminal window and execute this command:

sudo npm install -g truffle
The installation proceeds, ending with a long list of modules, as shown below.

4. Set Up a Project

In the Terminal window, execute these commands.

(On Ubuntu, you need to prefix the last command with "sudo".)
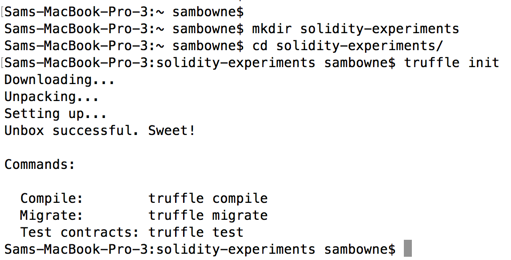
cd
mkdir solidity-experiments
cd solidity-experiments/
truffle init
The task succeeds, as shown below.

5. Starting the Development Testchain

Truffle can run an Ethereum test chain locally so you can develop contracts without spending any actual Ether.

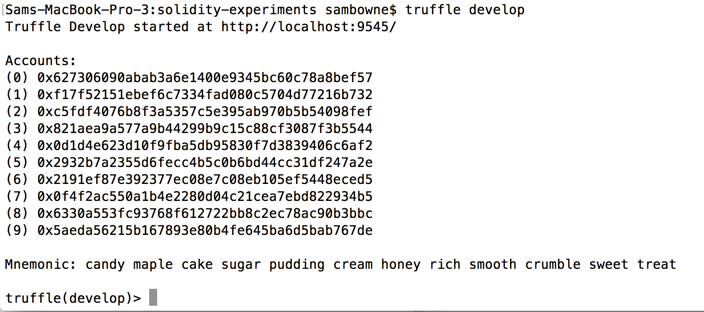
In the Terminal window, execute this command.

(On Ubuntu, you need to prefix this command with "sudo".)

truffle develop
The development blockchain starts, printing out some addresses, as shown below.

6. Compiling and Deploying Sample Contracts

Truffle will create all the files for an example project, including contracts for MetaCoin, a sample token contract.

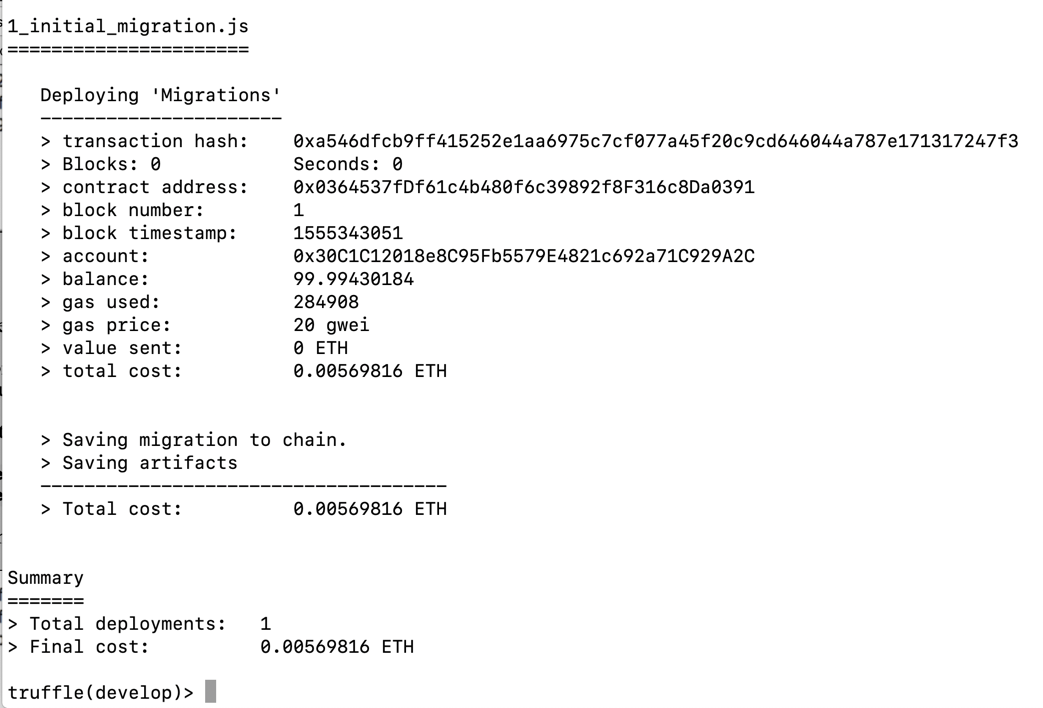
You should be able to compile the example contracts by running truffle compile. Then, to deploy the contracts to the simulated network using the testrpc node we have running, you need to run truffle migrate.

In the Terminal window, at the truffle(develop)> prompt, execute these commands.

networks --clean
compile
migrate
The task succeeds, as shown below.

7. Creating a Smart Contract

In this guide we'll be writing a simple Proof of Existence smart contract. The idea is to create a digital notary that stores hashes of documents as proofs of their existence.

In the Terminal window, at the truffle(develop)> prompt, execute these commands.

create contract ProofOfExistence1
The task succeeds without an error, as shown below.

8. Adding Solidity Code

In a new Terminal window, execute these commands to edit the contract.
cd
cd solidity-experiments
nano contracts/ProofOfExistence1.sol
The contract code appears, with a few lines of code, as shown below.

Remove the existing code and paste in this code:

pragma solidity ^0.5.0;
// Proof of Existence contract, version 1
contract ProofOfExistence1 {
  // state
  bytes32 public proof;
  // calculate and store the proof for a document
  // *transactional function*
  function notarize(string memory document) public {
    proof = proofFor(document);
  }
  // helper function to get a document's sha256
  // *read-only function*
  function proofFor(string memory document) public view returns (bytes32) {
    return sha256(bytes(document));
  }
}
Your screen should look like the image below.

Explanation

This code is in the Solidity language. Note these items: In Ethereum, gas refers to Ether (money) expended to pay for computations. On our testchain, Ether is free, so no real money is expended.

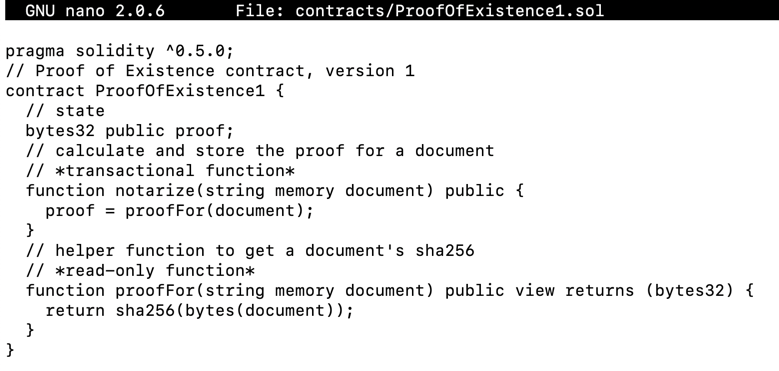
In the contract above, notarize is a transactional function and proofFor is a constant function.

Saving the ProofOfExistence1.sol File

In Nano, press Ctrl+X, Y, Enter.

9. Deploying the Contract

In the Terminal window, execute this command to edit the migration file.
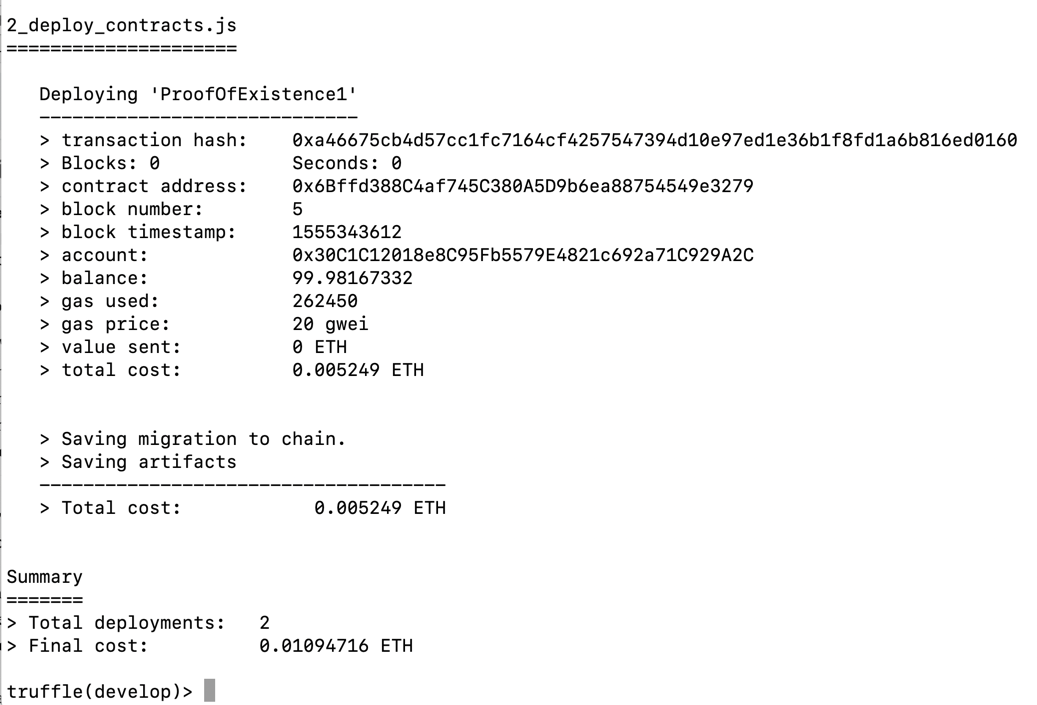
nano migrations/2_deploy_contracts.js
The file is empty. Paste in the code shown below:
var ProofOfExistence1 = artifacts.require("./ProofOfExistence1.sol");
module.exports = function(deployer) {
  deployer.deploy(ProofOfExistence1);
};

Press Ctrl+X, Y, Enter to save the file. To run the migration again, In your original Terminal window, at the truffle(develop)> prompt, execute this command.

migrate --reset
Truffle compiles the contract, as shown below.

10. Finding the Smart Contract's Address

First, we'll find the address of the deployed contract and print it out.

In your original Terminal window, at the truffle(develop)> prompt, execute these commands.

let poe = await ProofOfExistence1.at(ProofOfExistence1.address)
poe.address
The first command returns an "undefined" message, but the second one prints out a long hexadecimal address, as shown below.

11. Calculating a Hash

Let's calculate the hash for the message

An amazing idea

The SHA256 hash of this message is shown below, and it starts with a328.

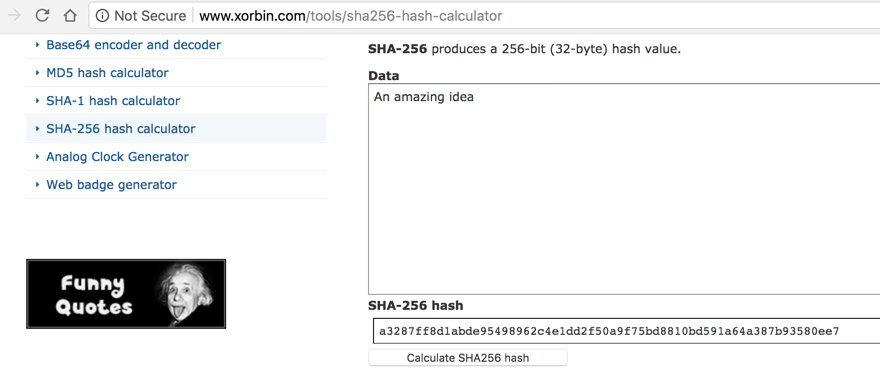
Let's use our smart contract to calculate that hash value.

In your original Terminal window, at the truffle(develop)> prompt, execute this command.

poe.proofFor('An amazing idea')
The first command returns the correct hash value, as shown below.

12. Registering a Document

In your original Terminal window, at the truffle(develop)> prompt, execute this command.
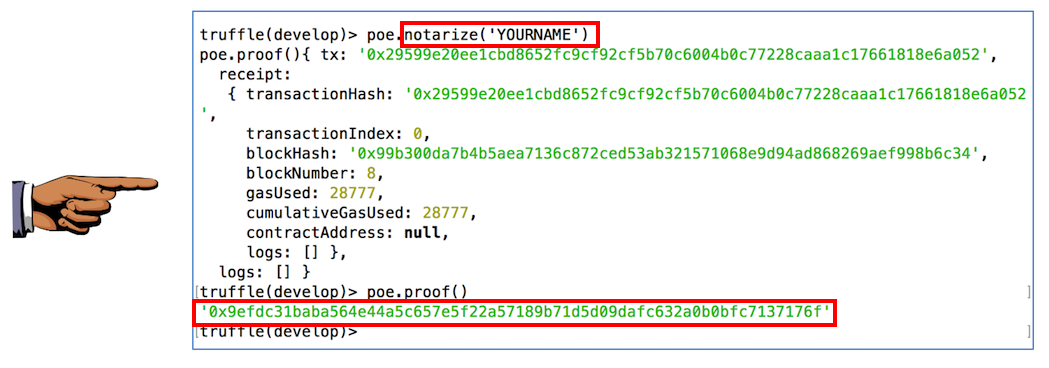
poe.notarize('An amazing idea')
poe.proof()
The first command performs a transaction, storing a block on the blockchain. The second command returns the hash value of the document, as shown below.

Notice that the transaction cost some gas, as shown above.

13. Registering Your Name

In your original Terminal window, at the truffle(develop)> prompt, execute this command, replacing "YOURNAME" with your own name.
poe.notarize('YOURNAME')
poe.proof()
The first command puts your name on the blockchain. The second command returns the hash value of the document, as shown below.

Saving a Screen Image

Make sure you can see these two required items:

Capture a full-screen image.

YOU MUST SUBMIT A FULL-SCREEN IMAGE FOR FULL CREDIT!

Save the image with the filename "YOUR NAME Proj 15", replacing "YOUR NAME" with your real name.

Turning in your Project

Email the image to cnit.141@gmail.com with the subject line: Proj 15 from YOUR NAME.

Sources

How to Build a Private Ethereum Blockchain
Building and installing Ethereum compilers
Compiling an LLL Contract for the First Time
Ethereum JSON RPC Methods
Deploying your first LLL contract -- Part 1
Deploying your first LLL contract -- Part 2
The Hitchhiker's Guide to Smart Contracts in Ethereum
Truffle Migrate doesn't work: Error: No network specified. Cannot determine current network
How to Install Node.js on Ubuntu 14.04

Thanks!

Thanks to Chee Vue for explaining how to update this project in 2019!

Posted 11-14-17 by Sam Bowne
Updated 8:30 pm 11-14-17
Updated 4-15-19