Interledger is the protocol used for payments between different ledgers.
Then, in a Terminal window, execute these commands to remove any old Node versions and install the latest Node.
brew install node

sudo chown -R $USER:$(id -gn $USER) /Users/$USER/.config

sudo npm install
However, the skill of using Ripple is worth a lot.
In a Terminal, execute these commands.
cd

git clone https://github.com/interledger/tutorials
cd tutorials/letter-shop
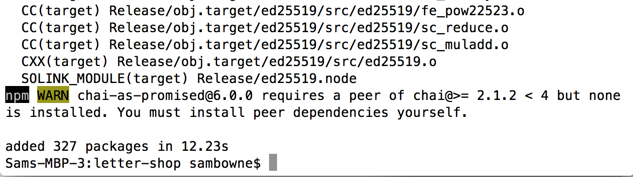
npm install
node shop.js

https://ripple.com/build/xrp-test-net/
Click the "Generate credentials" button. Copy your ADDRESS and SECRET values to a text file for later use, as shown below. These will be your SHOP credentials.
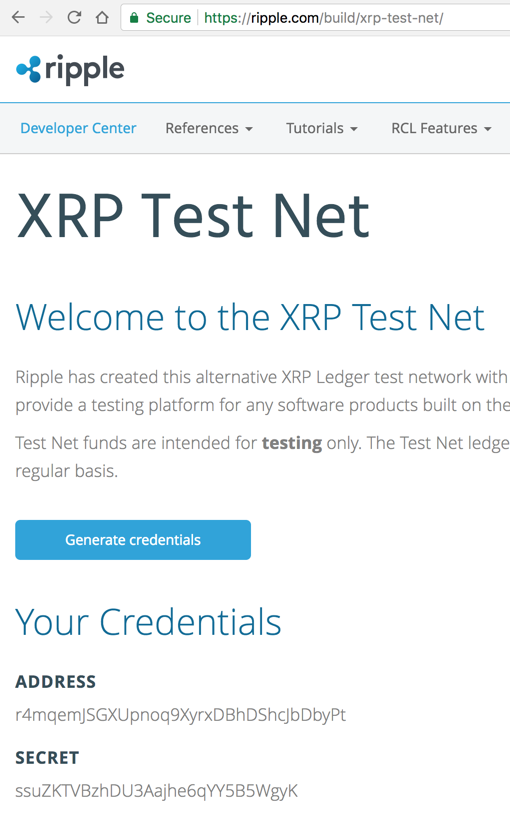
Click the "Generate credentials" button a second time. Copy your ADDRESS and SECRET values to a text file, also. These will be your CUSTOMER credentials.
cp plugins.js plugins.js.bak
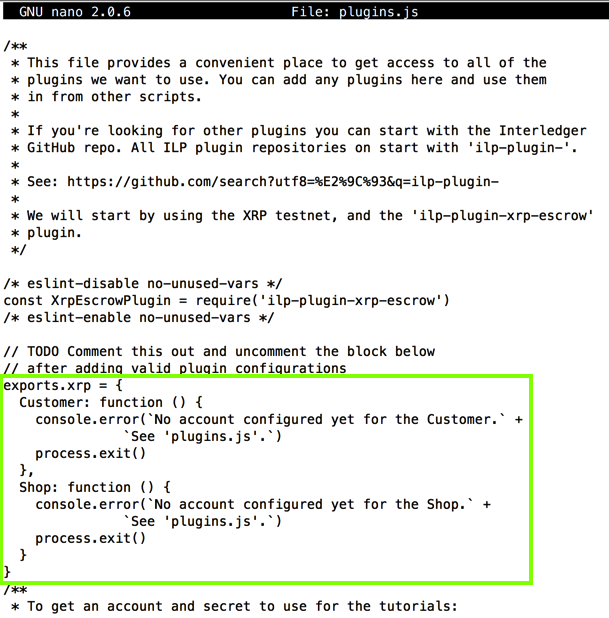
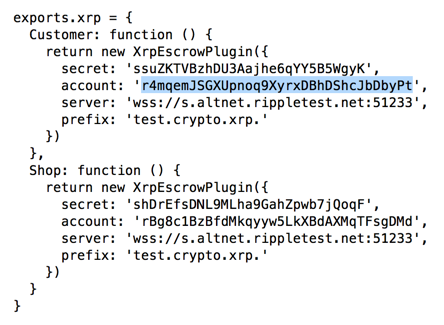
nano plugins.js
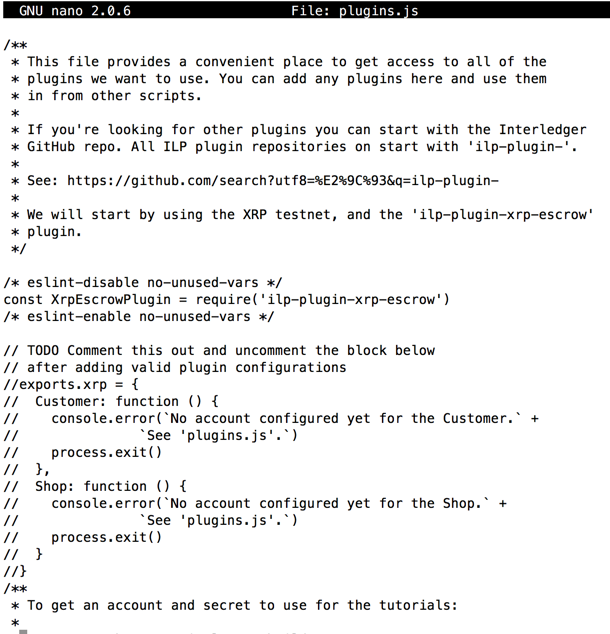
Your code should now look like this:
Scroll down in the file and find the section outlined in green in the image below.
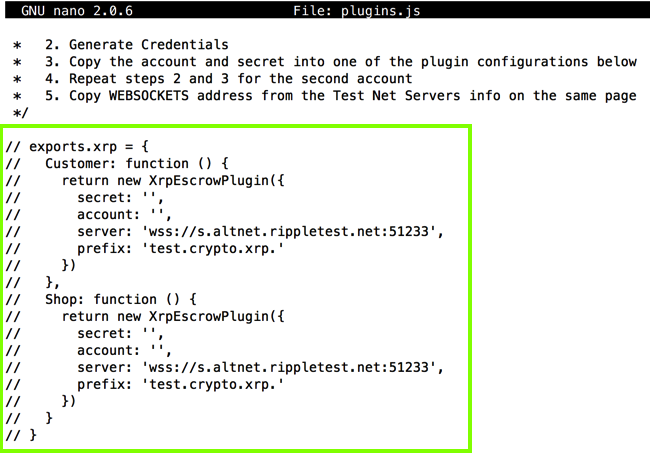
Delete the // from the start of each line.
Paste in the ADDRESS and SECRET and values into the lines, for both the SHOP and CUSTOMER.
Your code should now look like this:
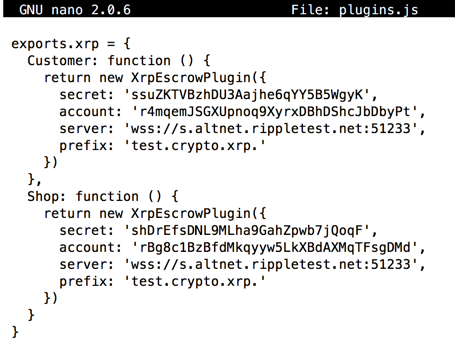
Press Ctrl+X, Y, Enter to save the file.
node shop.js

cp shop.js shop.js.bak1

nano shop.js
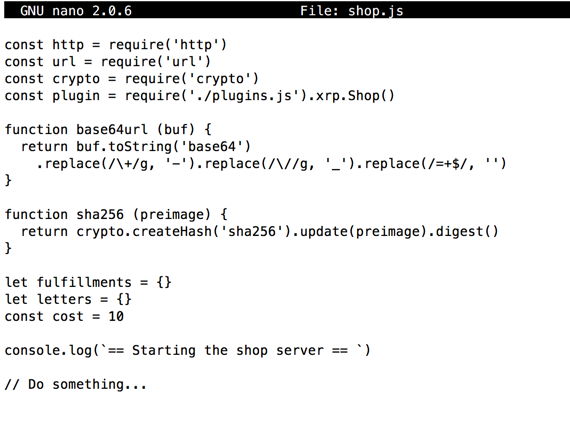
We need to add code that connects to the Ripple account, so the shop can receive funds.
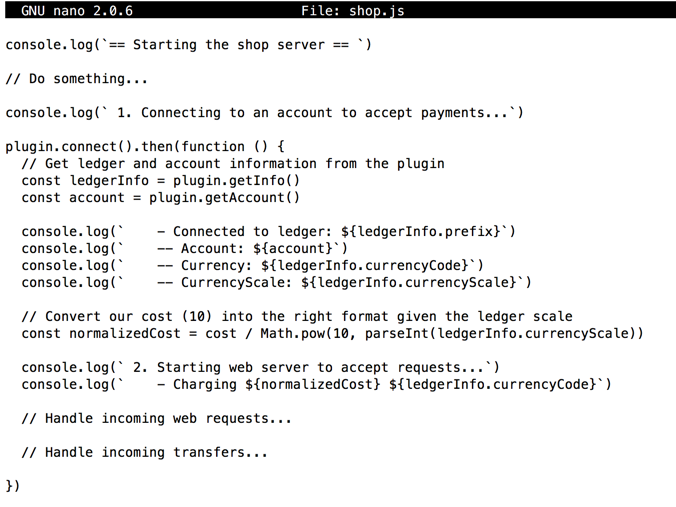
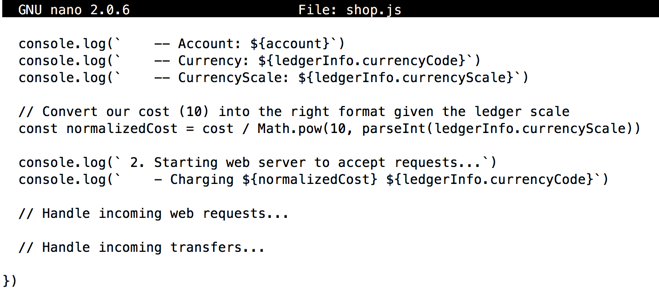
Paste this code at the end of the file:
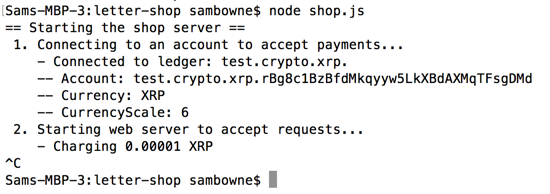
console.log(` 1. Connecting to an account to accept payments...`)

plugin.connect().then(function () {
  // Get ledger and account information from the plugin
  const ledgerInfo = plugin.getInfo()
  const account = plugin.getAccount()

  console.log(`    - Connected to ledger: ${ledgerInfo.prefix}`)
  console.log(`    -- Account: ${account}`)
  console.log(`    -- Currency: ${ledgerInfo.currencyCode}`)
  console.log(`    -- CurrencyScale: ${ledgerInfo.currencyScale}`)

  // Convert our cost (10) into the right format given the ledger scale
  const normalizedCost = cost / Math.pow(10, parseInt(ledgerInfo.currencyScale))

  console.log(` 2. Starting web server to accept requests...`)
  console.log(`    - Charging ${normalizedCost} ${ledgerInfo.currencyCode}`)

  // Handle incoming web requests...

  // Handle incoming transfers...

})
Press Ctrl+X, Y, Enter to save the file.
node shop.js
Press Ctrl+C to stop the code.
cp shop.js shop.js.bak2

nano shop.js
Now we'll add code that handles three types of Web requests.
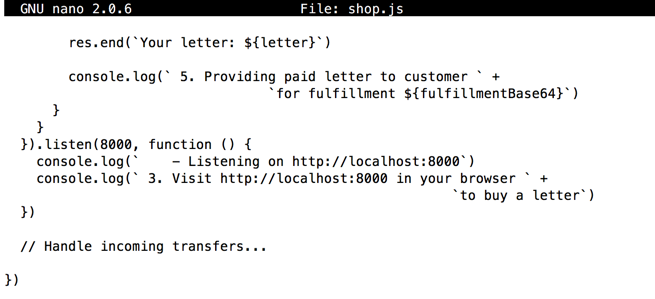
Paste this code after the "// Handle incoming web requests" line:
// Handle incoming web requests
http.createServer(function (req, res) {
// Browsers are irritiating and often probe for a favicon, just ignore
if (req.url.startsWith(`/favicon.ico`)) {
res.statusCode = 404
res.end()
return
}
console.log(` - Incoming request to: ${req.url}`)
const requestUrl = url.parse(req.url)
if (requestUrl.path === `/`) {
// Request for a letter with no attached fulfillment
// Respond with a 402 HTTP Status Code (Payment Required)
res.statusCode = 402
// Generate a preimage and its SHA256 hash,
// which we'll use as the fulfillment and condition, respectively, of the
// conditional transfer.
const fulfillment = crypto.randomBytes(32)
const condition = sha256(fulfillment)
// Get the letter that we are selling
const letter = ('ABCDEFGHIJKLMNOPQRSTUVWXYZ')
.split('')[(Math.floor(Math.random() * 26))]
console.log(` - Generated letter (${letter}) ` +
`at http://localhost:8000${req.url}${base64url(fulfillment)}`)
// Store the fulfillment (indexed by condition) to use when we get paid
fulfillments[base64url(condition)] = fulfillment
// Store the letter (indexed by the fulfillment) to use when the customer
// requests it
letters[base64url(fulfillment)] = letter
console.log(` - Waiting for payment...`)
res.setHeader(`Pay`, `${cost} ${account} ${base64url(condition)}`)
res.end(`Please send an Interledger payment of` +
` ${normalizedCost} ${ledgerInfo.currencyCode} to ${account}` +
` using the condition ${base64url(condition)}\n` +
`> node ./pay.js ${account} ${cost} ${base64url(condition)}`)
} else {
// Request for a letter with the fulfillment in the path
// Get fulfillment from the path
const fulfillmentBase64 = requestUrl.path.substring(1)
// Lookup the letter we stored previously for this fulfillment
const letter = letters[fulfillmentBase64]
if (!letter) {
// We have no record of a letter that was issued for this fulfillment
// Respond with a 404 HTTP Status Code (Not Found)
res.statusCode = 404
console.log(' - No letter found for fulfillment: ' +
fulfillmentBase64)
res.end(`Unrecognized fulfillment.`)
} else {
// Provide the customer with their letter
res.end(`Your letter: ${letter}`)
console.log(` 5. Providing paid letter to customer ` +
`for fulfillment ${fulfillmentBase64}`)
}
}
}).listen(8000, function () {
console.log(` - Listening on http://localhost:8000`)
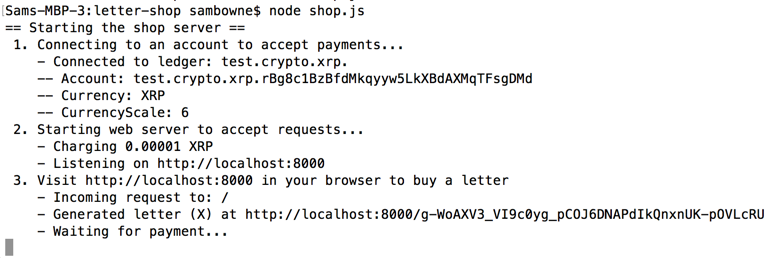
console.log(` 3. Visit http://localhost:8000 in your browser ` +
`to buy a letter`)
})
Press Ctrl+X, Y, Enter to save the file.
node shop.js
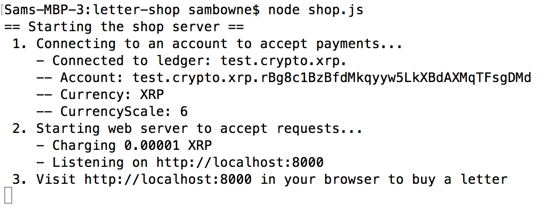
You see a message telling you what command to execute, as highlighted in the image below.

Open a new terminal window and execute these commands:
cd

cd tutorials/letter-shop

The message "== Starting the payment client == " appears, but nothing further happens.
As before, this is because there is code missing from the payment client.
nano pay.js
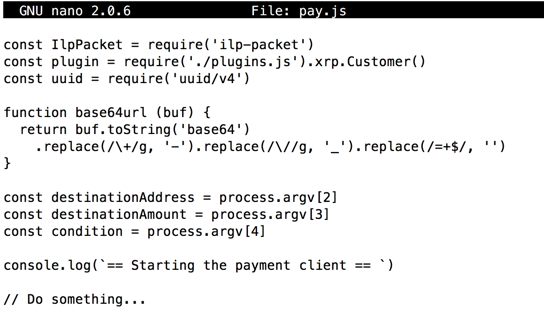
At the bottom, paste in this code:
console.log(` 1. Connecting to an account to send payments...`)

plugin.connect().then(function () {
  const ledgerInfo = plugin.getInfo()
  const account = plugin.getAccount()
  console.log(`    - Connected to ledger: ${ledgerInfo.prefix}`)
  console.log(`    -- Account: ${account}`)
  console.log(`    -- Currency: ${ledgerInfo.currencyCode}`)
  console.log(`    -- CurrencyScale: ${ledgerInfo.currencyScale}`)

  // Make payment...

  // Listen for fulfillments...

})
Your code should now look like the image below.
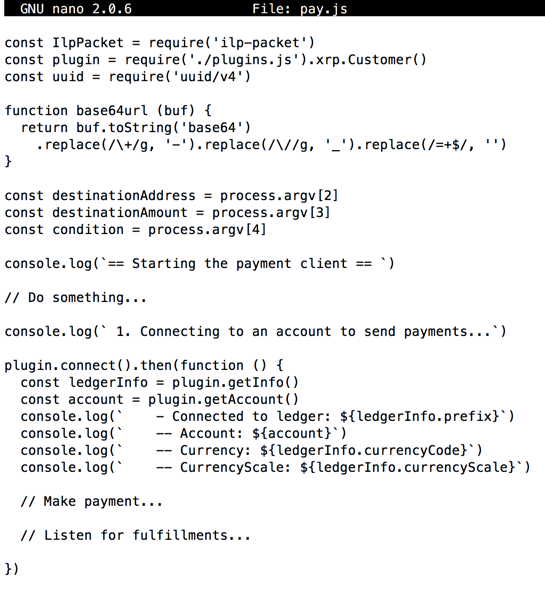
Press Ctrl+X, Y, Enter to save the file.
The client connects to an account, but then just hangs, as shown below.
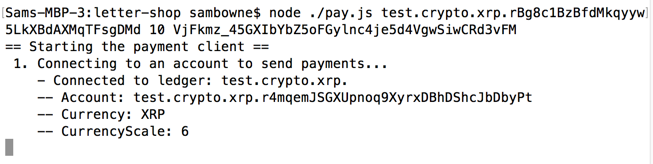
Press Ctrl+C to stop the client.
Execute this command:
nano pay.js
console.log(` 2. Making payment to ${destinationAddress} ` +
`using condition: ${condition}`)
// Send the transfer
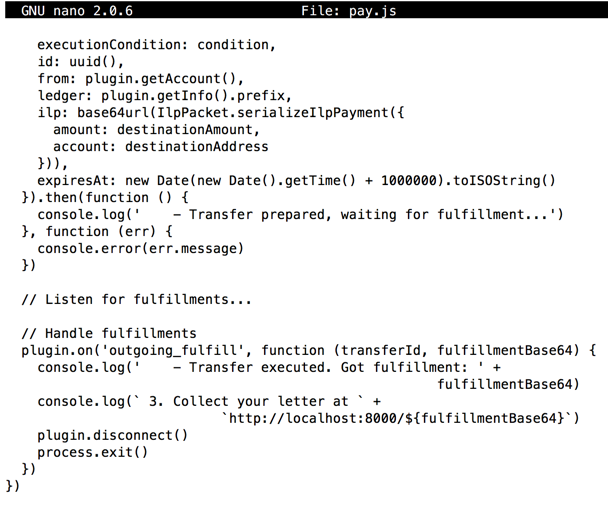
plugin.sendTransfer({
to: destinationAddress,
amount: destinationAmount,
executionCondition: condition,
id: uuid(),
from: plugin.getAccount(),
ledger: plugin.getInfo().prefix,
ilp: base64url(IlpPacket.serializeIlpPayment({
amount: destinationAmount,
account: destinationAddress
})),
expiresAt: new Date(new Date().getTime() + 1000000).toISOString()
}).then(function () {
console.log(' - Transfer prepared, waiting for fulfillment...')
}, function (err) {
console.error(err.message)
})
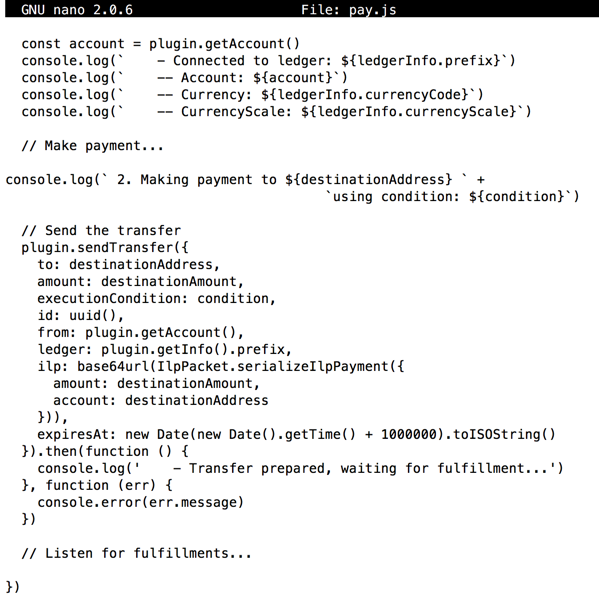
Press Ctrl+X, Y, Enter to save the file.
The client makes the payment, but stops with a "waiting for fulfillment" message, as shown below.
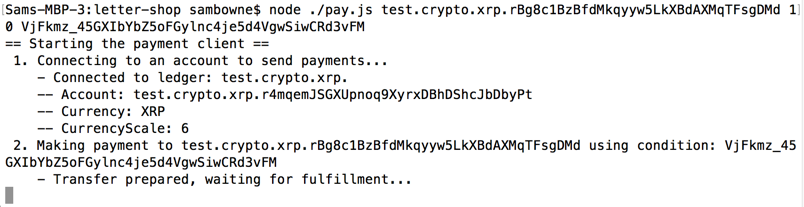
Press Ctrl+C to stop the client.
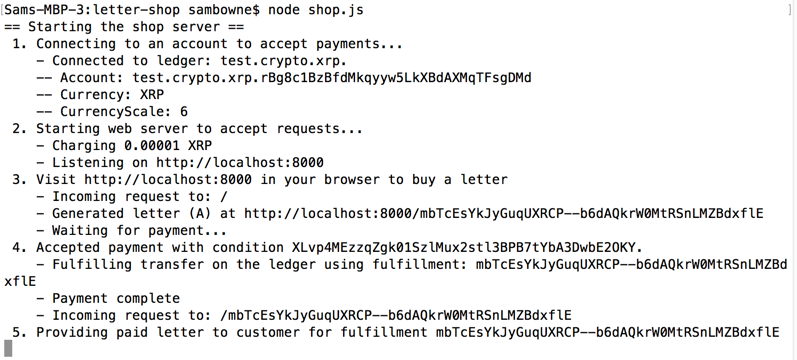
Look at your original Terminal window running the shop. It's still "Waiting for payment...", as shown below.
cat plugins.js
In the available Terminal window, execute this command, replacing YOUR-SENDING-ADDRESS with your own CUSTOMER address:
curl -X POST -d '{ "method": "account_objects", "params": [{"ledger_index":"validated", "account": "YOUR-SENDING-ADDRESS", "type": "escrow"}]}' https://client.altnet.rippletest.net:51234
"status":"success","validated":true
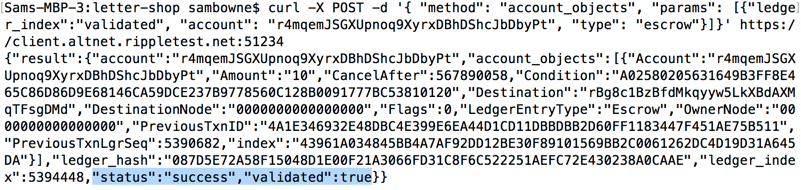
So the transaction was created on the ledger, but never received.
When a payment is received, an "incoming_prepare" event occurs. The shop.js code needs a handler for that event.
Execute this command:
nano shop.js
// Handle incoming payments
plugin.on('incoming_prepare', function (transfer) {
if (parseInt(transfer.amount) < 10) {
// Transfer amount is incorrect
console.log(` - Payment received for the wrong amount ` +
`(${transfer.amount})... Rejected`)
const normalizedAmount = transfer.amount /
Math.pow(10, parseInt(ledgerInfo.currencyScale))
plugin.rejectIncomingTransfer(transfer.id, {
code: 'F04',
name: 'Insufficient Destination Amount',
message: `Please send at least 10 ${ledgerInfo.currencyCode},` +
`you sent ${normalizedAmount}`,
triggered_by: plugin.getAccount(),
triggered_at: new Date().toISOString(),
forwarded_by: [],
additional_info: {}
})
} else {
// Lookup fulfillment from condition attached to incoming transfer
const fulfillment = fulfillments[transfer.executionCondition]
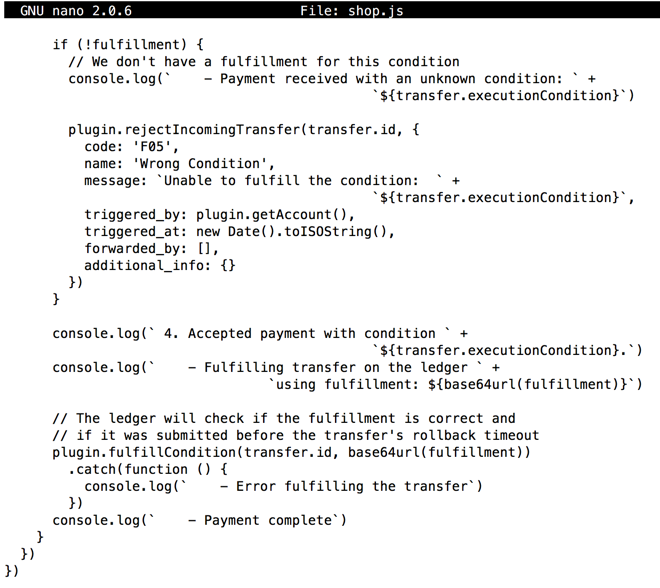
if (!fulfillment) {
// We don't have a fulfillment for this condition
console.log(` - Payment received with an unknown condition: ` +
`${transfer.executionCondition}`)
plugin.rejectIncomingTransfer(transfer.id, {
code: 'F05',
name: 'Wrong Condition',
message: `Unable to fulfill the condition: ` +
`${transfer.executionCondition}`,
triggered_by: plugin.getAccount(),
triggered_at: new Date().toISOString(),
forwarded_by: [],
additional_info: {}
})
}
console.log(` 4. Accepted payment with condition ` +
`${transfer.executionCondition}.`)
console.log(` - Fulfilling transfer on the ledger ` +
`using fulfillment: ${base64url(fulfillment)}`)
// The ledger will check if the fulfillment is correct and
// if it was submitted before the transfer's rollback timeout
plugin.fulfillCondition(transfer.id, base64url(fulfillment))
.catch(function () {
console.log(` - Error fulfilling the transfer`)
})
console.log(` - Payment complete`)
}
})
Press Ctrl+X, Y, Enter to save the file.
Execute this command:
nano pay.js
  // Handle fulfillments
  plugin.on('outgoing_fulfill', function (transferId, fulfillmentBase64) {
    console.log('    - Transfer executed. Got fulfillment: ' +
                                                      fulfillmentBase64)
    console.log(` 3. Collect your letter at ` +
                           `http://localhost:8000/${fulfillmentBase64}`)
    plugin.disconnect()
    process.exit()
  })
Press Ctrl+X, Y, Enter to save the file.
Copy the command, as shown below.

In an available terminal window, and execute the command.
cd

cd tutorials/letter-shop
The purchase completes and a URL appears, as shown below.
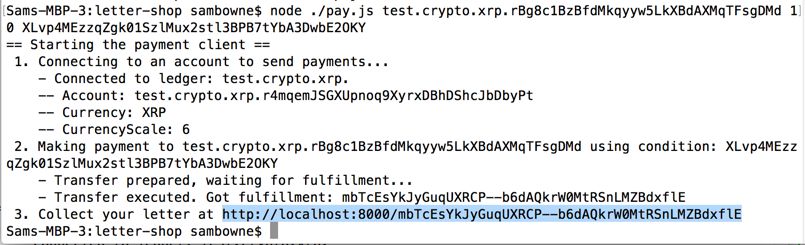
Open that URL in a browser. Your letter appears, as shown below.

YOU MUST SUBMIT A FULL-SCREEN IMAGE FOR FULL CREDIT!
Save the image with the filename "YOUR NAME Proj 17", replacing "YOUR NAME" with your real name.
Posted 12-28-17 by Sam Bowne