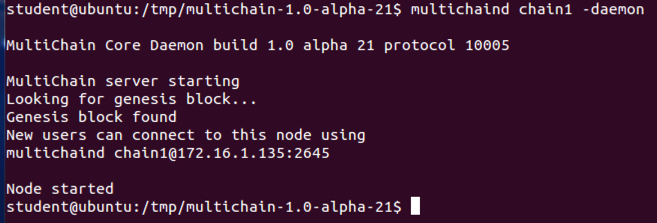
multichaind chain1 -daemon
Make a note of your node address. In the figure below, it is
chain1@172.16.1.135:2645
2. Connecting to a blockchain
Now we'll connect to this blockchain from elsewhere. On the second server, run the following command, replacing the node address with your own value:
multichaind chain1@172.16.1.135:2645
Make a note of the wallet address which appears at the end of the "multichain-cli" commands at the bottom of this message. In the figure below, it's
1563sRd7muFNrVumhsX9RNF3hBohba1wcKmSx2
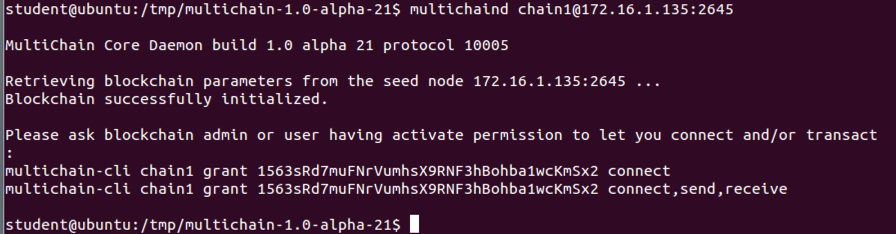
Back on the first server, add connection permissions for this address:
multichain-cli chain1 grant 1563sRd7muFNrVumhsX9RNF3hBohba1wcKmSx2 connect

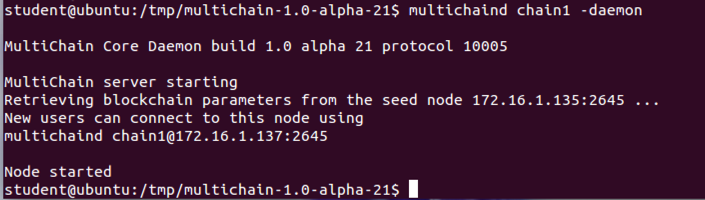
Now try reconnecting again from the second server:
multichaind chain1 -daemon
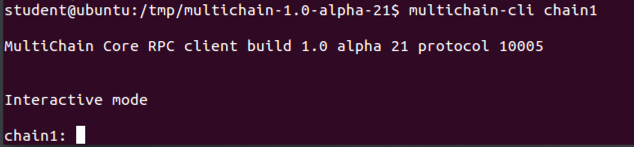
3. Some commands in interactive mode
Before we proceed, let's enter interactive mode so we can issue commands without typing multichain-cli chain1 every time. On both servers:
multichain-cli chain1
Now that the blockchain is working on two nodes, you can run the commands in this section on either or both. To get general information:
getinfo

See a list of all available commands:
help
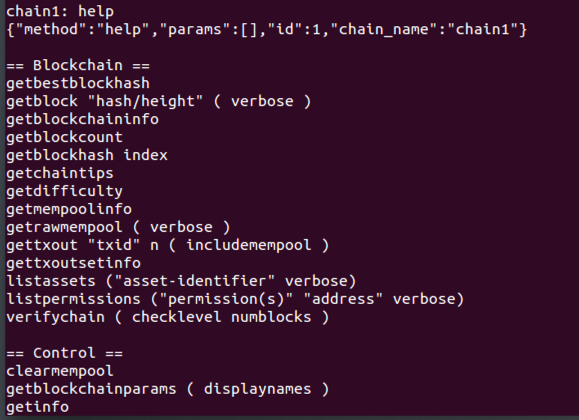
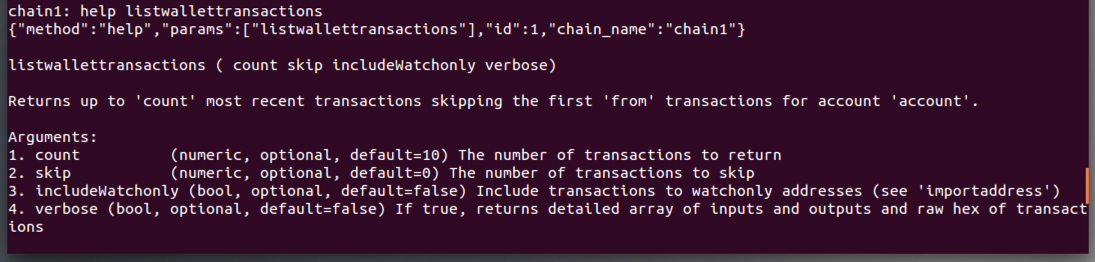
To see more information about a specific command, enter "help" followed by the command name, like this:
help listwallettransactions
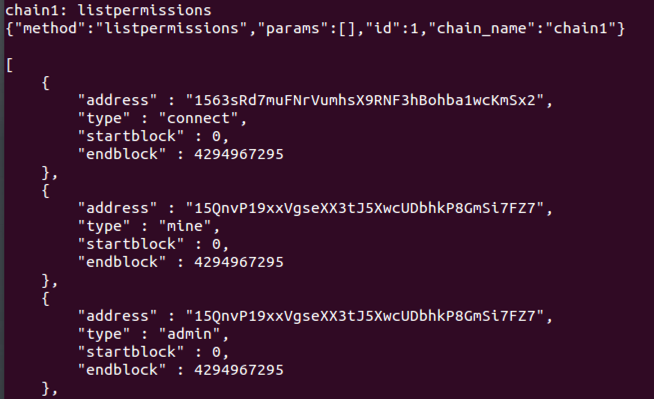
Show all permissions currently assigned:
listpermissions
After that there are many entries showing my First Server with many permissions, such as "mine" and "admin".
Create a new address in the wallet:
getnewaddress

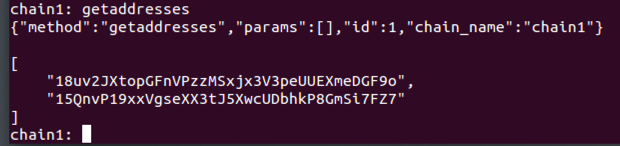
List all addresses in the wallet:
getaddresses
Get the parameters of this blockchain (based on params.dat file):
getblockchainparams

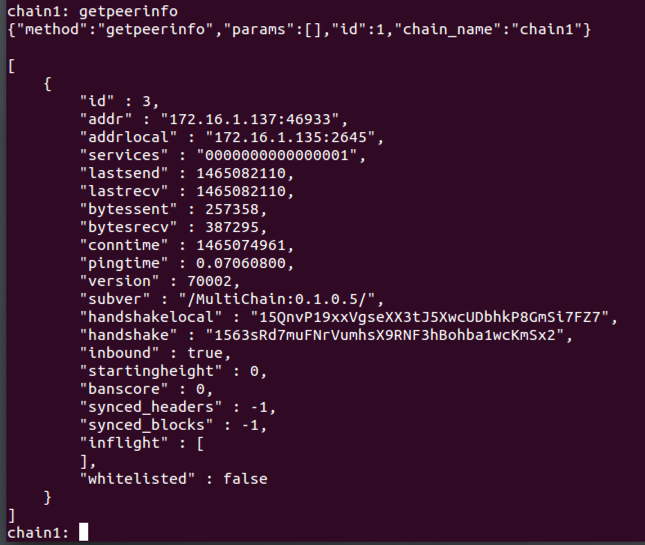
For each node, get a list of connected peers:
getpeerinfo
4. Using native assets
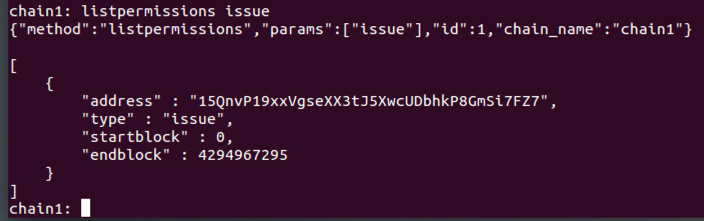
Now we are going to create a new asset and send it between nodes. On the first server, get the address that has the permission to create assets:
listpermissions issue
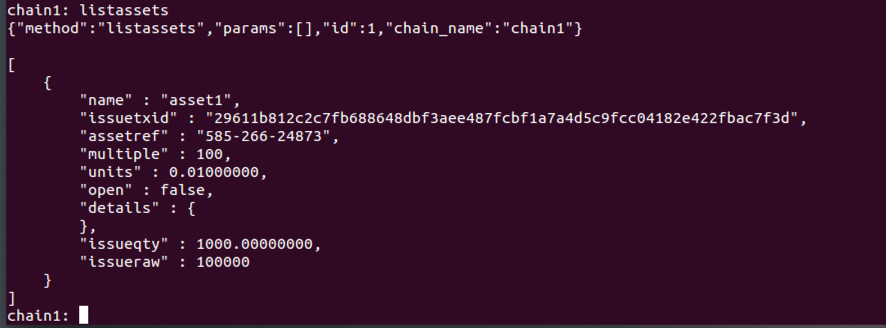
Now we'll create a new asset on this node with 1000 units, each of which can be subdivided into 100 parts, sending it to itself.
On your First Server, execute this command, using the address you noted in the previous step.
issue 15QnvP19xxVgseXX3tJ5XwcUDbhkP8GmSi7FZ7 asset1 1000 0.01

On both servers, verify that the asset named asset1 is listed:
listassets
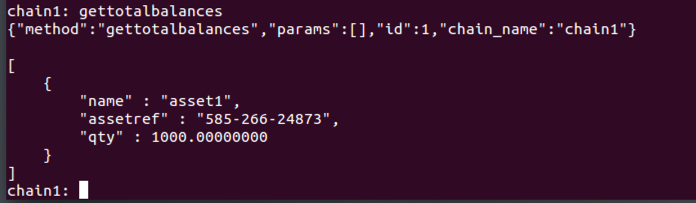
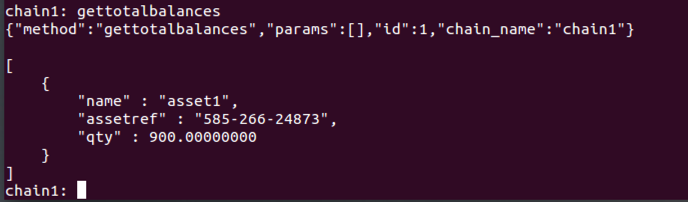
Now check the asset balances on the First Server:
gettotalbalances
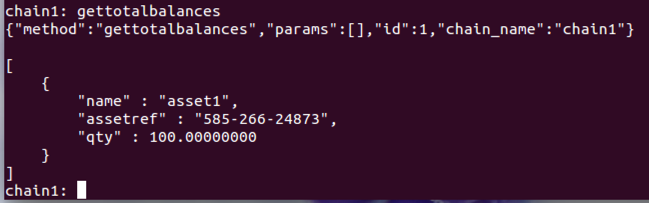
Now check the asset balances on the Second Server:
gettotalbalances

On the first server, now try sending 100 units of the asset to the second server's wallet. The address here is the address of your Second Server, which you found back in section "2. Connecting to a blockchain".
sendassettoaddress 1563sRd7muFNrVumhsX9RNF3hBohba1wcKmSx2 asset1 100

So let's add receive and send permissions. On your First Server, execute this command, using your Second Server's address:
grant 1563sRd7muFNrVumhsX9RNF3hBohba1wcKmSx2 receive,send

Now try sending the asset again. On your First Server, execute this command, using your Second Server's address:
sendassettoaddress 1563sRd7muFNrVumhsX9RNF3hBohba1wcKmSx2 asset1 100

Note: the transaction that created the asset requires 30 seconds or so for confirmation.On the First Server, execute this command to check its asset balances:If you are working really fast, you may see another error at this point. If that happens, wait 30 seconds and try again.
gettotalbalances
On the Second Server, execute this command to check its asset balances:
gettotalbalances
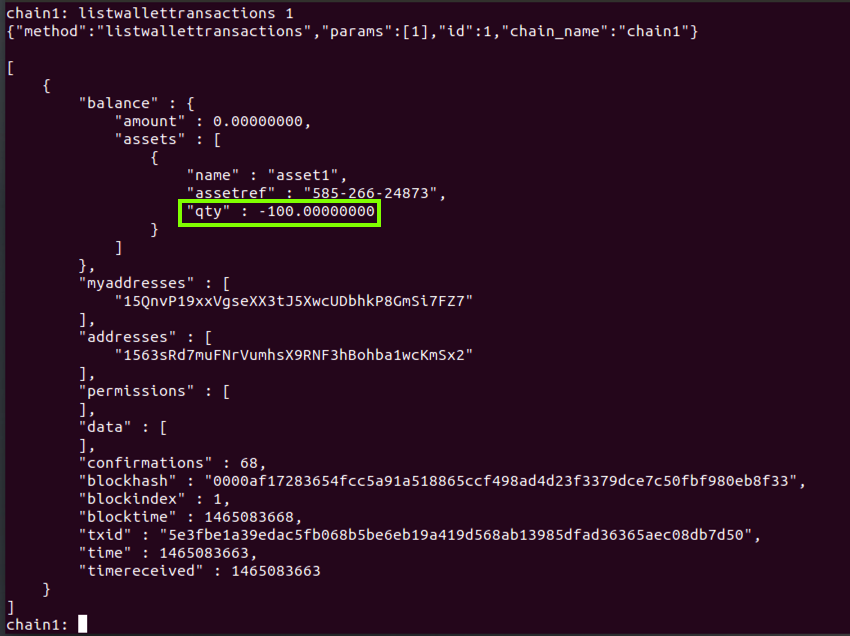
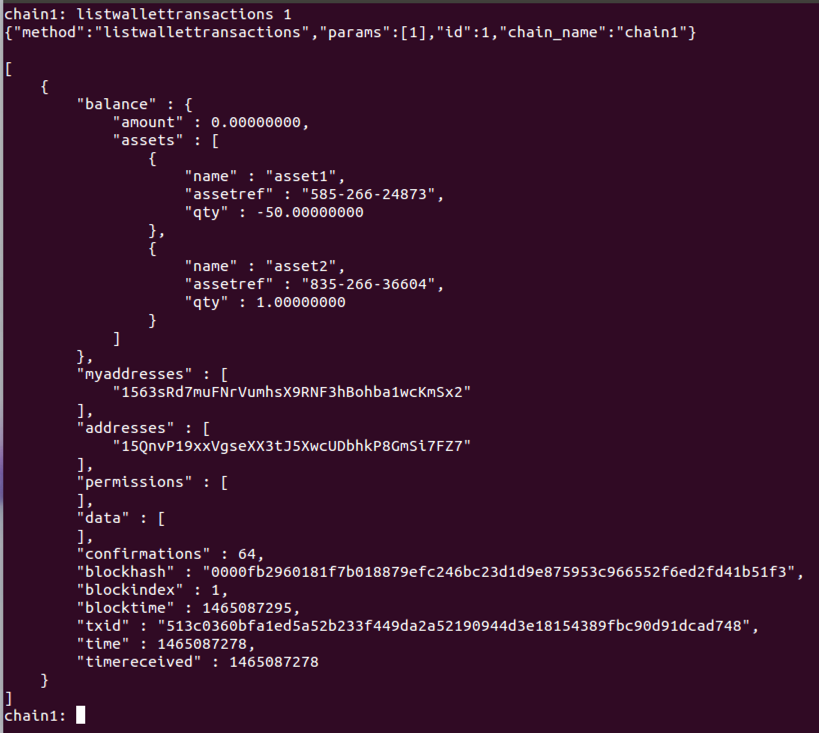
On the First Server, execute this command to see the most recent transaction.
listwallettransactions 1
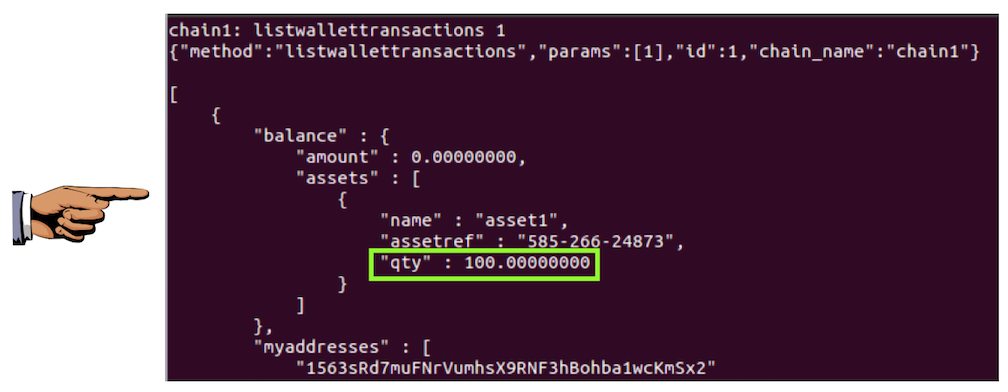
On the Second Server, execute this command to see the most recent transaction.
listwallettransactions 1
Saving a Screen Image
Make sure '"qty" : 100.00' is visible, as shown above.Capture a whole-desktop image.
YOU MUST SUBMIT A FULL-SCREEN IMAGE FOR FULL CREDIT!
Save the image with the filename "YOUR NAME Proj 9a", replacing "YOUR NAME" with your real name.
5. Transaction metadata
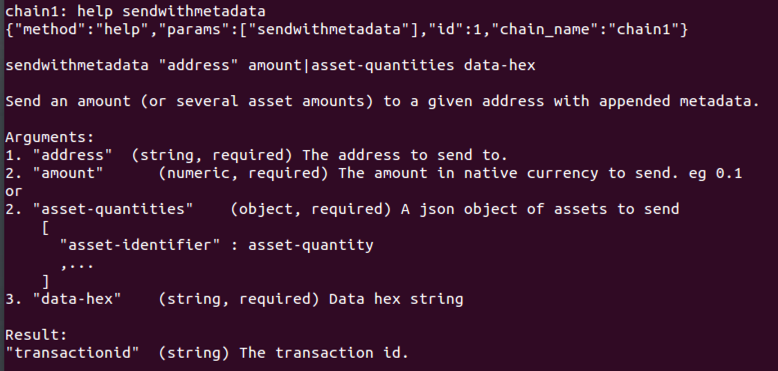
On the First Server, execute this command to learn about the "sendwithmetadata" command:
help sendwithmetadata
Let's send 125 units of asset1 along with metadata of "deadbeef". On your First Server, execute this command, using the address of your Second Server.
sendwithmetadata 1563sRd7muFNrVumhsX9RNF3hBohba1wcKmSx2 '{"asset1":125}' deadbeef

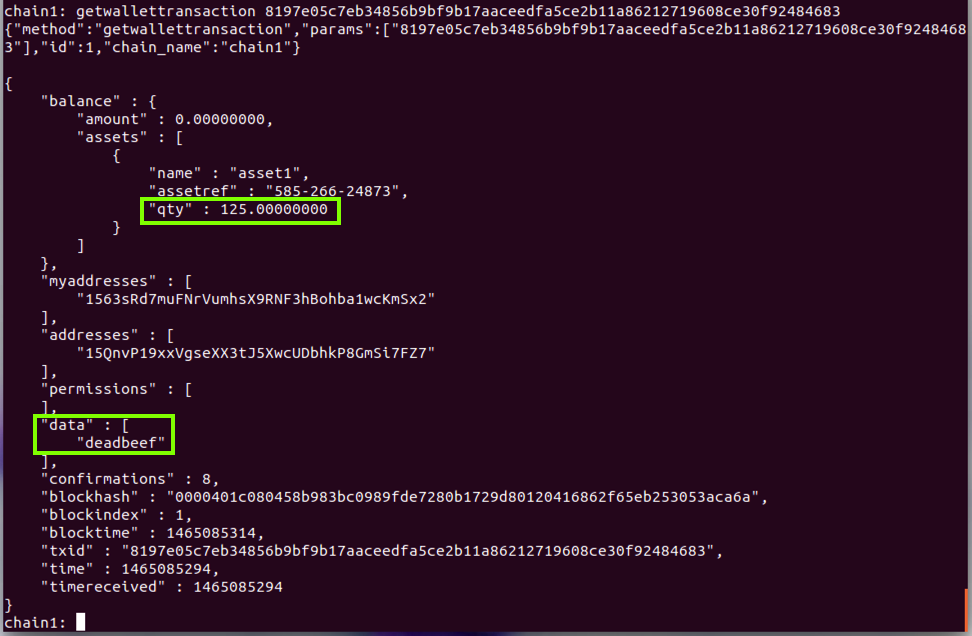
To examine the transaction, execute this command on your Second Server, using that Transaction ID:
getwallettransaction 8197e05c7eb34856b9bf9b17aaceedfa5ce2b11a86212719608ce30f92484683
6. Atomic exchange transactions
Now we'll create a second asset and build an exchange transaction which swaps some of the first asset for some of the second. This transaction will be atomic, meaning that the two-way exchange must succeed or fail as a whole (also known as delivery-versus-payment).First let's create the second asset with 10 indivisible units. On your First Server, execute this command, using the address you noted in section "4. Using native assets":
issue 15QnvP19xxVgseXX3tJ5XwcUDbhkP8GmSi7FZ7 asset2 10 1

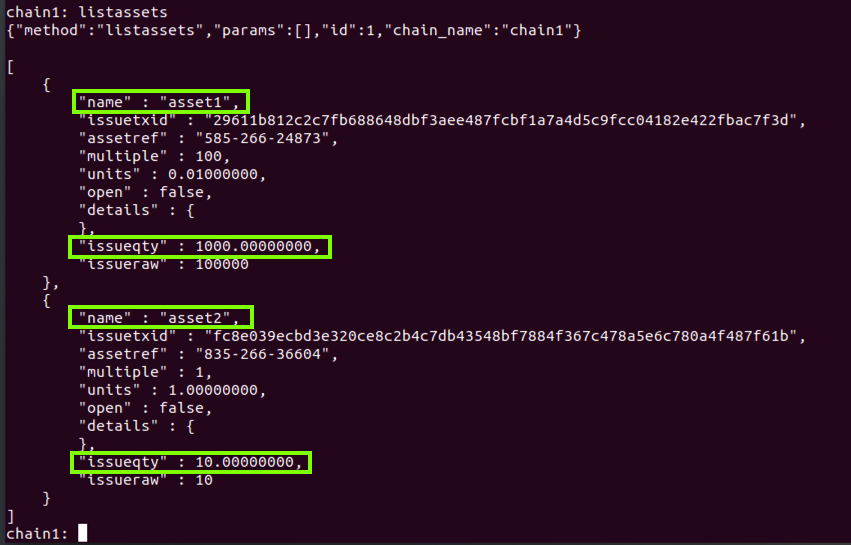
On your First Server, check your assets:
listassets
We are going to swap 50 units of asset1 for 1 unit of asset2. To do this, we will begin building the exchange transaction on the First Server, then complete it on the Second Server.
On the First Server, create a locked transaction output containing 1 unit of asset2:
preparelockunspent '{"asset2":1}'

Because it is locked, this transaction output will be protected against spending unless explicitly spent or unlocked. Now we will use it to start the exchange transaction, specifying that we want 50 units of asset1 in exchange for this output.
On the First Server, execute this command, using the "txid" you got from the previous command. The "0" is the "vout" value, which is probably the same on your system.
createrawexchange 9895f9da49d95b8ee489a2cbee92983e4368f8d522e02679604c823ef1375b3b 0 '{"asset1":50}'
decoderawexchange [paste-hex-blob]
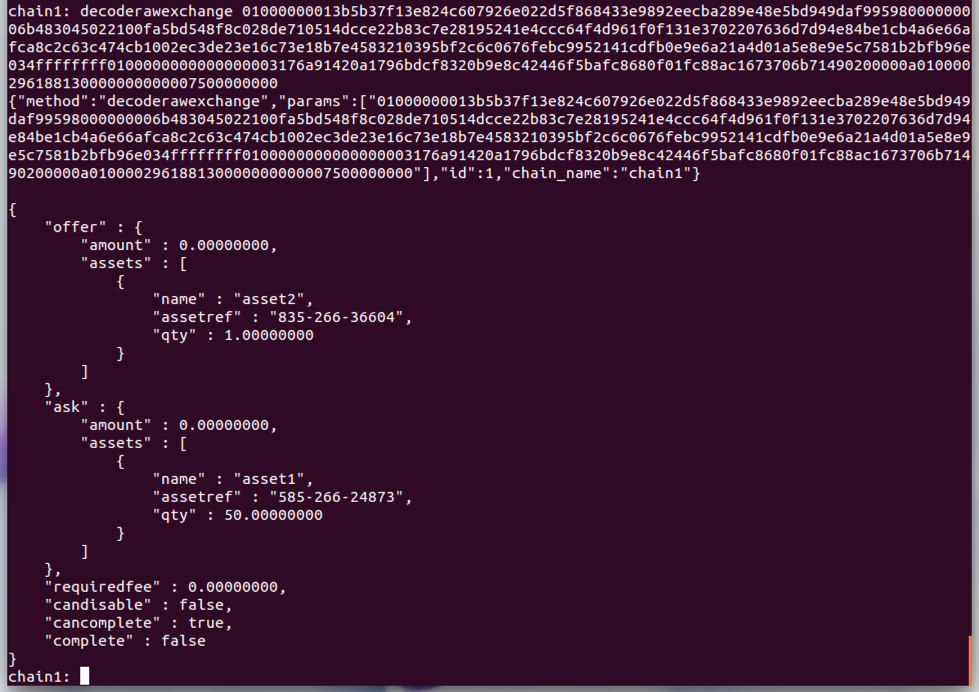
The output will show you exactly what is represented by this exchange offer in the offer and ask sections. In addition, "cancomplete" should be "true" meaning that the second server has the assets required to complete the exchange.
Now on the second server, create a locked transaction output containing 50 units of asset1:
preparelockunspent '{"asset1":50}'

Now we will prepare the exchange transaction. On your Second Server, execute this command, using your hex-blob, and the "txid" and "vout" values returned by the previous command:
appendrawexchange [paste-hex-blob] a7676682a1db07fa7d359b8791bb2f2b718b200ae5ad27118f0fc26cc8fdcb8ae 1 '{"asset2":1}'
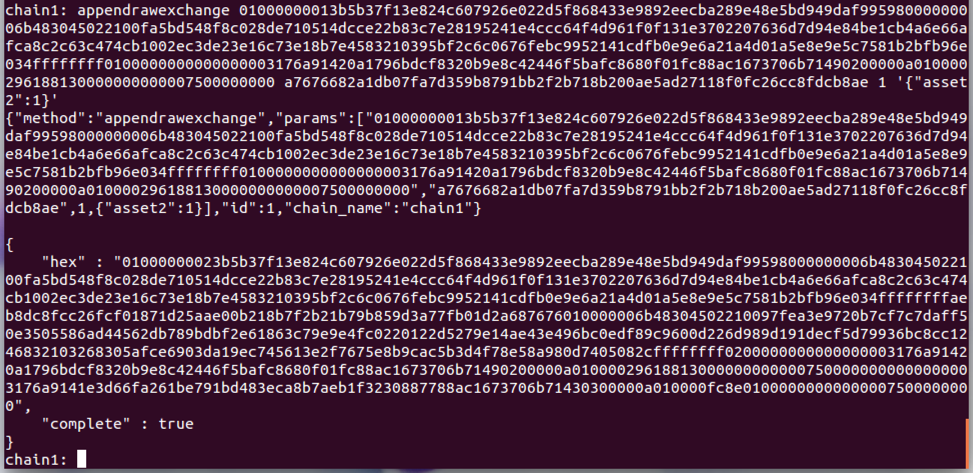
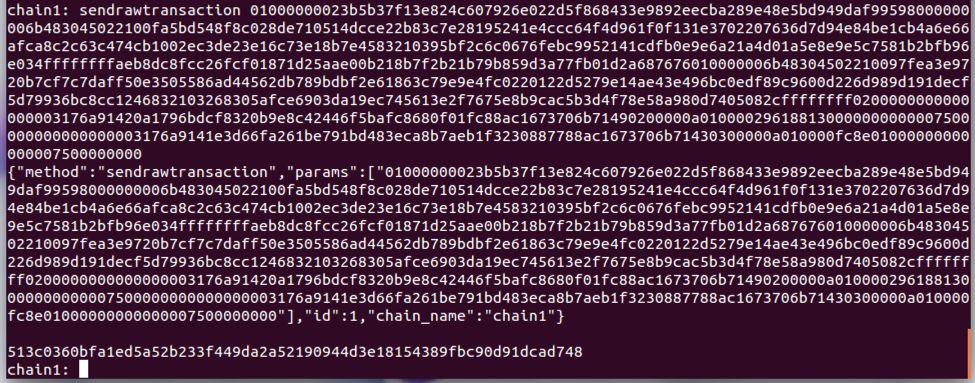
This final hex blob is a raw transaction representing the completed exchange. On your Second Server, execute this command to send the transaction to the network:
sendrawtransaction [paste-longer-hex-blob]
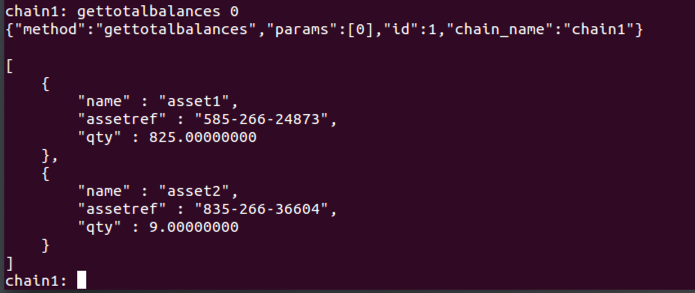
To verify that the exchange was successful, on your First Server, execute this command:
gettotalbalances 0
To verify that this is correct, let's review the transactions we've performed.
We created 1000 units of asset1 on the First Server.So the First Server should have:
We sent 100 units of asset1 to the Second Server.
We sent 125 more units of asset1 to the Second Server with metadata.
We created 10 units of asset2 on the First Server.
We sent 1 unit of asset2 to the Second Server and received 50 units of asset1 in exchange.
1000 - 100 - 125 + 50 = 825 units of asset1 andAs you can see above, the balances are correct on the First Server.
10 - 1 = 9 units of asset2
The Second Server should have:
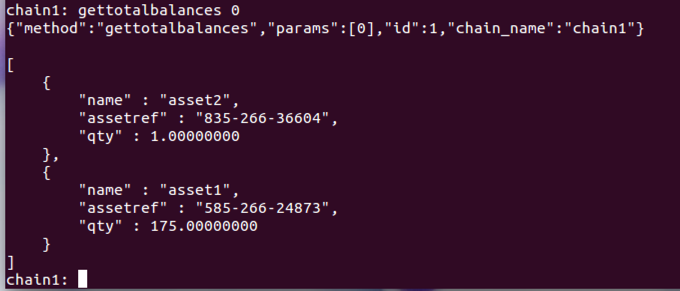
100 + 125 - 50 = 175 units of asset1 andOn your Second Server, execute this command:
1 unit of asset2
gettotalbalances 0
The last exchange of assets was performed atomically in a single transaction, which you can view on either server using:
listwallettransactions 1
7. Round-robin mining
In this section we'll start collaborative mining between the nodes. To do that, we need to give the Second Server permission to mine.On your First Server, execute this command, using the address of your Second Server from the "2. Connecting to a blockchain" section:
grant 1563sRd7muFNrVumhsX9RNF3hBohba1wcKmSx2 mine

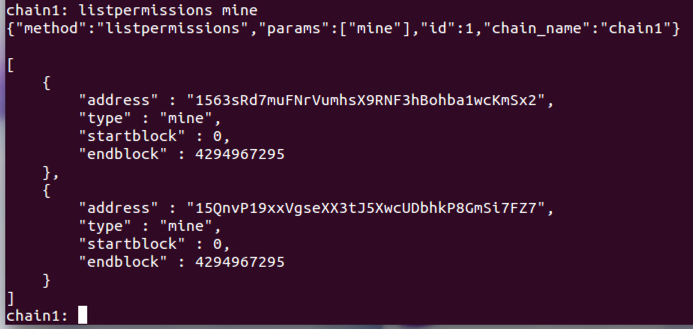
On the Second Server, execute this command to see how many permitted miners there are:
listpermissions mine
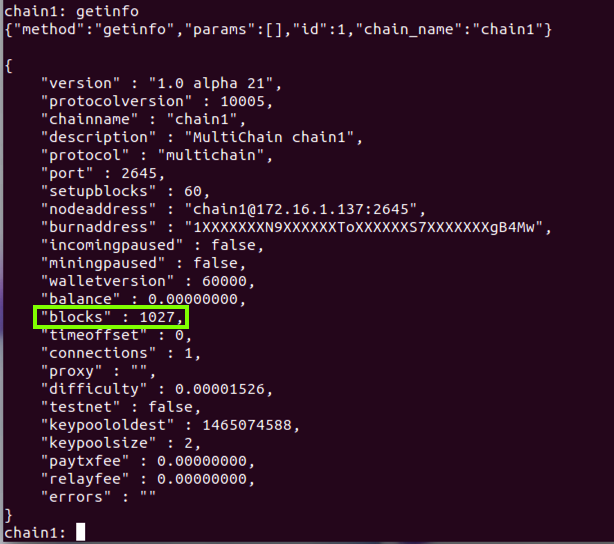
Now wait for a couple of minutes, so that a few blocks are mined. On either server, check the current block height:
getinfo
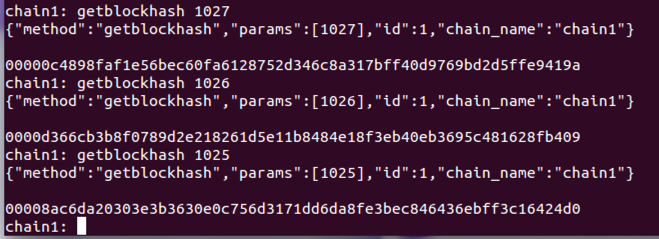
Now get the hashes of the last few blocks, with commands like this:
getblockhash 1027
getblockhash 1026
getblockhash 1025
For each hash, get more information about the block:
getblock [block-hash]


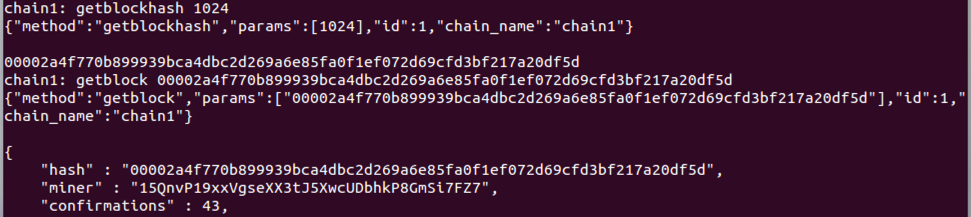
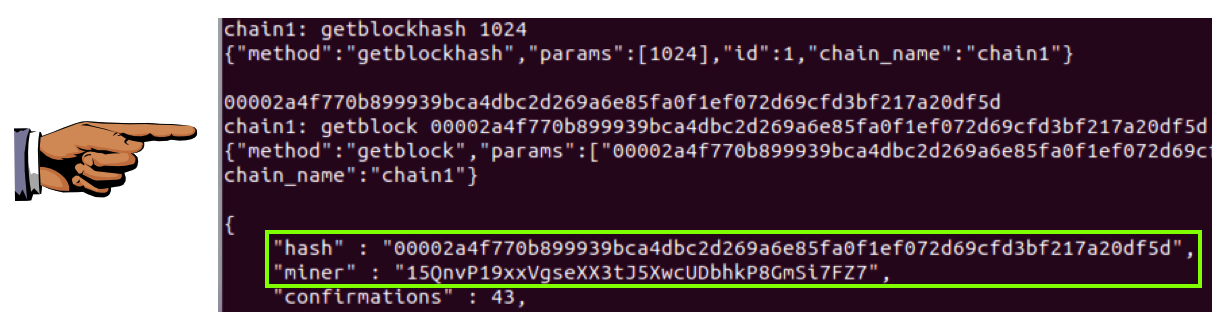
Saving a Screen Image
Capture a whole-desktop image of one of the "getblockhash" results, showing a hash beginning with a few 0's, and a miner ID, as shown above.YOU MUST SUBMIT A FULL-SCREEN IMAGE FOR FULL CREDIT!
Save the image with the filename "YOUR NAME Proj 9b", replacing "YOUR NAME" with your real name.
Turning in your Project
Email the images to cnit.141@gmail.com with the subject line: Proj 9 from YOUR NAME.Leaving Interactive Mode
On both servers, at the chain1: prompt, execute this command:
exit
Sources
Installing MultiChain
Posted 6-4-16 by Sam Bowne
Revised 6-11-17
Updated to 1.0.1 10-16-17