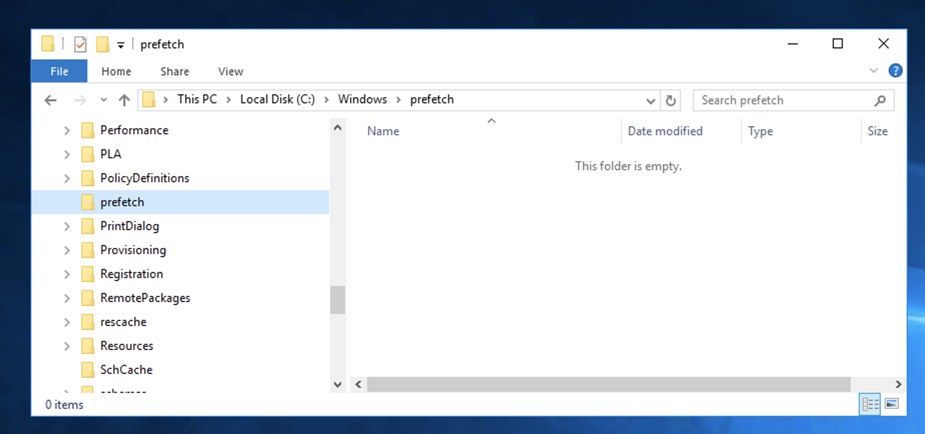
Navigate to
C:\Windows\Prefetch
The folder is empty, as shown below.
This is because Prefetch is disabled by default for Windows Servers.
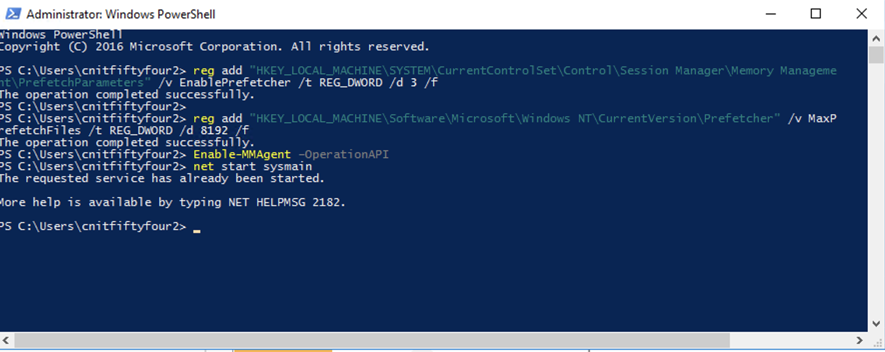
Click "Windows PowerShell"
In Powershell, execute these commands, as shown below:
reg add "HKEY_LOCAL_MACHINE\SYSTEM\CurrentControlSet\Control\Session Manager\Memory Management\PrefetchParameters" /v EnablePrefetcher /t REG_DWORD /d 3 /f

reg add "HKEY_LOCAL_MACHINE\Software\Microsoft\Windows NT\CurrentVersion\Prefetcher" /v MaxPrefetchFiles /t REG_DWORD /d 8192 /f

Enable-MMAgent -OperationAPI

net start sysmain
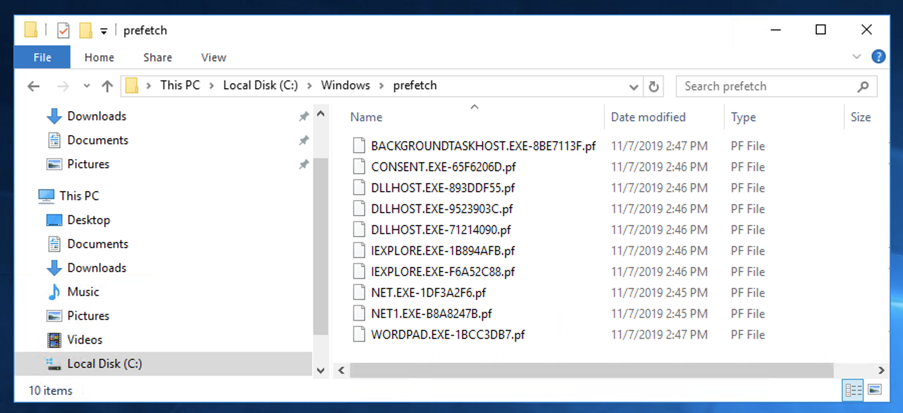
Click Start and type WORDPAD. In the search results, click WORDPAD.
C:\Windows\Prefetch
folder, at the top, click the curved-arrow Refresh button.
The folder shows entries for IEXPLORE.EXE and WORDPAD.EXE, as shown below.
On your Windows machine, in Internet Explorer, open this page:
Install Firefox.
In Firefox, go to
http://sites.google.com/site/lupingreycorner/vulnserver.zip
If that link doesn't work, try this alterative download link.
Save the "vulnserver.zip" file in your Downloads folder.
Click Start, "File Explorer". Navigate to your Downloads folder.
In your Downloads folder, right-click vulnserver.
Click "Extract All...", Extract.
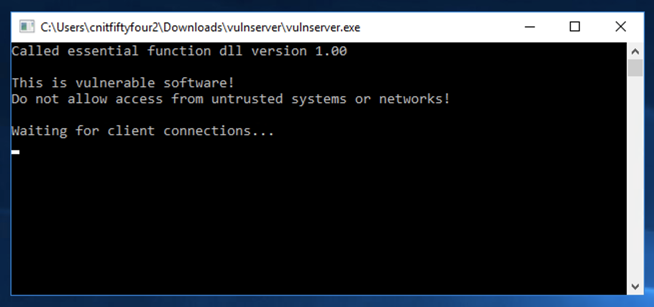
A "vulnserver" window opens. Double-click vulnserver.
In the "Open File - Security Warning" box, click OK.
The Vulnserver application opens, as shown below.
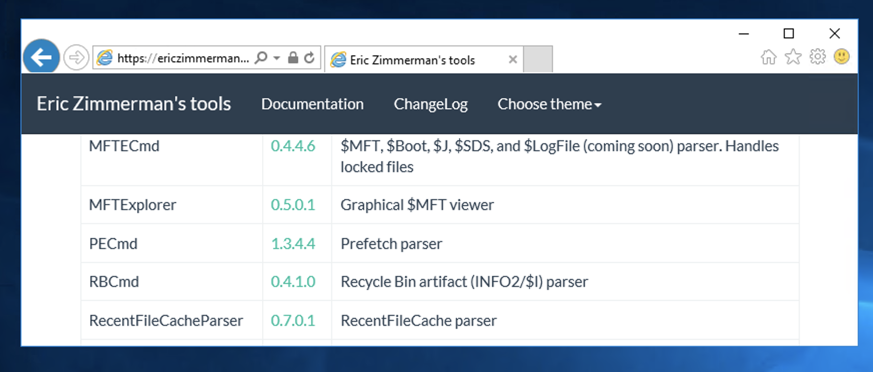
https://ericzimmerman.github.io/
Click the number next to PECmd, as shown below.
Click Save.
Click "Open folder".
A File Explorer window appears showing the Downloads folder.
Right-click PECmd and click "Extract All..." Extract.
A window appears showing PECmd.exe.
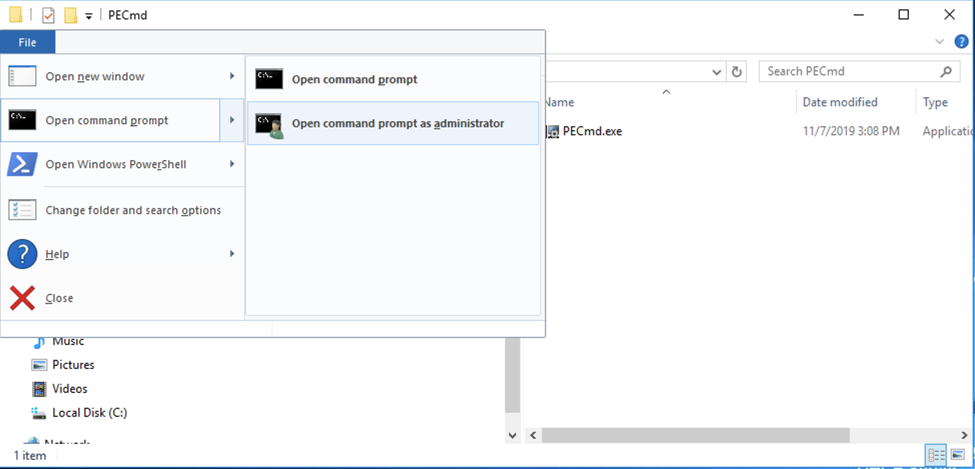
At the top left, click File. Point to "Open command prompt", and click "Open command prompt as administrator", as shown below.
In the User Account Control box, click Yes.
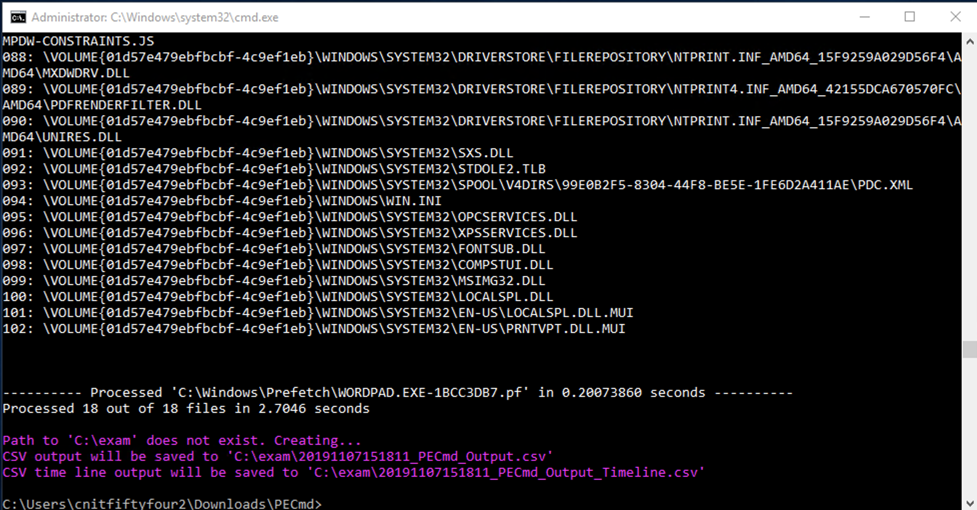
In the Command Prompt window, execute this command, as shown below.
PECmd.exe -d "C:\Windows\Prefetch" --csv "C:\exam"
In Internet Explorer, go to
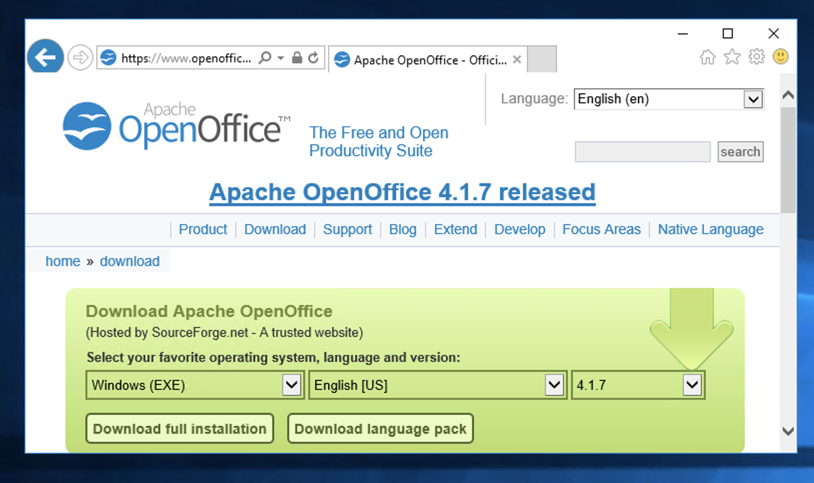
https://www.openoffice.org/download/
Click the "Download full installation" button, as shown below.
The next page shows a timer at 5 aseconds, which doesn't count down.
Click "Problems Downloading" and click "direct link".
Click Save.
Click "Open folder".
Double-click the installer and install the software with the default options.
You see two CSV files.
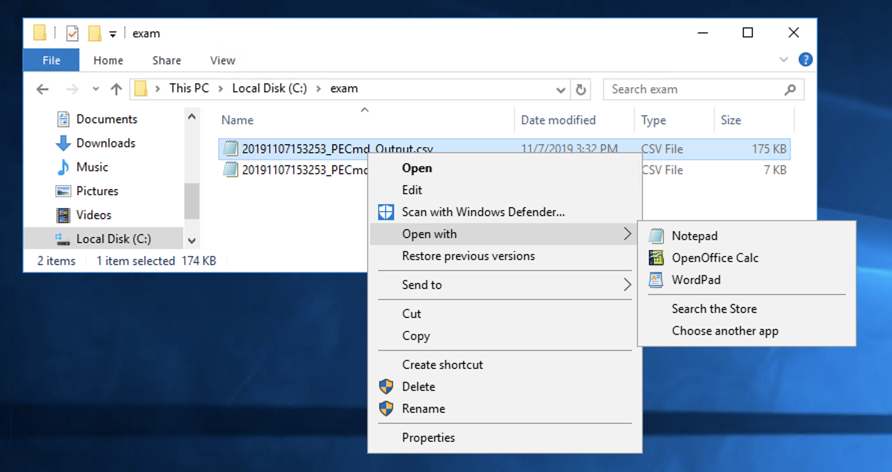
Right-click the first one and click "Open with", "OpenOffice Calc", as shown below.
In OpenOffice, click Next and click Finish.
In the Text Import box, check the Comma box and clear all the other boxes, as shown below.
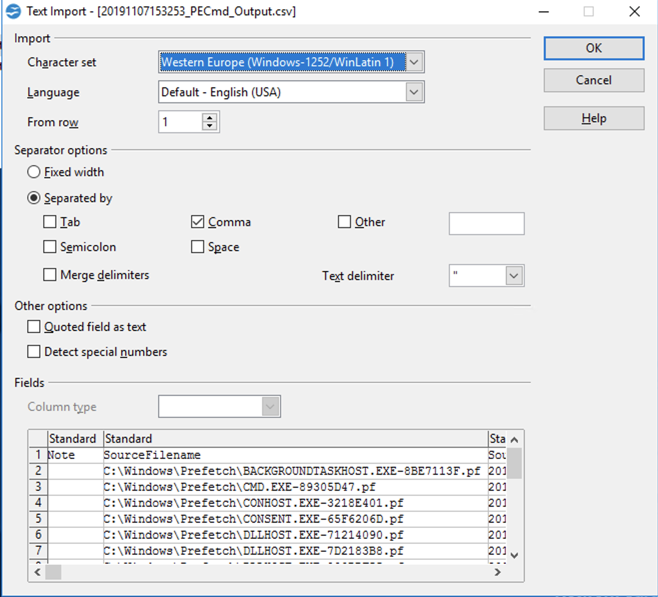
Click OK.
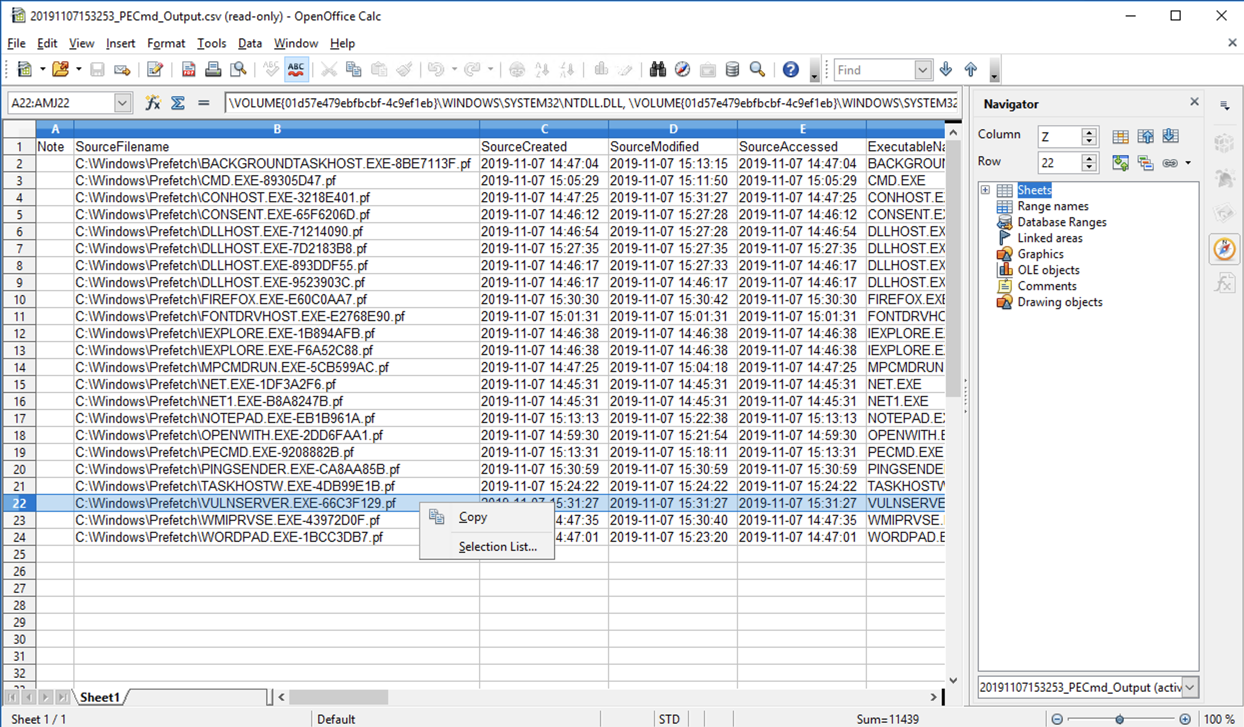
A spreadsheet appears, showing one line per application launched.
Right-click the VULNSERVER line and click Copy, as shown below.
Click the Start button and type NOTEPAD.
In the search results, click NOTEPAD.
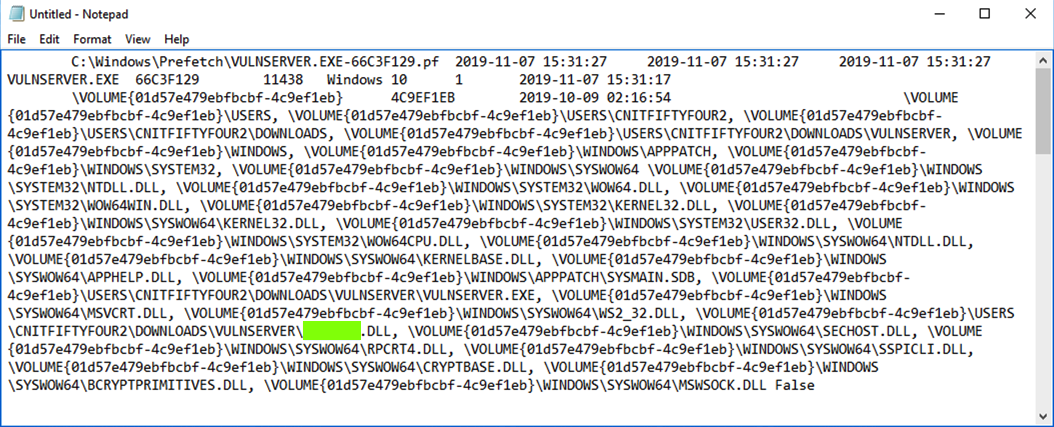
In Notepad, press Ctrl+V to paste in the data about VULNSERVER.
From the Notepad menu bar, click View, "Word Wrap".
Complete information about the VULNSERVER launch appears, as shown below.
That's the flag.
Posted 11-7-19
em dashes changed to normal dashes in PowerShell command 11-8-19