Execute the steps below on your Windows machine.
Otherwise, follow the appropriate steps below for your Windows version:
Windows 10
1. Next to the Start button, search for "Defender". Open "Windows Security settings" or "Windows Defender settings".
2. Click "Virus & threat protection".
3. Under "Virus & threat protection settings", click "Manage settings".
4. Turn off "Tamper Protection".
5. Under Exclusions, click "Add or remove exclusions". Click "Add an exclusion", Folder. Double-click C:\. Click "Select Folder". At the top left, click the back-arrow.
6. Turn off "Cloud-delivered protection" and "Automatic sample submission".
Windows 11
1. Next to the Start button, search for "Virus". Open "Virus & threat protection".
2. Under "Virus & threat protection settings", click "Manage settings".
3. Turn off "Tamper Protection".
4. Under Exclusions, click "Add or remove exclusions". Click "Add an exclusion", Folder. Double-click C:\. Click "Select Folder". At the top left, click the back-arrow.
5. Turn off "Cloud-delivered protection" and "Automatic sample submission".
T1574.001: Hijack Execution Flow: DLL Search Order Hijacking
T1053.005: Scheduled Task/Job: Scheduled Task
T1562.001: Impair Defenses: Disable or Modify Tools
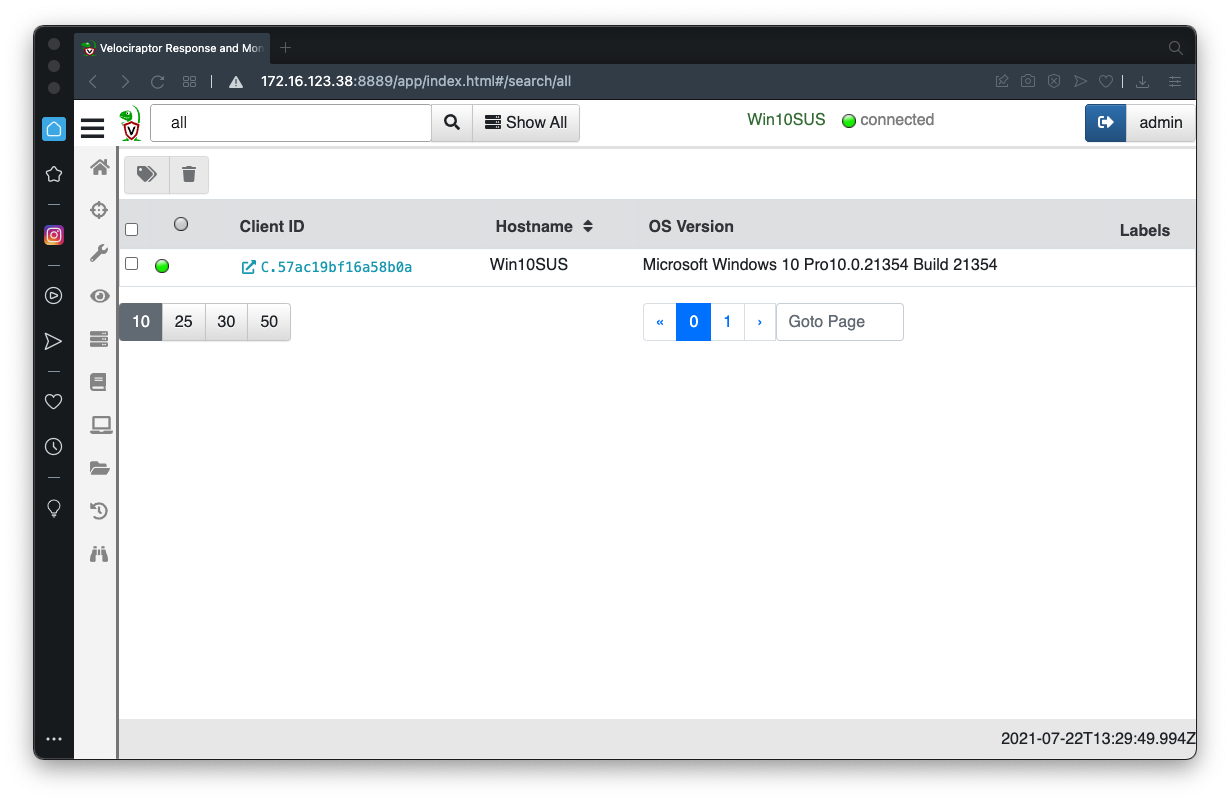
In the Velociraptor GUI, at the top center, click the "Show All" button.
Click your client's Client ID, which appears in blue text, as shown below.
If it's a Linux machine, execute these commands:
sudo apt update
sudo apt install wireshark -y
Windows.Network.PacketCapture
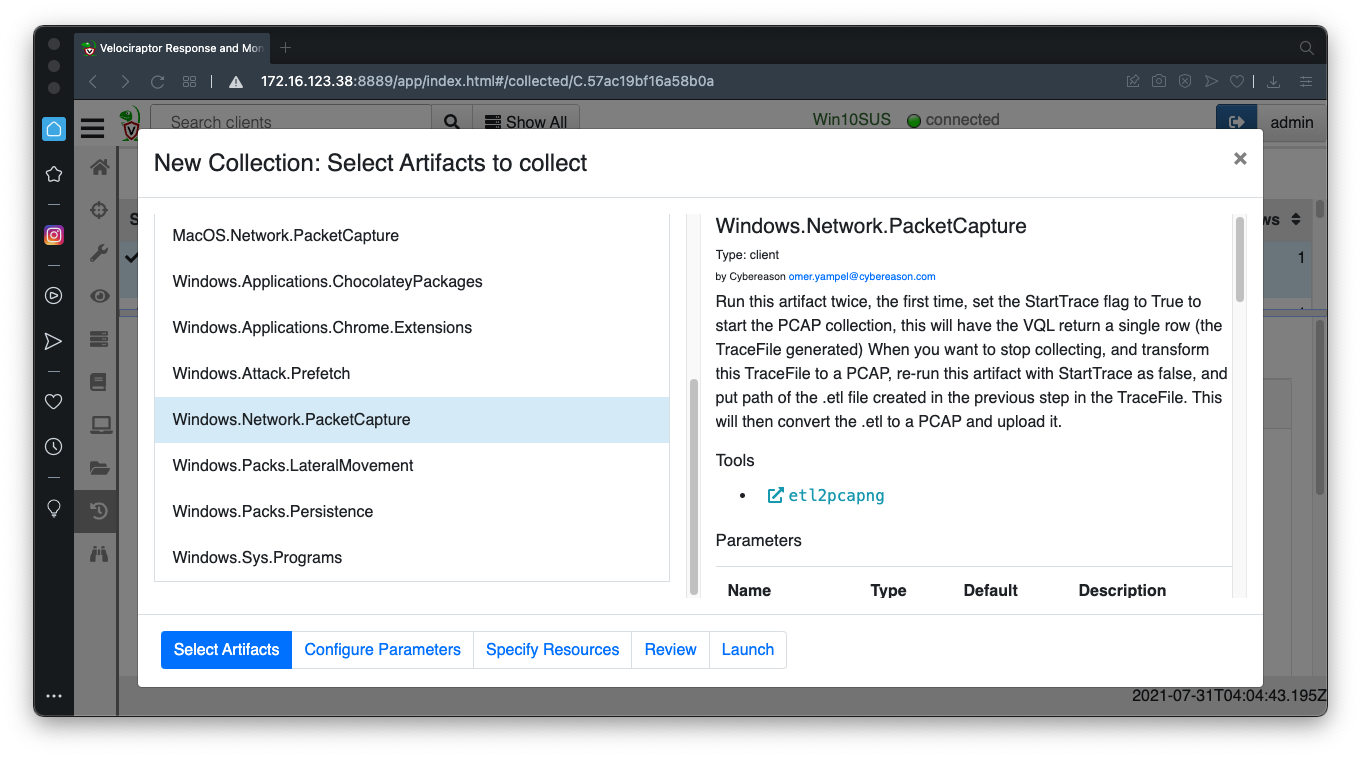
Launch the collector without changing the parameters. This starts capturing packets on the Windows machine.
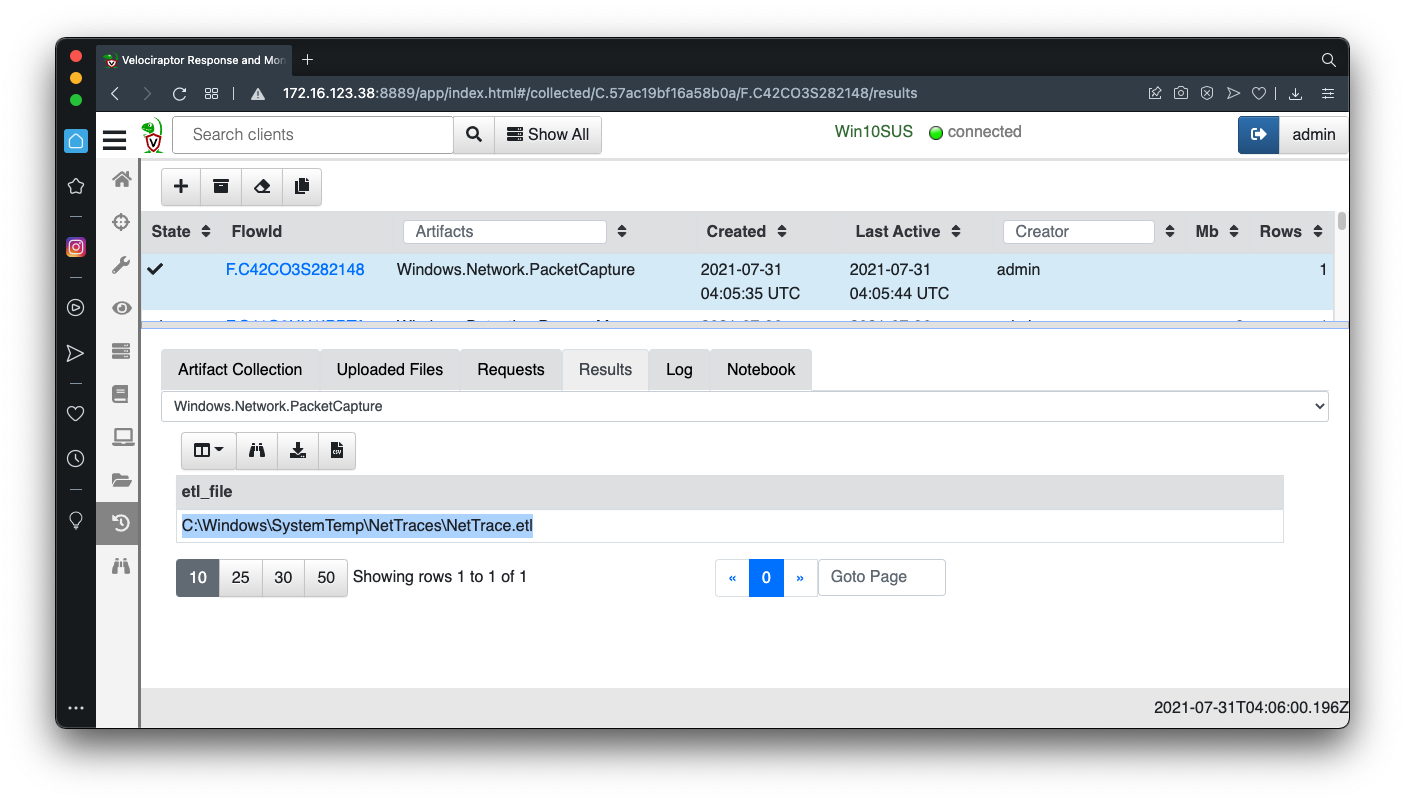
In the results, copy the path to the .etl file, as shown below.
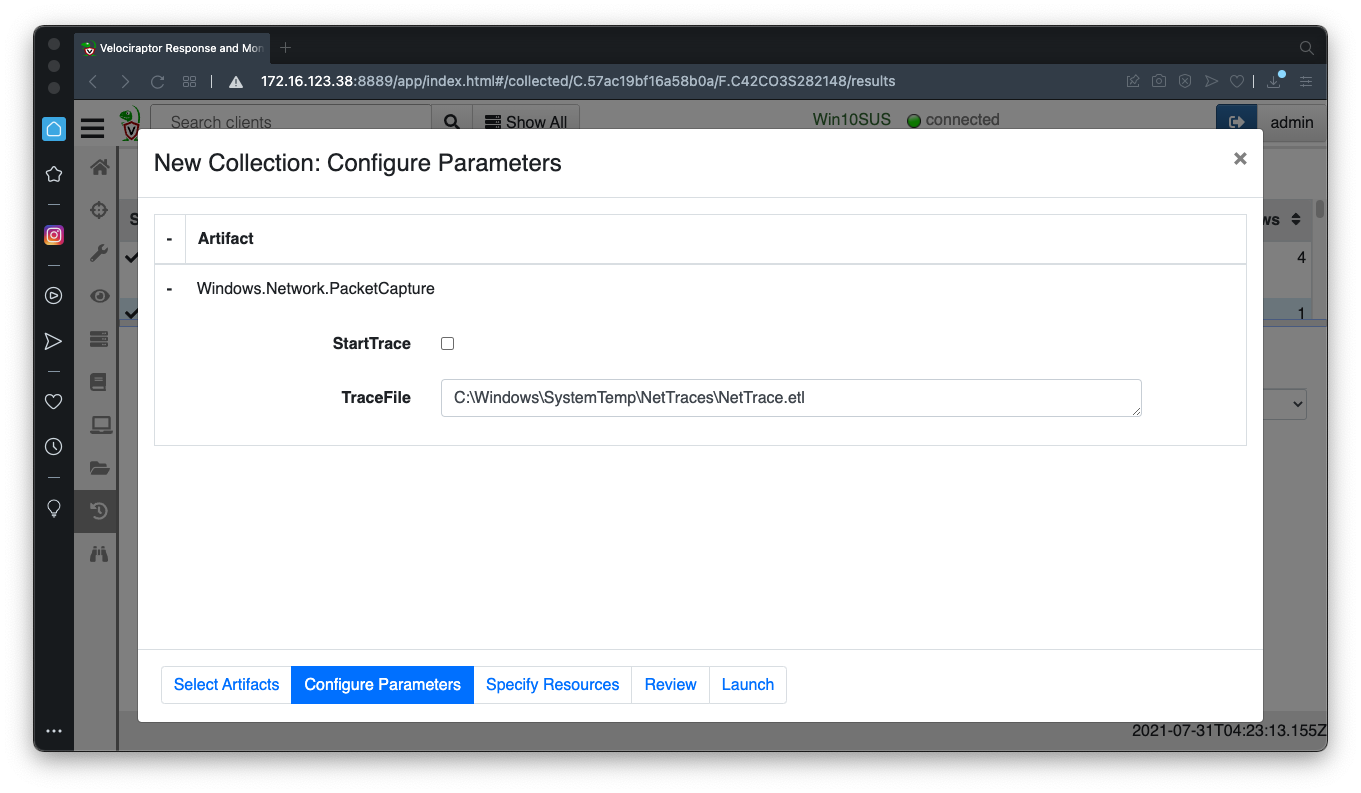
Wait a minute and run the same collector again.
Adjust the parameters as shown below.
When it finishes, click the "Uploaded Files" tab. A link appears to a .pcapng file, as shown below.
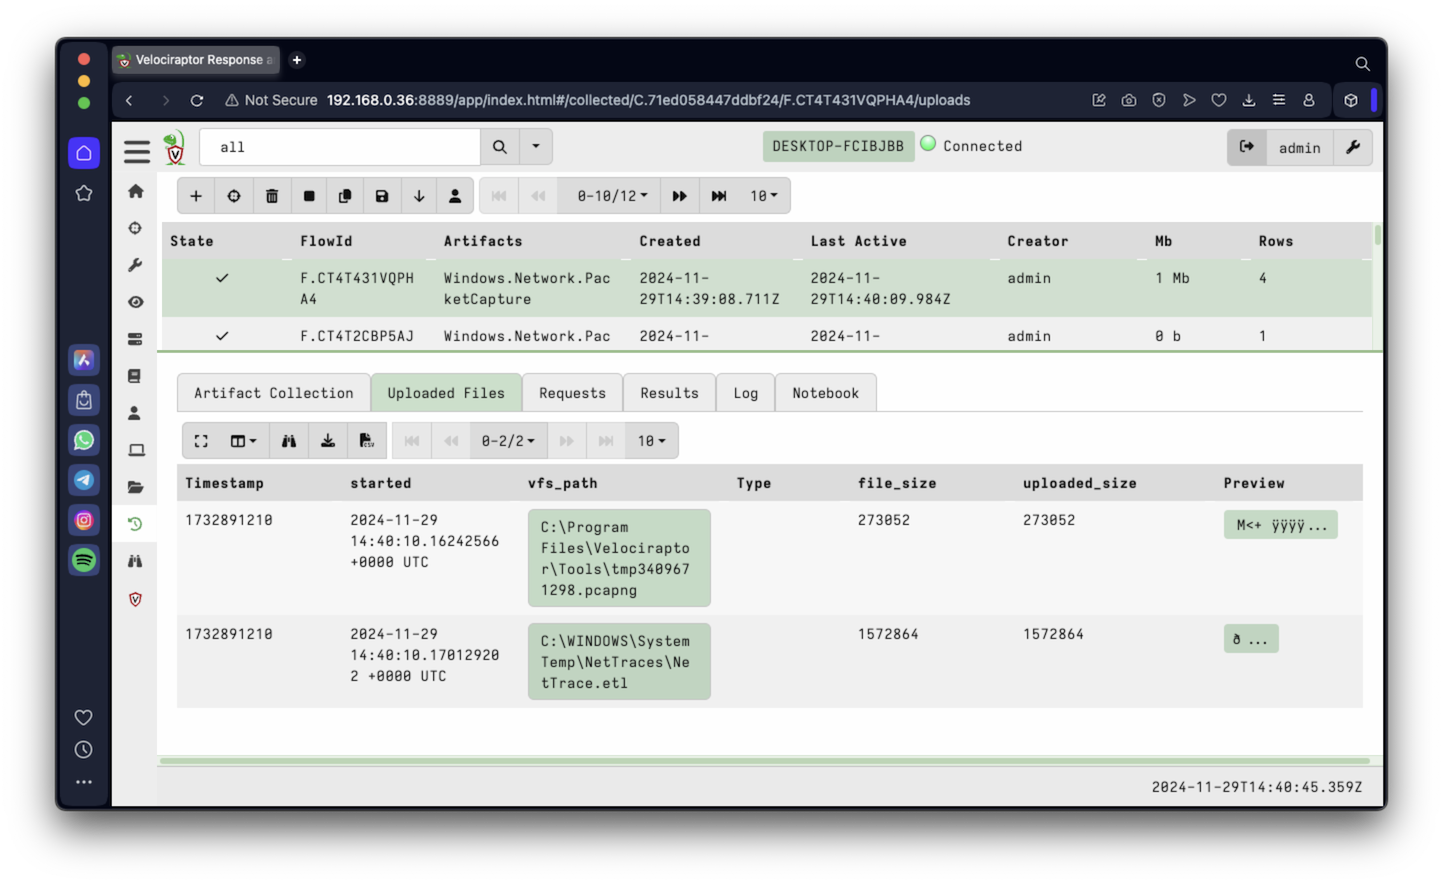
Click the link, download the .pcapng file, and open it in Wireshark.
Troubleshooting
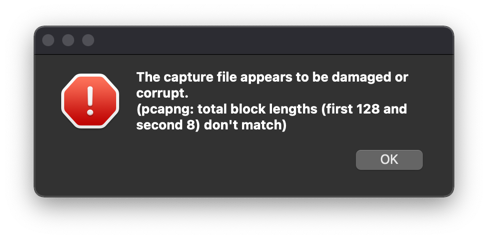
You may see the error message shown below.
You can fix that with the online "pcapfix" tool here:
https://f00l.de/hacking/pcapfix.php
You can also fix it on your Windows system with Microsoft's "etl2pcapng" tool. Download the etl2pcapng.exe file from the link below and save it in your Downloads folder.
https://github.com/microsoft/etl2pcapng/releases
Open a Administrator Command Prompt and execute these commands:
Now open the trace.pcapng file in your Downloads folder in Wireshark.
IR 373.1: User-Agent (10 pts)
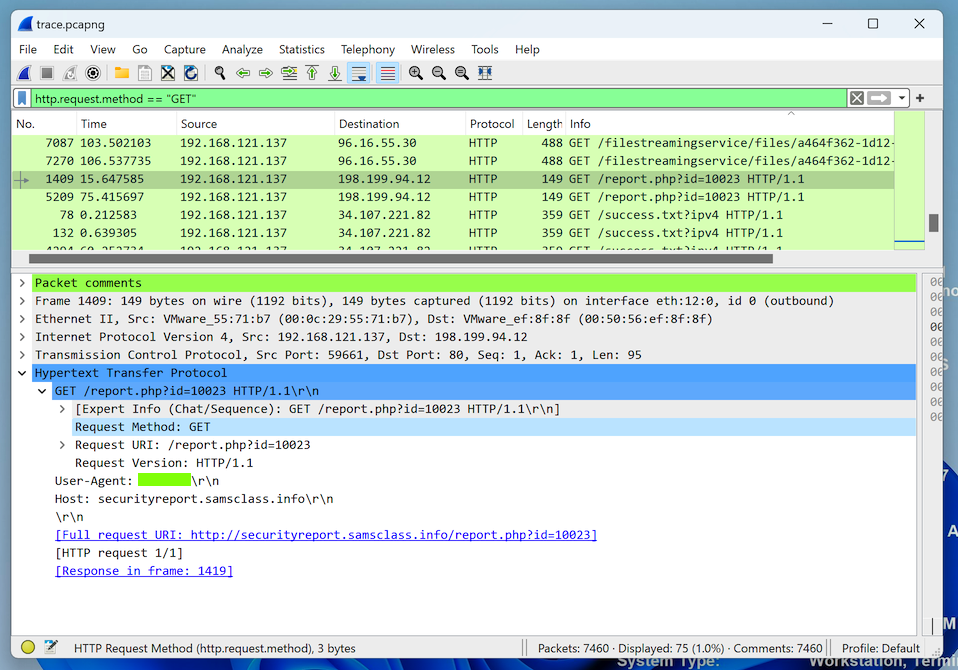
First we'll find the network beacons, which tell the C & C server that the machine is pwned.In Wireshark, enter this display filter:
Find the requests to a subdomain of "samsclass.info".http.request.method == "GET"Expand the packet details to find the User-Agent. That's the flag, as shown below.
IR 373.2: DNS Cache (5 pts)
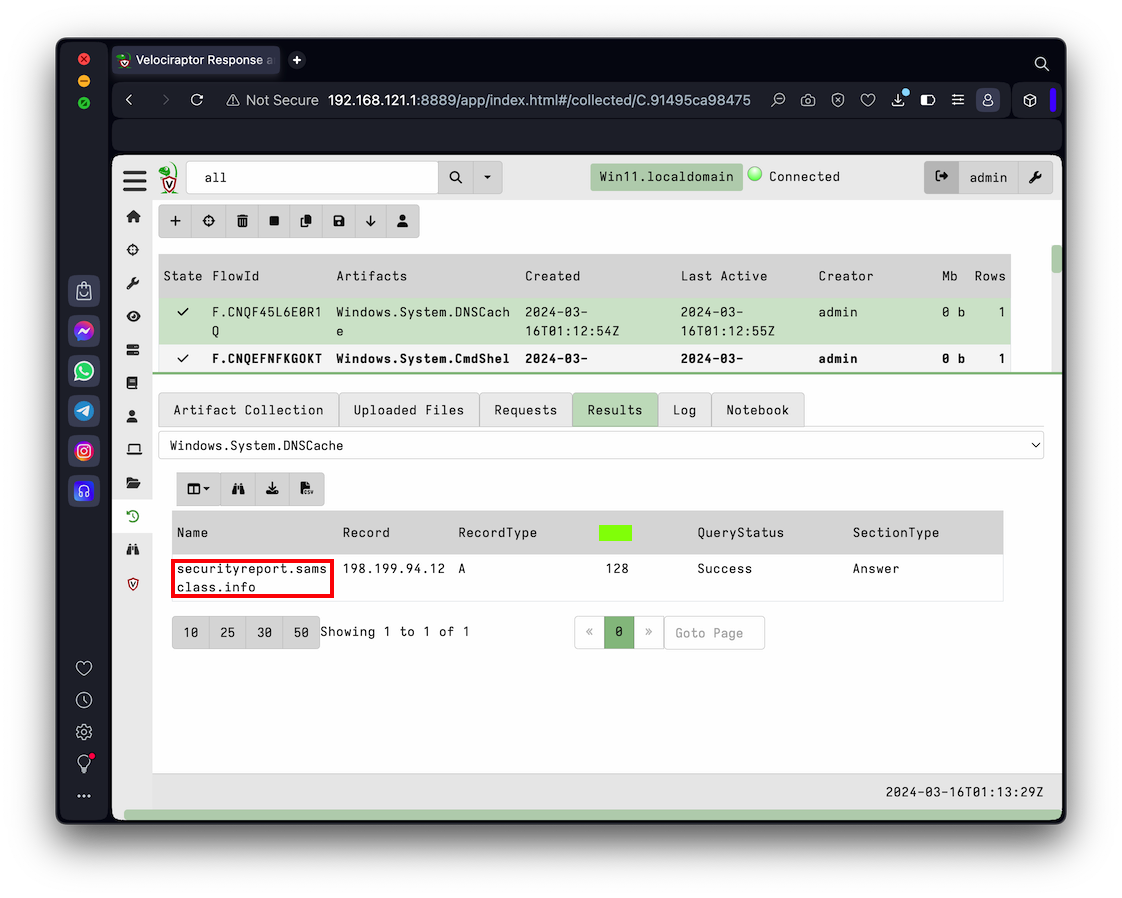
Next, we'll find the domain name of the C &amn; C server in the DNS cache.Launch this collector, with no parameter changes.
Windows.System.DNSCacheThe DNS cache usually contains the C & C domain name, outlined in red in the image below. You may have to try again to see it.The flag is covered by a green rectangle in the image below.
Troubleshooting
On some networks, the DNS cache is always empty.If that happens, change the DNS server on your Windows machine to 8.8.8.8
Wait a minute, and collect the DNS cache again.
ipconfig /flushdns
IR 373.3: Beaconing EXE (10 pts)
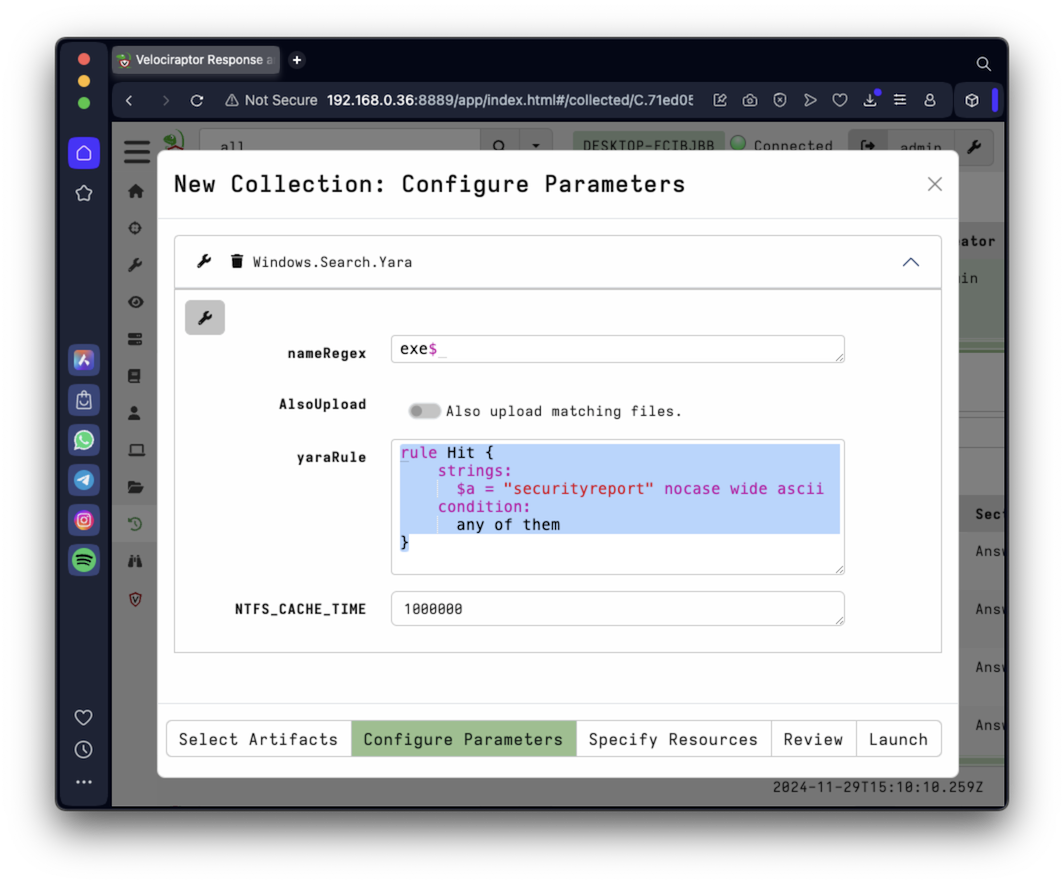
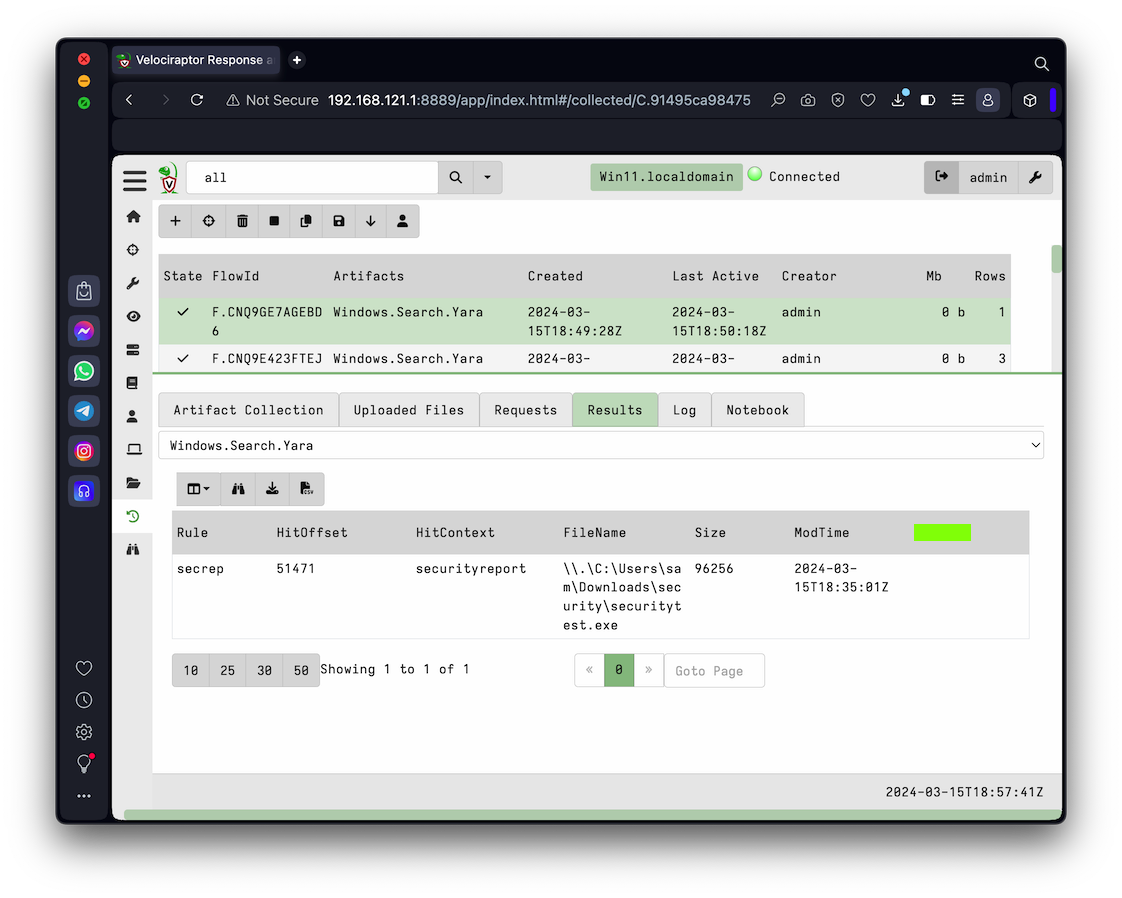
Find this collector:Windows.Search.YaraConfigure these parameters, as shown below:Use a nameRegex of
exe$Use the yaraRule shown below, which will find files referencing the C & C domain name:
rule Hit {
    strings:
      $a = "securityreport" nocase wide ascii
    condition:
      any of them
}
Launch the collector.
It finds the file responsible for the beacons, as shown below.
The flag is covered by a green rectangle in the image below.
IR 373.4: Using Sysmon to find a Persistence Mechanism (10 pts)
First examine the date and time on your Windows machine. Make sure it is correct.Select this collector to install Sysmon:
Windows.Sysinternals.SysmonInstallIf you are using Windows on an Intel processor, launch this artifact without changing the parameters.Examine the Results. This installation must succeed to complete this flag.
Windows on Apple Silicon (ARM)
If you are using Windows on ARM (a Mac M1 or later host), you need to manually install sysmon.At the top right of the Velociraptor page, click the green button labelled DESKTOP.
Click >_Shell.
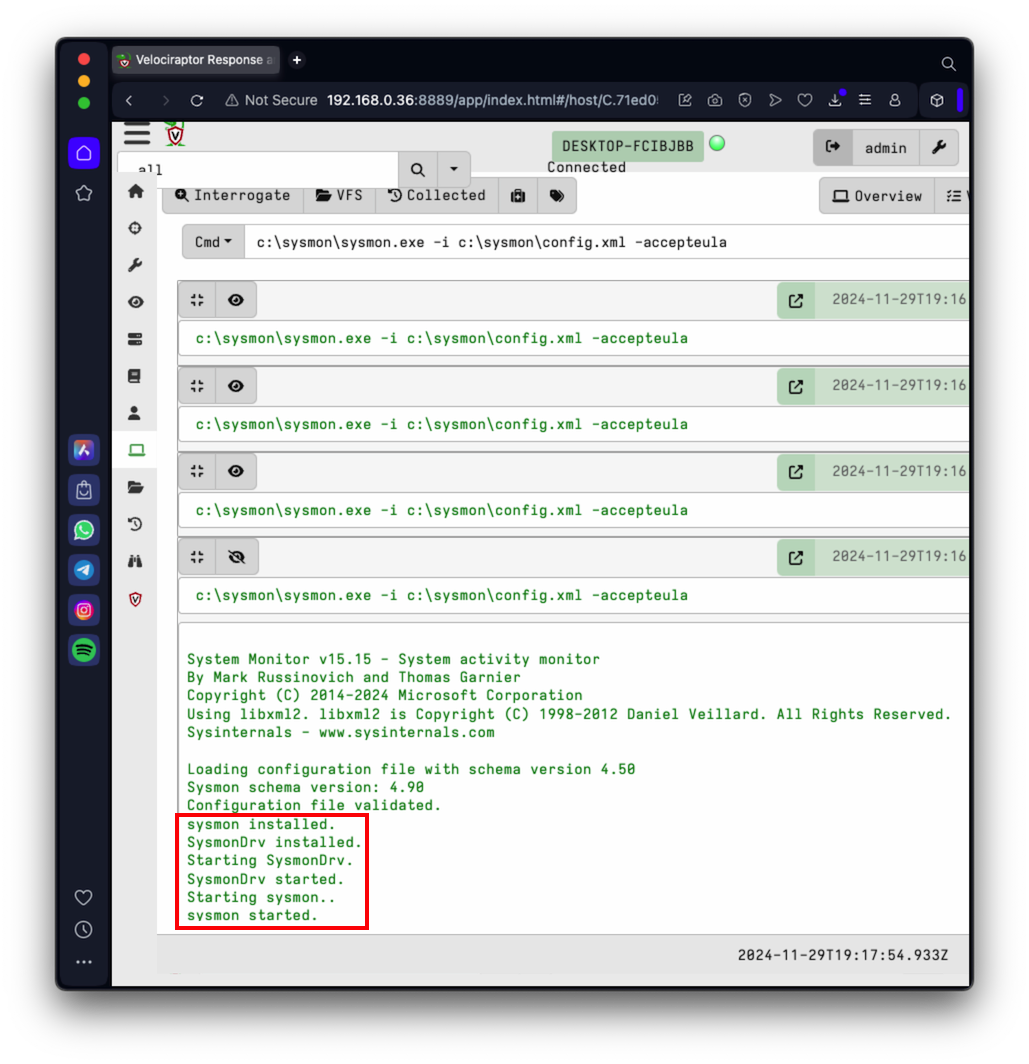
Select a shell type of Powershell and execute these commands, one by one, as shown below:
Select a shell type of Cmd and execute the command below:Sysmon should install and start successfully, as outlined in red in the image below.
Skip the "Windows.Sysinternals.SysmonInstall" collector below and proceed with "Windows.EventLogs.EvtxHunter".
Then launch this collector to collect the sysmon event logs:
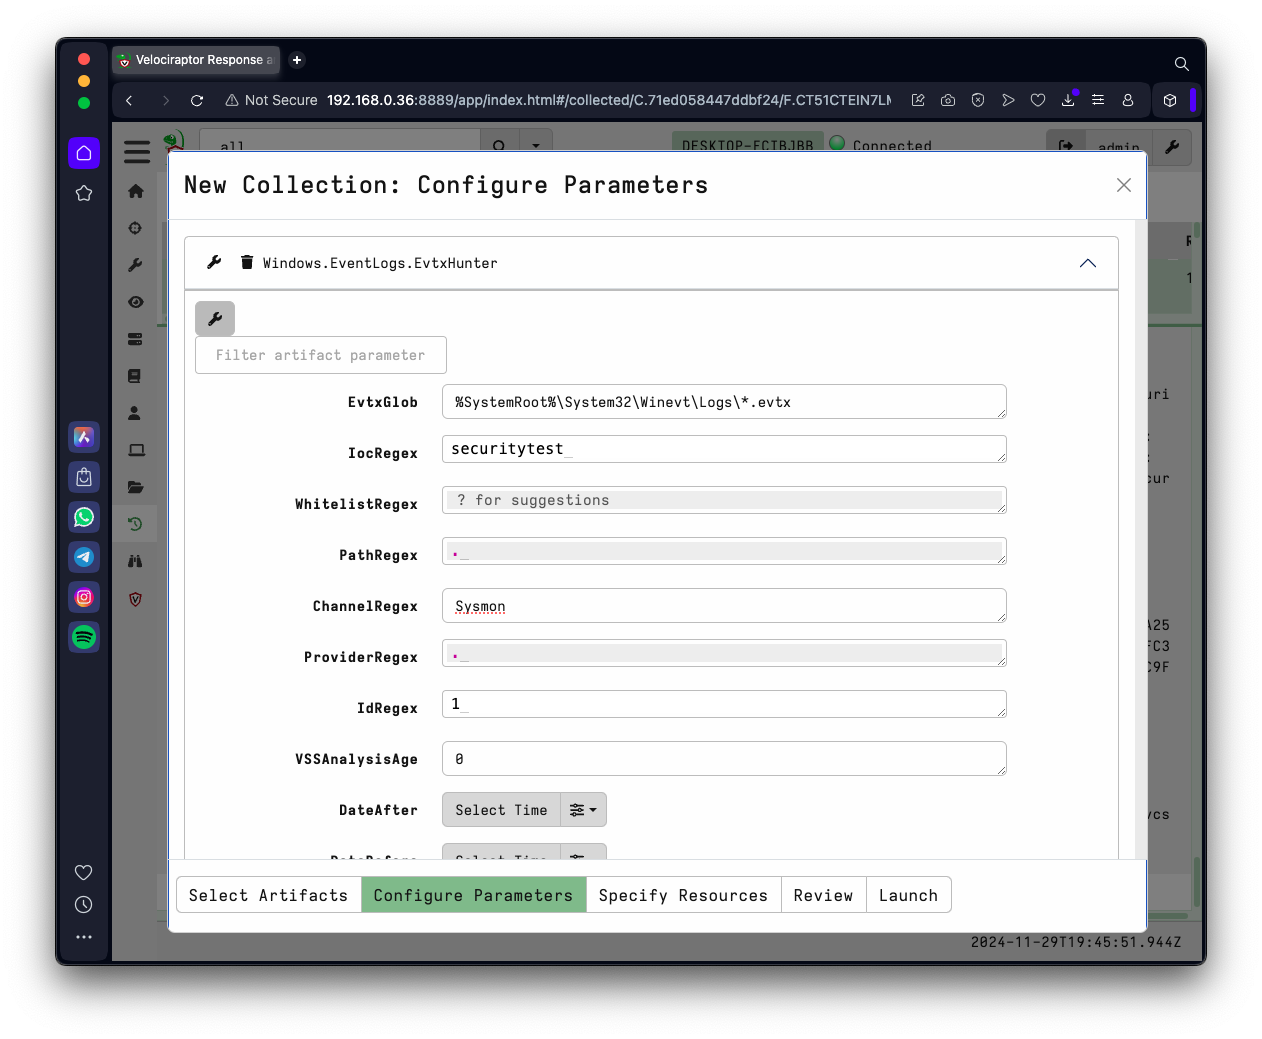
Windows.EventLogs.EvtxHunterUse these parameters, as shown below.
- IocRegex securitytest
- ChannelRegex Sysmon
- IdRegex 1
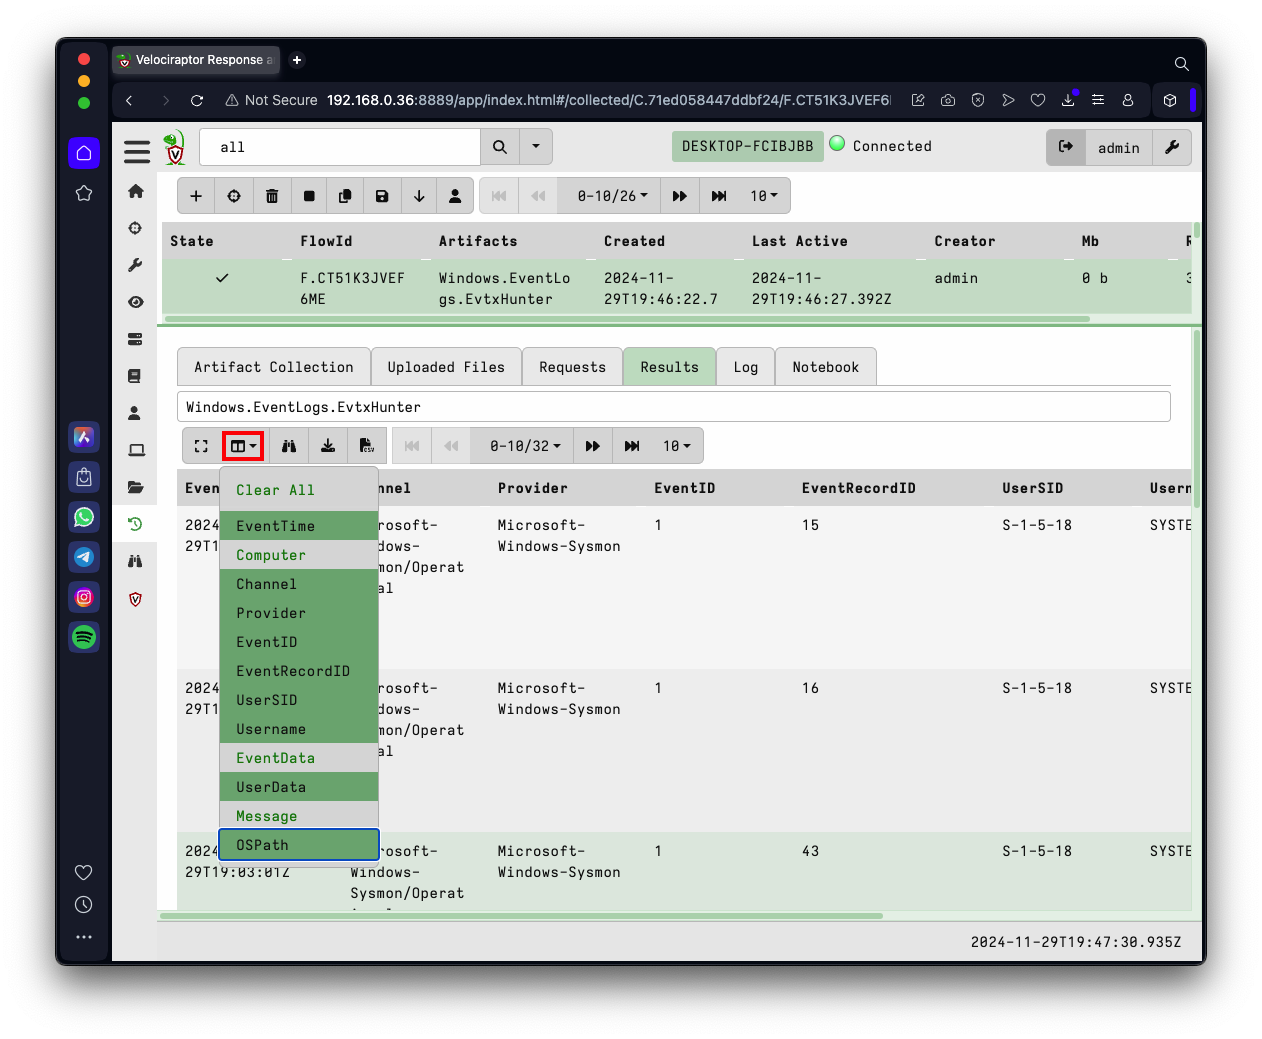
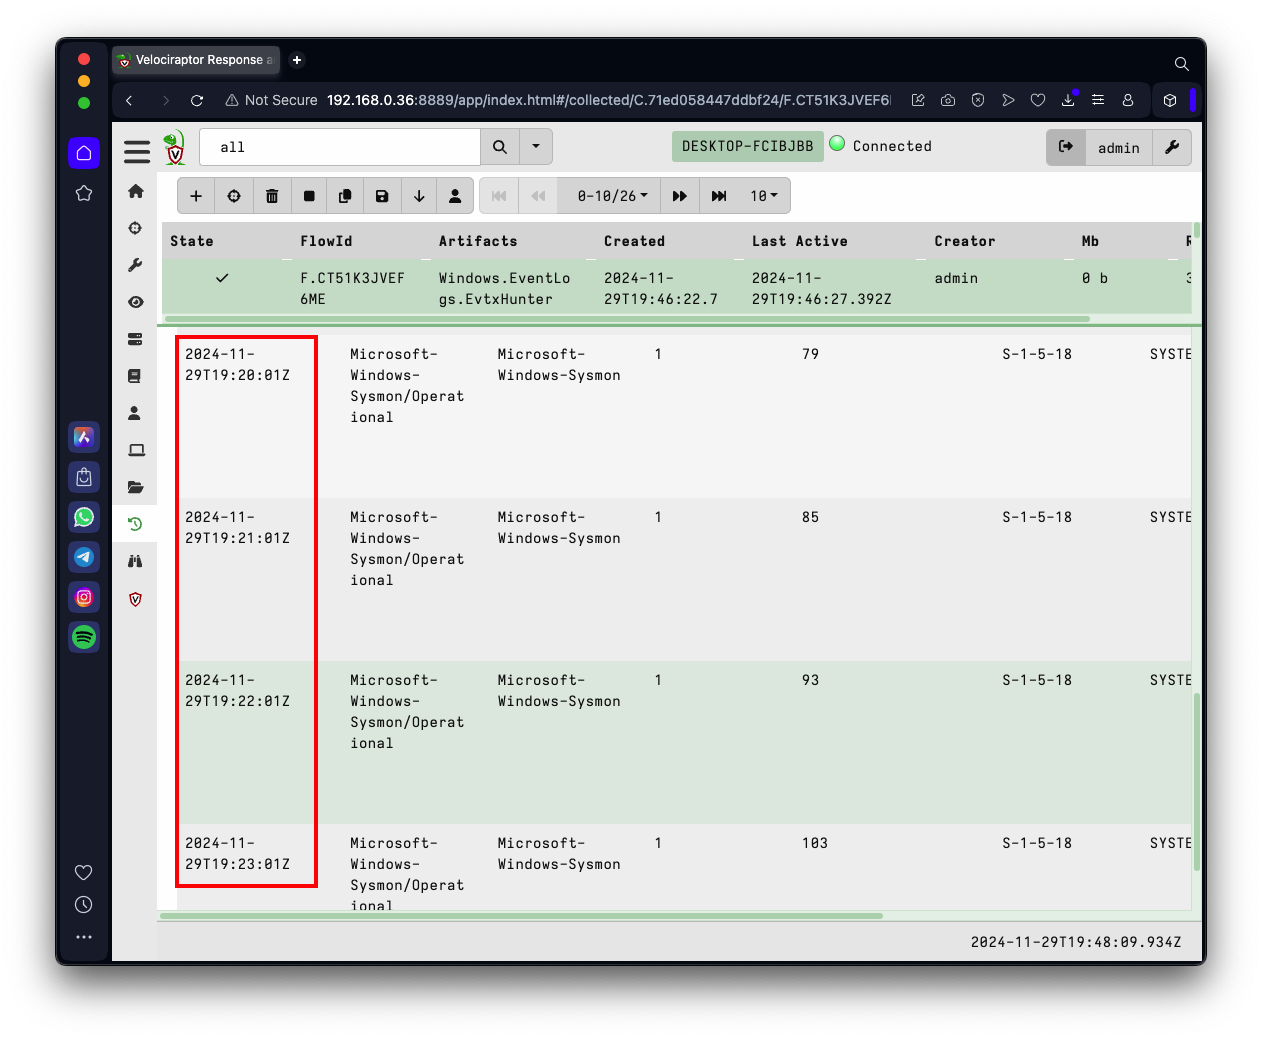
In the Results page, click the "Show/Hide Columns" icon, outlined in red in the image below, and clear the EventData, Message, and OSPath fields, as shown below.
Now you can see the times of these events, showing that a new process is created every minute, as shown below. This suggests the use of Scheduled tasks.
Click the "Show/Hide Columns" icon and show the Message field again.
Make the Message column wider. Scroll down to look at the most recent event.
Look in the ParentCommandLine for the flag, covered by a green rectangle in the image below.
IR 373.5: Scheduled Tasks (5 pts)
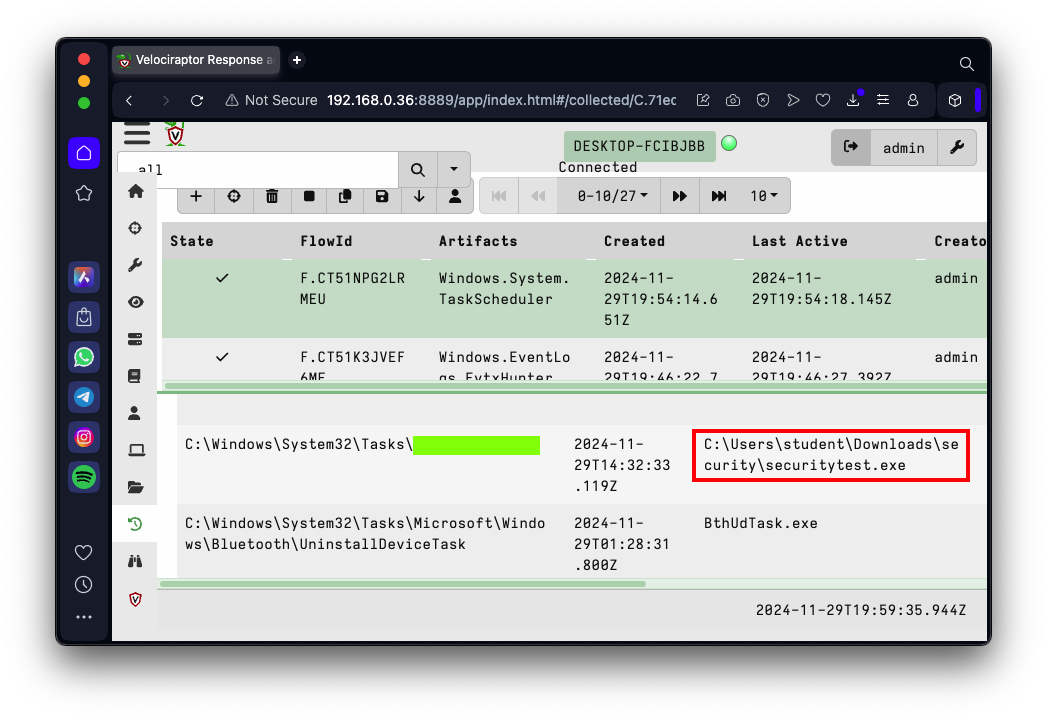
Launch this collector, with no changes to the parameters:Windows.System.TaskSchedulerIn the Command column, find the beaconing command, outlined in red in the image below.The flag is covered by a green rectangle in the image below.
When I did it in October, 2025, there were 244 scheduled tasks. To search them, I downloaded a CSV file and opened it in a spreadsheet, so I could search for "securitytest".
In the column that appears, click "Hunt Manager", as shown below.
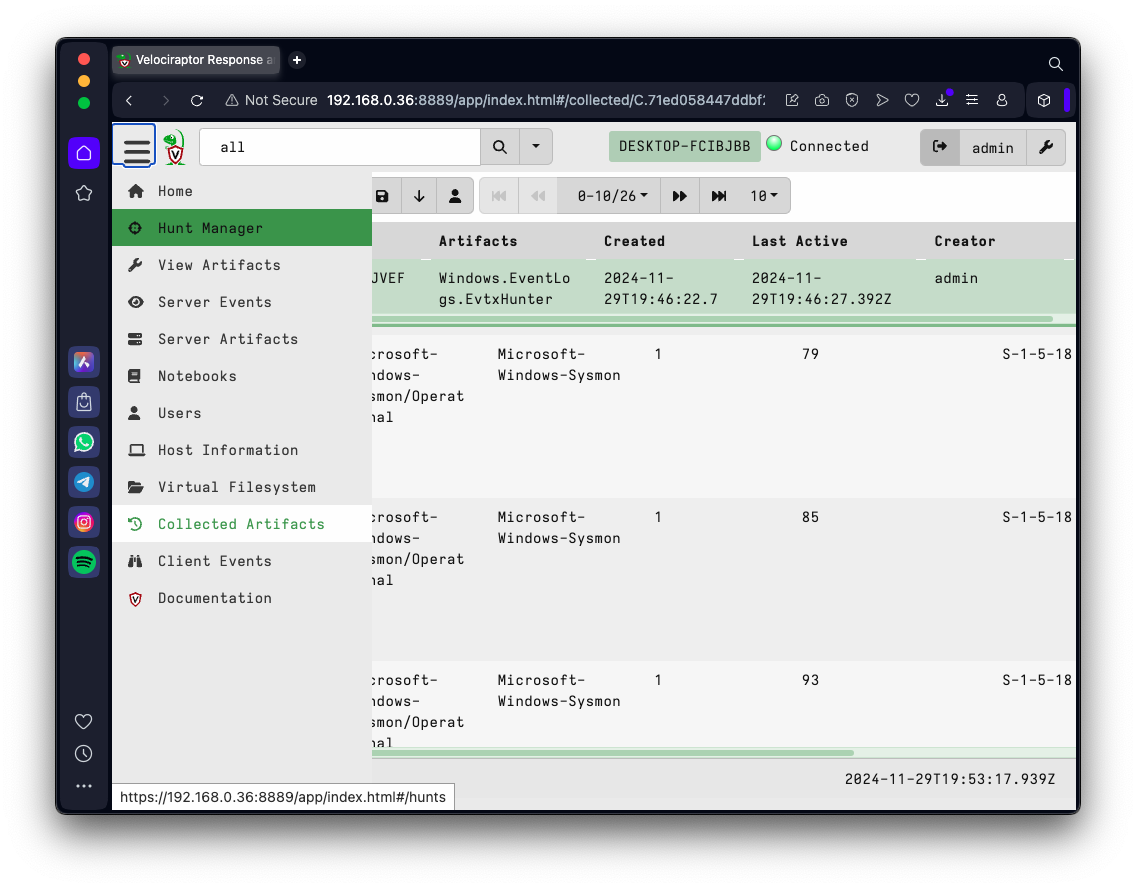
At the top left, click the plus-sign, outlined in green in the image below.

Enter a Description of Detect securitytest beaconer, as shown below.

At the bottom left, click the blue "Select Artifacts" button.
Find these collectors, and click each one to highlight it.
Then search for the next one and highlight it.
Windows.Sysinternals.SysmonInstall (Omit for Windows on ARM)At the bottom left, click the blue "Configure Parameters" button.
Windows.EventLogs.EvtxHunter
Windows.System.TaskScheduler
Windows.System.DNSCache
You see four artifacts, as shown below.
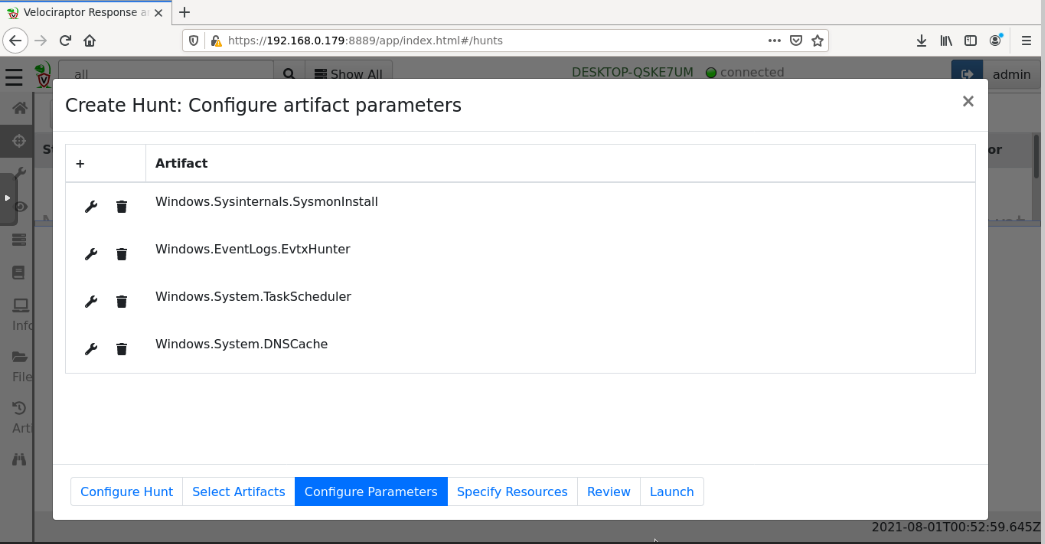
Configure these parameters by clicking the appropriate wrench icons:
Windows.Sysinternals.SysmonInstallAt the bottom right, click Launch.
No parameter changesWindows.EventLogs.EvtxHunter
IocRegex: securitytestWindows.System.TaskScheduler
TasksPath: c:/Windows/System32/Tasks/SecurityScriptWindows.System.DNSCache
No parameter changes
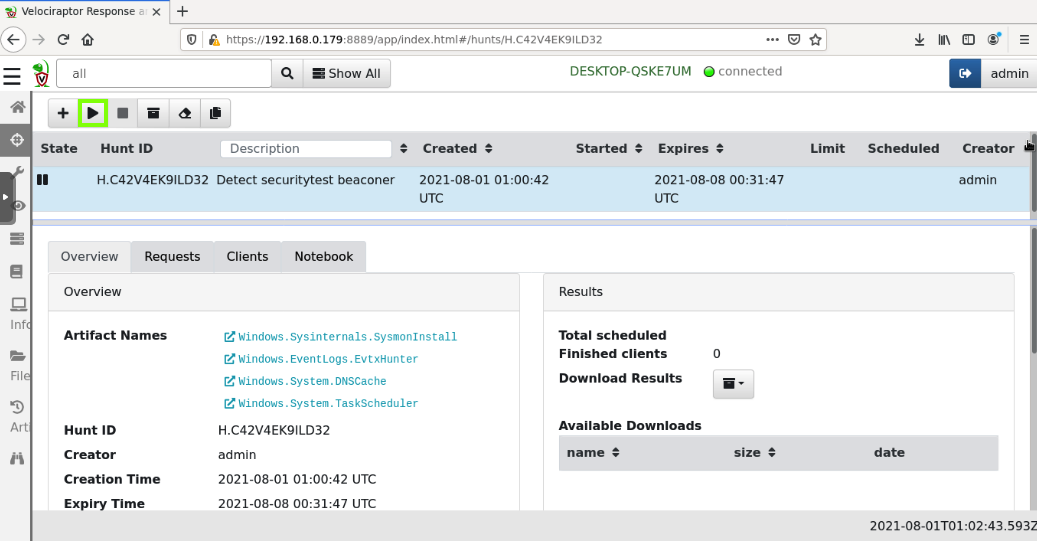
In the next page, in the center pane, click the hunt's name to select it.
At the top left, click the right-arrow to run the hunt, outlined in green in the image below.
Click Run It!.
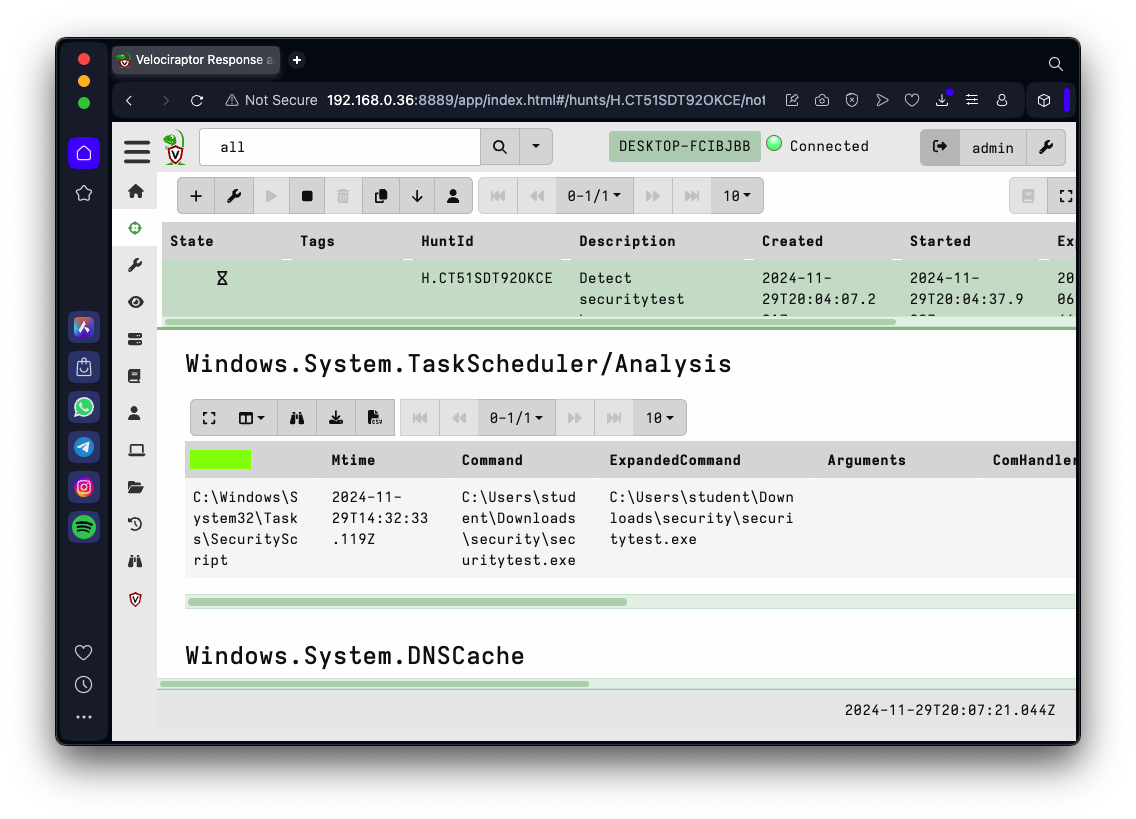
IR 373.6: TaskScheduler/Analysis (10 pts)
In the center pane, click the hunt's name to select it.In the lower pane, click the Notebook tab.
Find the Windows.SystemTaskScheduler/Analysis section.
The flag is covered by a green rectangle in the image below.
schtasks /delete /tn SecurityScript /f
rmdir /s "%userprofile%\downloads\security" /q
Posted 7-30-2021
Wireshark install added 8-2-2021
Number at top corrected 10-21-21
Flag 4 changed 10-22-21
Tips added 11-9-22
Many images and instructions updated 3-15-24
Video added 4-17-24
Updated for Win 11 11-29-24
etl2pcapng command updated, flag 2 instructions updated, DNS cache flush and CSV download tips added 10-25-25