Alternative Method: Students who prefer not to do an installation onto a physical computer may do "Project 5x: Installing Windows 7 Ultimate in VMware" instead of this project.
Restart your machine. When you see the message "Press any key to boot from CD or DVD", press the Enter key.
When you see the "Install Windows" box, accept the default "Language to install","Time and currency format", and "Keyboard or input method" settings and click Next.
In the next screen, click "Install now".
Check the "I accept the license terms" box and click Next.
Click "Custom (advanced)".
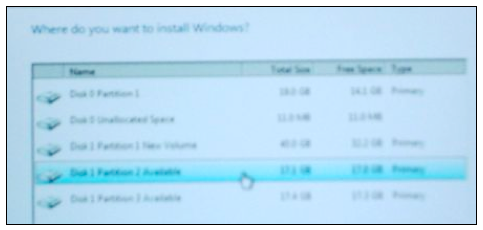
Note the Disk number and Partition number you chose. In the image above, "Disk 1 Partition 2" is selected.
If you are working at home, you should know what partition you want to use.
After you have clicked an available partition, click Next.
Now wait--it will take a while to copy the files. Your computer will restart one or more times. When it restarts, don't touch the keyboard--just let it boot from the default hard disk partition. When I did it, it took about 10 minutes.
Use your own name as the user name, and use the computer name written on the front panel label, which should be something like S214-01. Click Next.
The next box asks for a password. I recommend that you use a password of P@ssw0rd in the S214 lab, because there's no security in there anyway. Put anything in the hint box.
When it asks for a product key, clear the "Automatically activate Windows when I'm online" box, leave the product key blank, and click Next.
At the "Help protect and improve Windows automatically" screen, click "Use recommended settings".
At the "Review your time and date settings" screen, click Next.
If a "Select your computer's current location" screen appears, click "Home network". This will make it possible for you to set up a homegroup later.
If a "Do you want to create a homegroup?" box appears now, click Skip.
Your desktop appears.
Type this command into the Command Prompt window, then press the Enter key.
echo %systemdrive%
Find your system drive in the list--it should be labeled "Available (C:)" if you are working in S214. You need to change this name, so that later students in the lab don't see your partition as "Available" and install another OS on the same partition.
Right-click your system drive icon and click Rename. Type in a new name of "Your Name Win 7" and press the Enter key.
Type this command into the Administrator Command Prompt window, then press the Enter key:
bcdedit /set description "Your Name Win 7" {current}
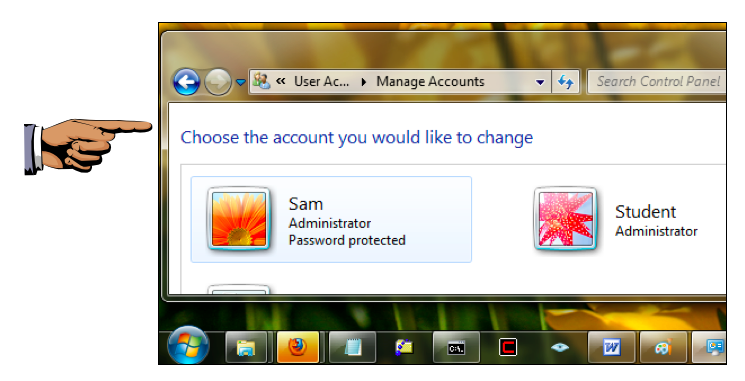
In the "User Accounts and Family Safety" section, click "Add or remove user accounts".
If you are working at home, you don't need to make the Student account, but you must state in your email message that you did the project at home.
If you are working in the S214 lab, you need to create a Student account for the other students to use, with these steps:
Click outside the vitual machine on the host machine's taskbar.
Press the PrintScrn key. Paste the image into Paint. Save the image with the filename "Your Name Proj 1".
YOU MUST SUBMIT FULL-DESKTOP IMAGES FOR FULL CREDIT
Last Modified: 1-22-13