https://my.vmware.com/web/vmware/free#desktop_end_user_computing/vmware_player/5_0
Instead, make a folder on another partition for your virtual machines this way:
Click Start, Computer. Double-click the VMs-S214 drive. Create a new folder with your name on it.
If you are working on your own computer, this step is not necessary--you can save your virtual machine in your Documents folder or any other place you wish.
If you are using an ISO file, save it in your folder on the VMS-S214 drive, or somewhere you can find it.
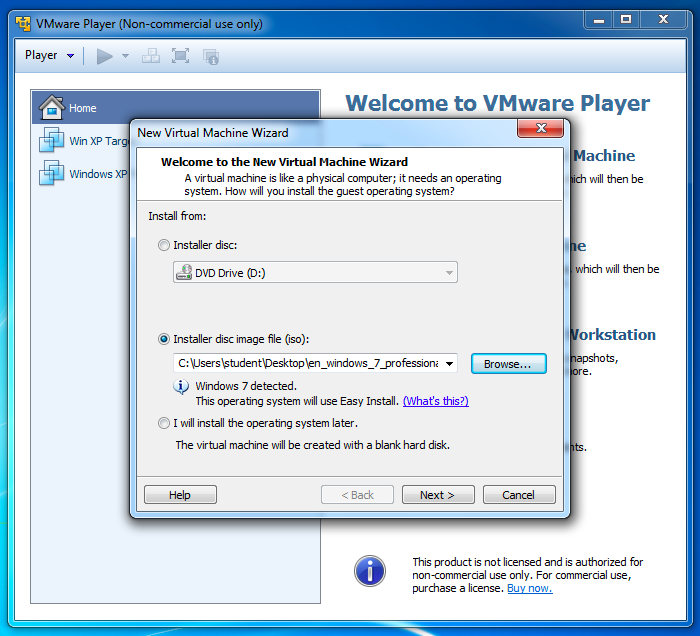
On the right side of the "VMware Player" window, click "Create a New Virtual Machine".
In the "New Virtual Machine Wizard", select one of the top two options, to tell VMware where your Windows 7 installation medium is.
Click Next.
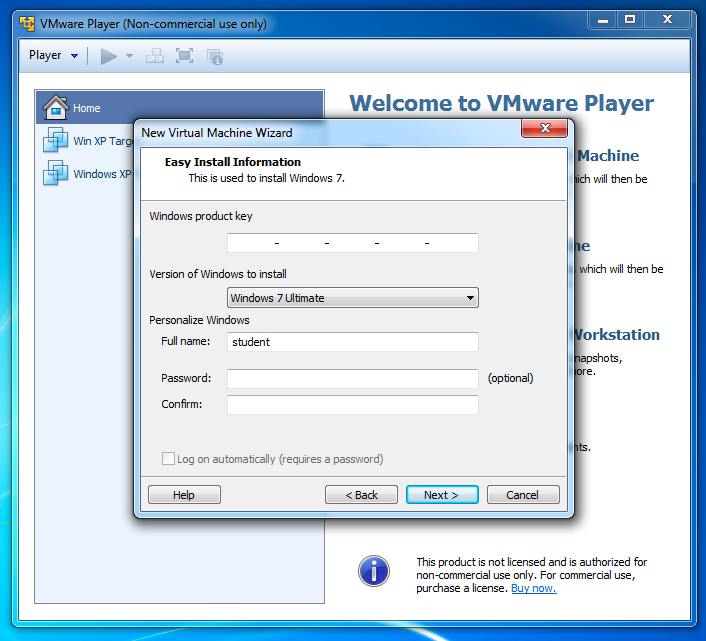
In the next screen, In the "Version of Windows to Install" drop-down list box, select "Windows 7 Ultimate", as shown below.
Leave the Product Key empty.
You can leave the other fields at default values.
Click Next.
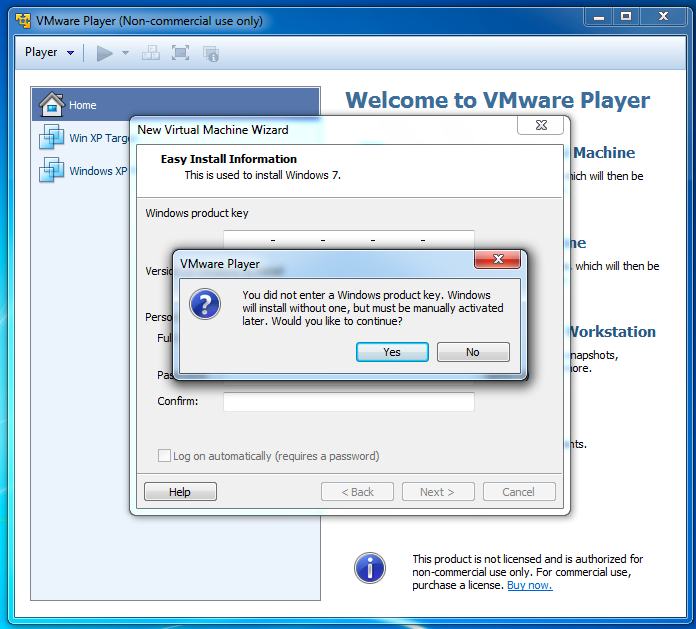
A box pops up asking if you want to continue without a product key, as shown below. Click Yes.
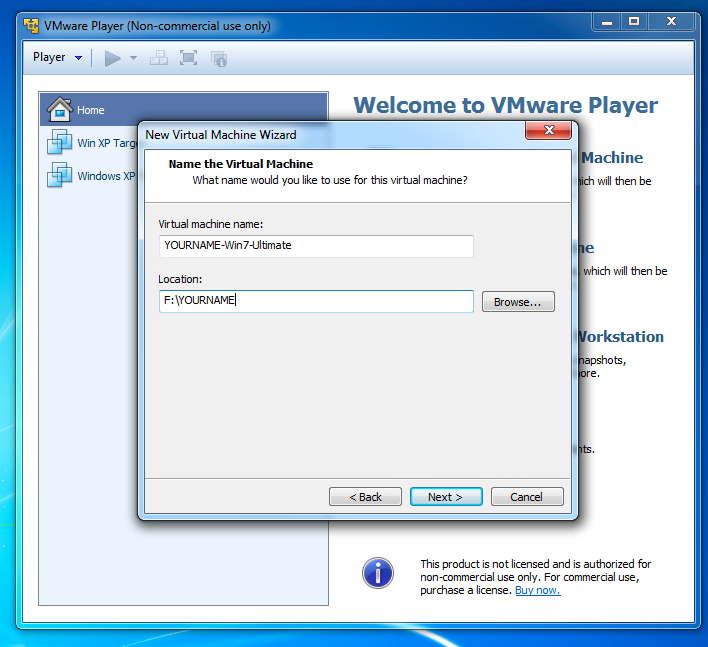
In the next screen, enter a "Virtual machine name" of YOURNAME-Win7-Ultimate, as shown below. Don't use the literal text "YOURNAME"--replace that with your own name.
Click the Browse button and browse to the VMs-S214 drive, and open your folder.
Click Next.
In the "Specify Disk Capacity" screen, accept the default options and click Next.
In the "Ready to Create Virtual Machine" screen, click Finish.
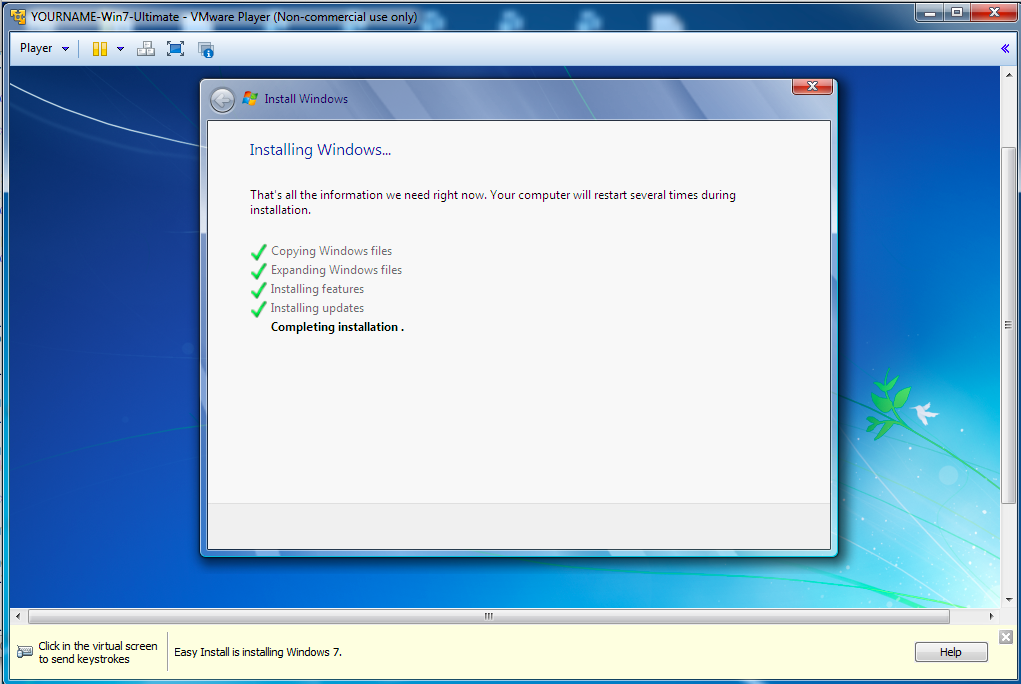
The installation proceeds automatically, as shown below. You will probably have to click through a few warning boxes VMware pops up when the machine starts.
You should see a System window showing that your Windows edition is "Windows 7 Ultimate", as shown below.
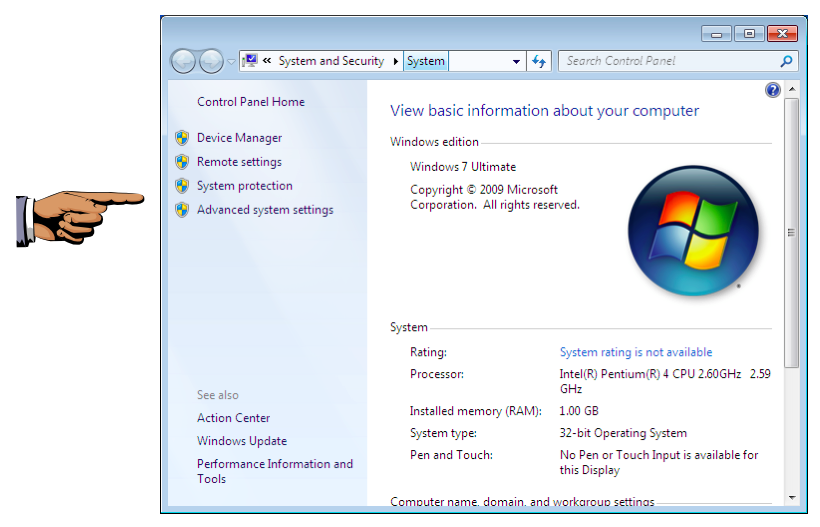
Click outside the vitual machine on the host machine's taskbar.
Press the PrintScrn key. Paste the image into Paint. Save the image with the filename "Your Name Proj 5xa".
If you are working in the S214 lab, you need the second image to show that you have created a Student account for the other students to use, as shown below on this page, with these steps:
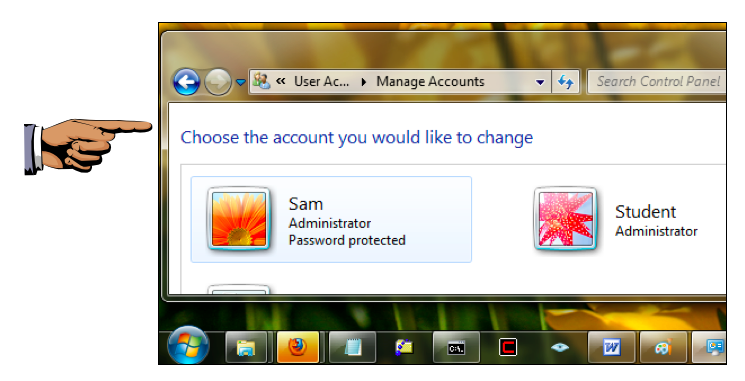
Make sure the Student account is visible, showing its Administrator status, and no "Password protected" message.
Click outside the vitual machine on the host machine's taskbar.
Press the PrintScrn key. Paste the image into Paint. Save the image with the filename "Your Name Proj 5xb".
Last Modified: 1-20-13