CCSF blocks Mega, so you'll have to do it off-campus. To get it on-campus, you can copy it from storage media in SCIE 214.
- Filename: QR3.7z
- Size: 7,628,423,881 bytes
- MD5: 0b8142b1ad9819256ac489a0d9011e39
- SHA-1: 33dad09a193606b4e2a70717ae6c6c9ba05d7078
- SHA-256: 3c4c22cc50a10f204eab925383af98aefc2ab40016211d3afe98c750c73698cf
Start the VM.
Log in to the console with these credentials, as shown below.
- Username: root
- Password: P@ssw0rd
qchange_netsetup
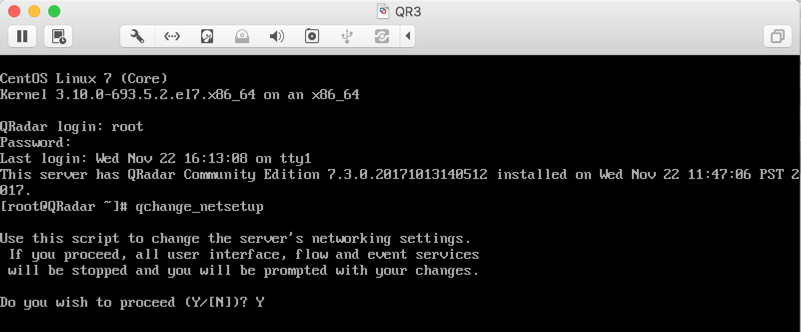
A series of crudely graphical screens appear. Use Tab to move through the options and Enter to select them.
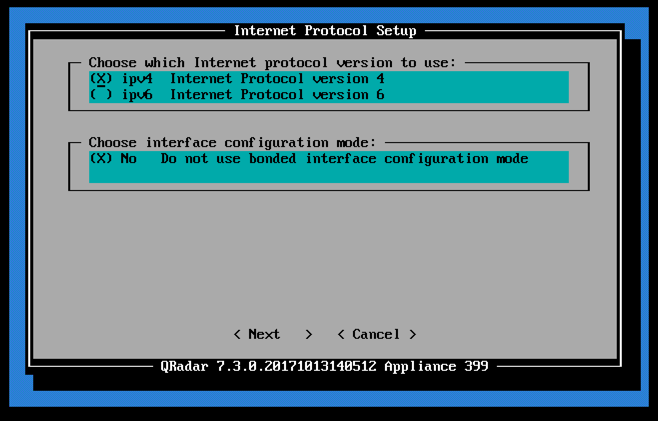
In the first screen, accept the default options of "ipv4" and "No", as shown below.
Press Tab until Next is highlighted and then press Enter.
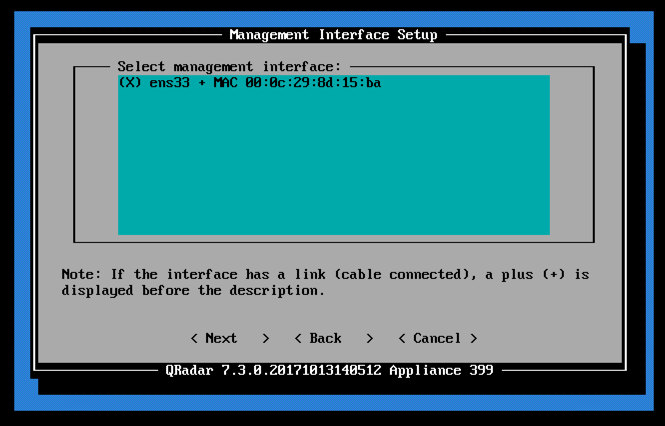
At the "Management Interface Setup" screen, accept default options of "ens33", as shown below.
Press Tab until Next is highlighted and then press Enter.
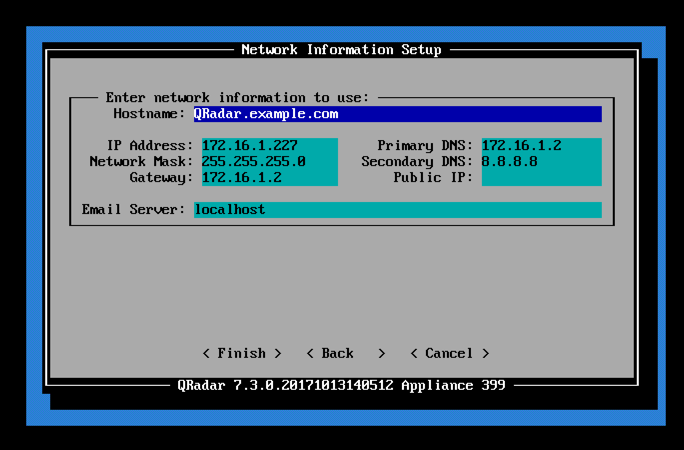
At the "Network Information Setup" screen, it should fill in with good default values. Make sure one of the DNS servers is 8.8.8.8 as shown below.
Make a note of the server's IP address! You will need it later.
Press Tab until Finish is highlighted and then press Enter.
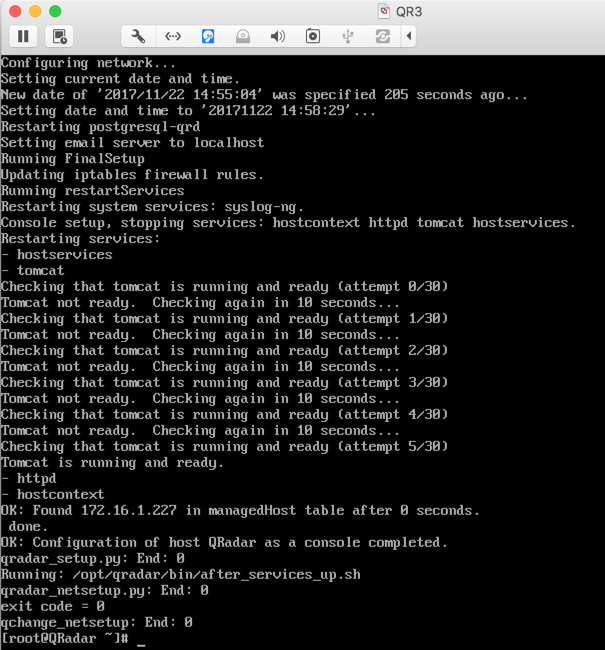
Wait while the machine configures networking and restarts services, as shown below. Tomcat is Java-based and slow to start.
Logging In to QRadar
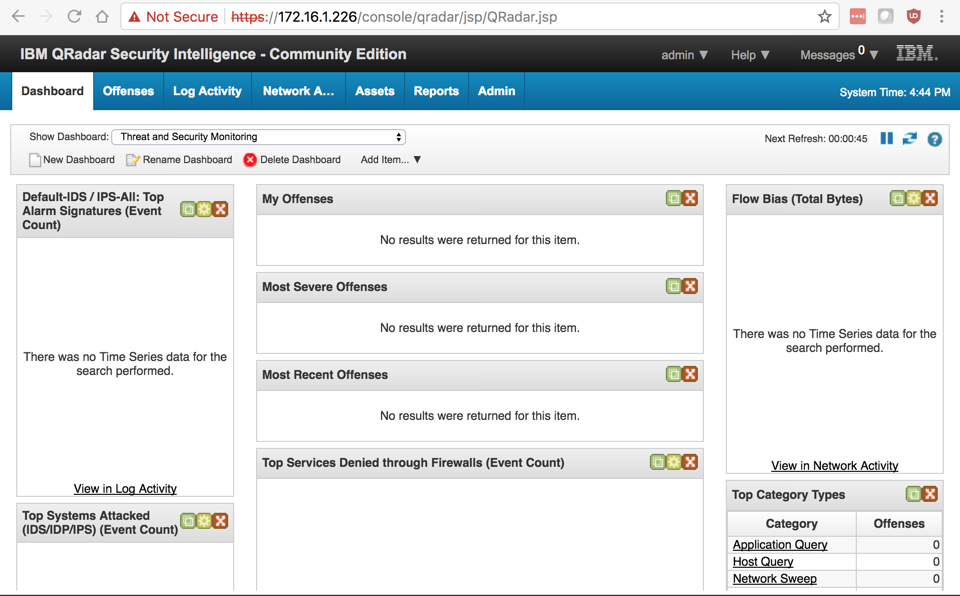
On your host system, in a Web browser, go to this URL, replacing the IP address with the IP address of your QRadar VM.https://172.16.1.226/console/
Approve the self-signed certificate.
Log in with these credentials, as shown below.
- Username: admin
- Password: P@ssw0rd

QRadar opens, as shown below.
Viewing Log Sources
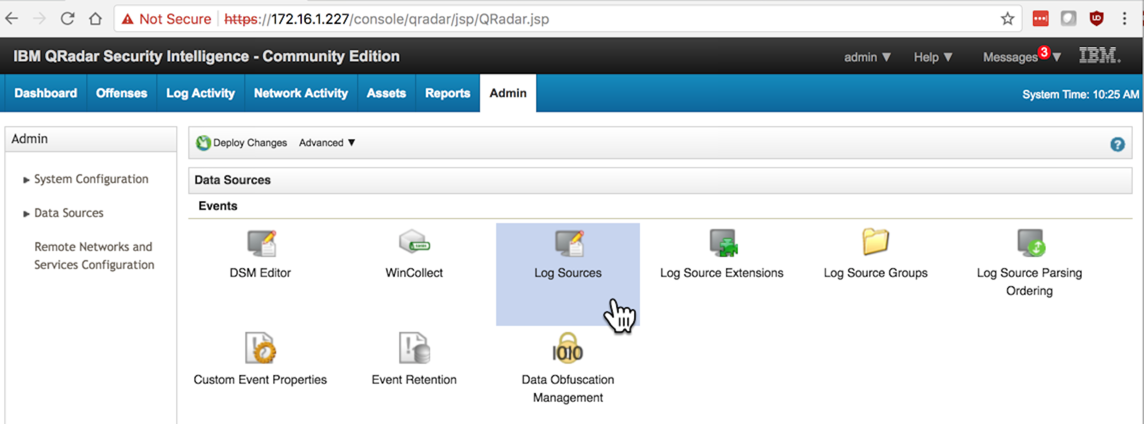
In the QRader administration page, at the top center, click the Admin tab.Scroll down to the "Data Sources" section and click "Log Sources", as shown below.
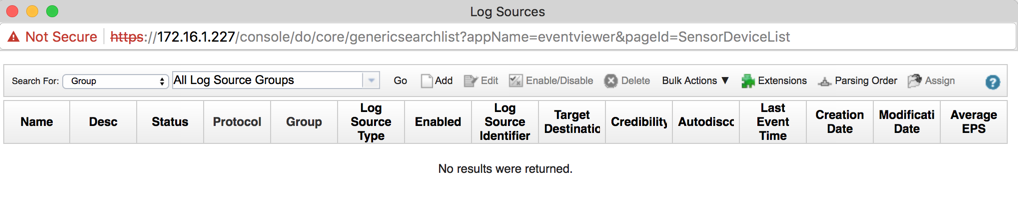
A box pops up, as shown below.
In the top center, click the Add button.
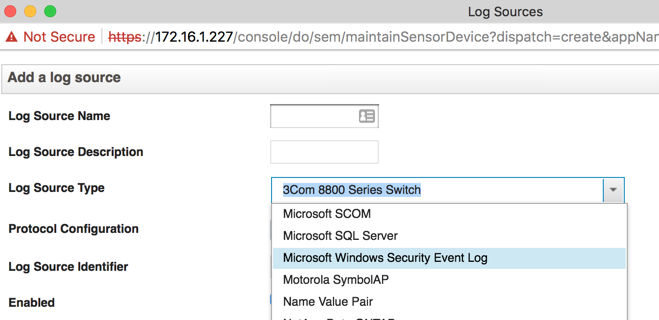
An "Add a log source" window appears. In the "Log Source Type" list box, scroll down to see "Microsoft Windows Security Event Log", as shown below.
You don't need to select it at this time; just to verify that it's there. It's not included in the default QRadar Community Edition installation, but I added it to the VM you downloaded already.
Close the "Add a log source" window.
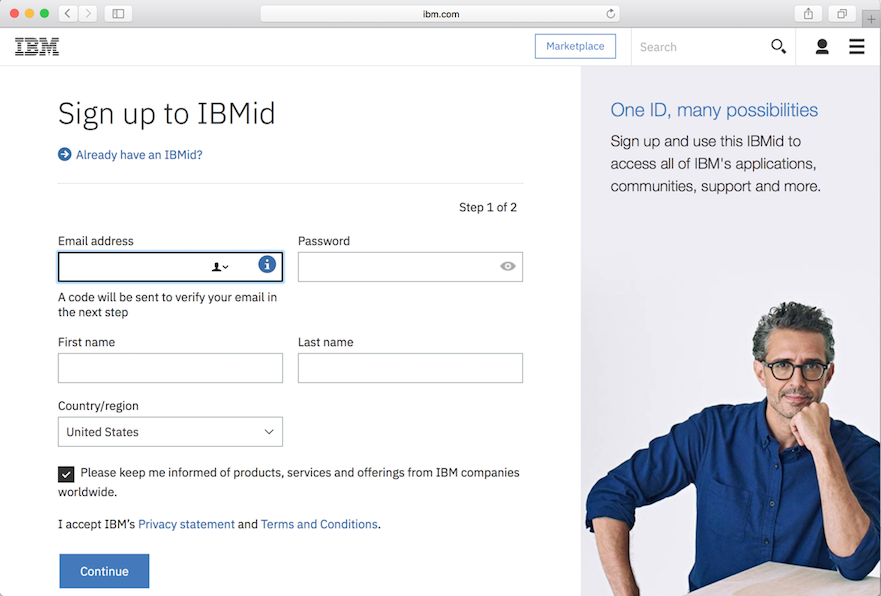
Making an IBM Account
In a Web browser, go tohttps://www.ibm.com/account/us-en/signup/register.html
Create an IBM ID. You will need it to download software below.
Downloading WinCollect
The WinCollect agent is free software from IBM to send Windows event logs to QRadar.In a Web browser, go to
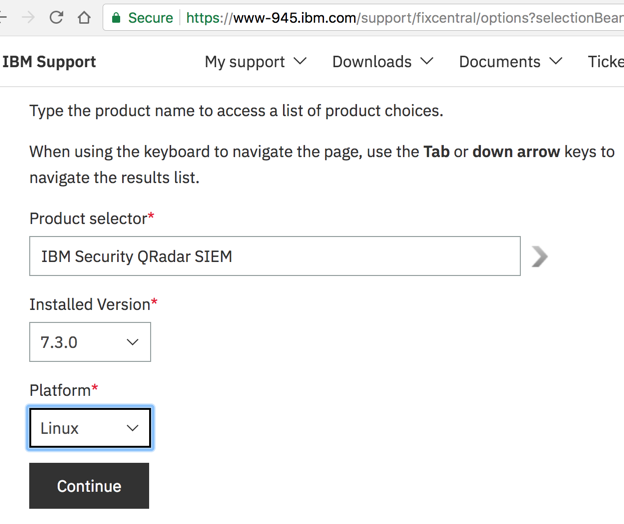
https://www-945.ibm.com/support/fixcentral
Make these selections:
- Product selector: IBM Security QRadar SIEM
- Installed Version: 7.3.0
- Platform: Linux
Click Continue.
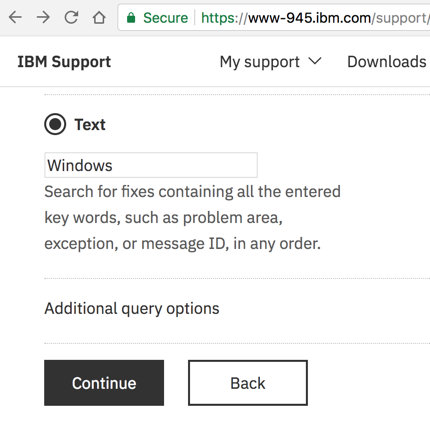
At the bottom of the next page, click the Text button and type in
Windows
as shown below.
Click Continue.
In the results, scroll down to the WINCOLLECT section, as shown below.
There are several items here, including the main engine for 32-bit and 64-bit windows, and various "interim fix" patches.
We only need the first 4 files. Check them, as shown below.
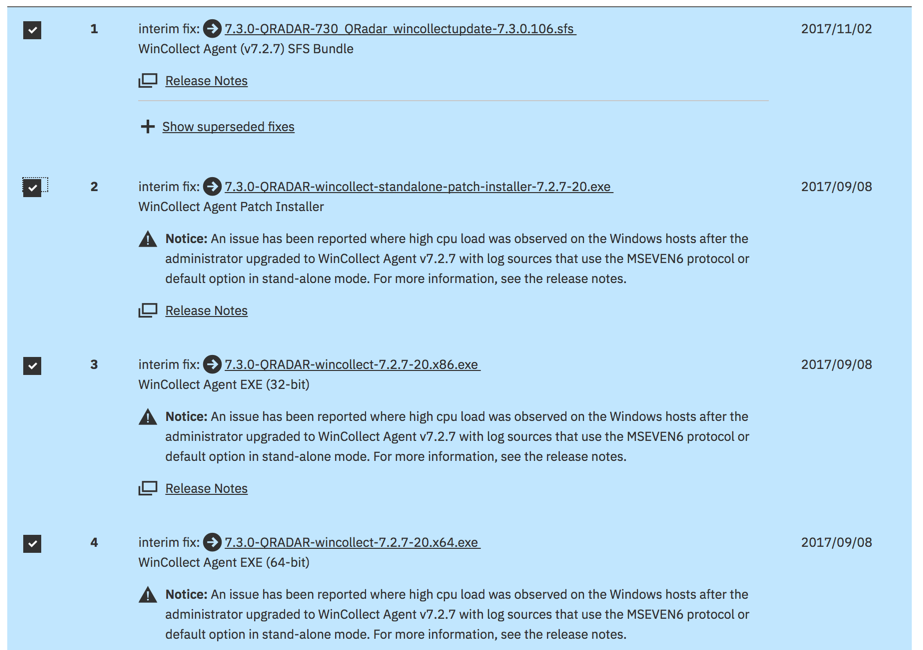
At the bottom, click the Continue button.
If you are prompted to, sign in to your IBM account.
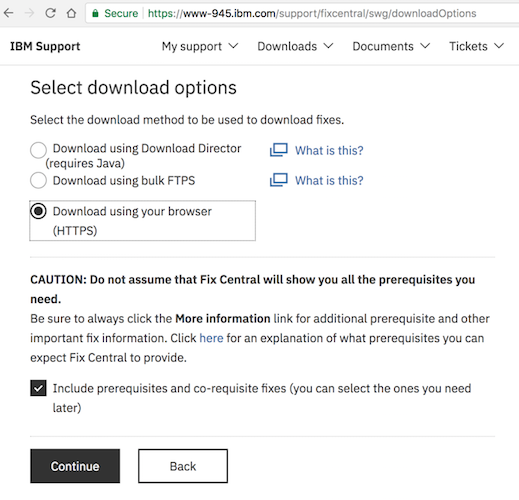
On the next page, click the "Download using your browser" button, as shown below, and click Continue".
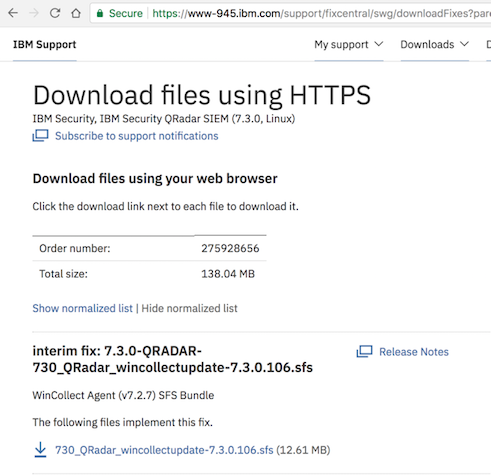
On the next page, click the blue downward-pointing arrow next to each product you want, one by one, as shown below,
Overview of WinCollect Installation
To collect windows logs, we'll need to do these steps:On the QRadar VM
Install File 1: 7.3.0-QRADAR-730_QRadar_wincollectupdate-7.3.0.106.sfsOn 32-Bit Windows Systems
Install these files, in this order:- wincollect-7.2.7-20.x86.exe
- wincollect-standalone-patch-installer-7.2.7-20.exe
On 64-Bit Windows Systems
Install these files, in this order:- wincollect-7.2.7-20.x64.exe
- wincollect-standalone-patch-installer-7.2.7-20.exe
Installing FileZilla
We need to update software on the QRadar VM. We'll need FileZilla to do that.In a Web browser, go to
https://filezilla-project.org/download.php?platform=osx
Install FileZilla with the default options.
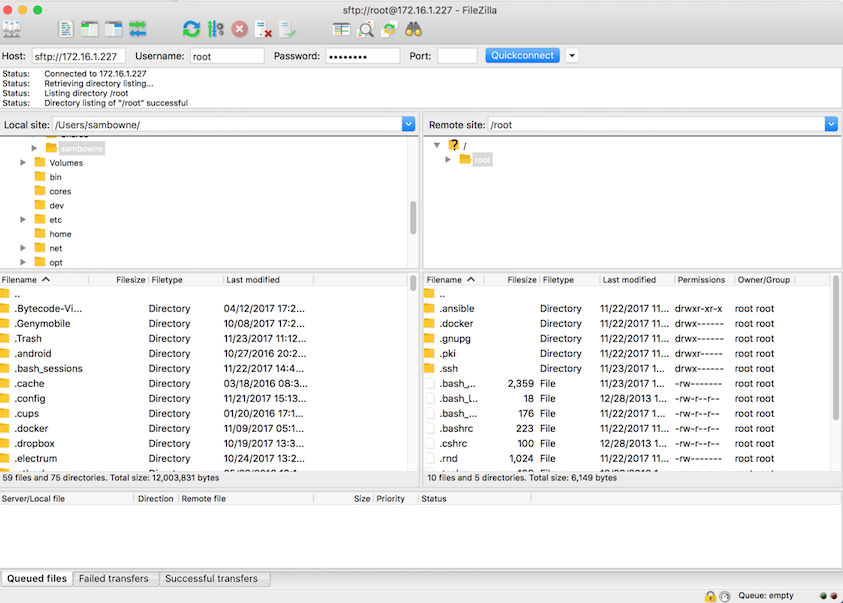
Run FileZilla. At the top, enter these values, as shown below:
- Host: Enter the IP address of your QRadar VM
- Username: root
- Password: P@ssw0rd
- Port: 22
A box pops up asking whether to remember passwords. For this project, there's no need to worry about unauthorized use of your QRadar VM, so click "Save passwords" and click OK.
An "Unknown host key" box pops up. Click OK.
FileZilla connects, as shown below.
The left pane shows your host system, and the right pane shows your QRadar VM.
Installing Software on the QRadar VM
In the right pane of FileZilla, click the top yellow folder icon for /In the folder list, click /tmp
In the left pane of FileZilla, navigate to your Downloads folder.
Drag the 7.3.0-QRADAR-730_QRadar_wincollectupdate-7.3.0.106.sfs file from the left pane to the right pane, as shown below.

In your QRadar VM console, execute these commands, as shown below.
mkdir -p /media/updates
cd /tmp
mount -o loop -t squashfs 730_QRadar_wincollectupdate-7.3.0.106.sfs /media/updates
/media/updates/installer

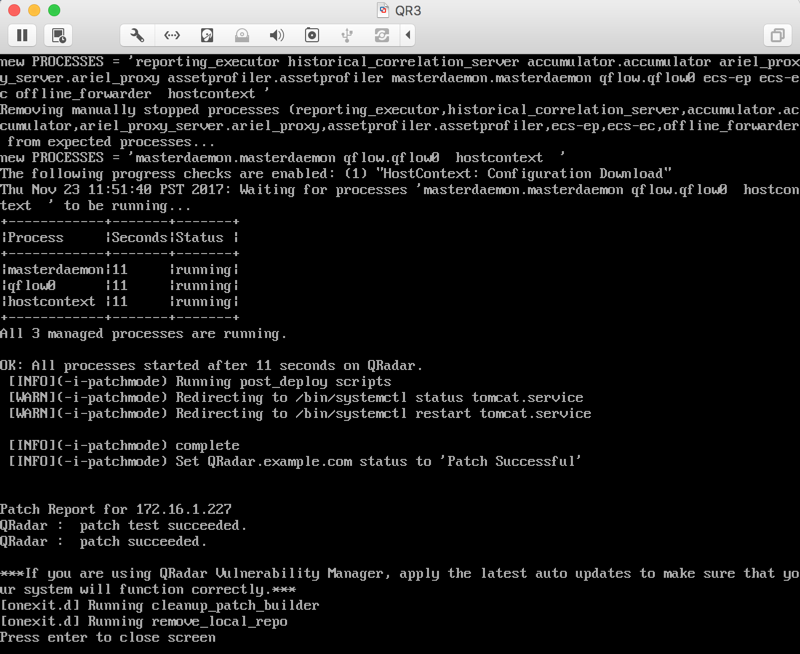
The installation takes about 5 minutes, and a lot of messages scroll by. Tomcat restarts, which is slow as always.
When it finishes, you'll see "patch succeeded", as shown below.
In your Web browser, log in to the QRadar GUI again with the credentials admin and P@ssw0rd
Click the Admin tab.
A message says "There are no changes to deploy". This is contrary to the IBM patch Release Notes, which say that a manual deploy and release is required after the patch. However, the console showed that this patch automatically performed those steps already.
This is typical for enterprise-class software patches--you can't always rely on the documents being accurate.
Deleting the Patch File
In FileZilla, in the right pane, left-click the 730_QRadar_wincollectupdate-7.3.0.106.sfs, then right-click it and click Delete. Click Yes to delete it.Installing Wincollect on the Windows System
Copy the appropriate version of Wincollect from your host machine's Downloads folder to your Windows machine.- For 32-bit Windows: wincollect-7.2.7-20.x86.exe
- For 64-bit Windows: wincollect-7.2.7-20.x64.exe
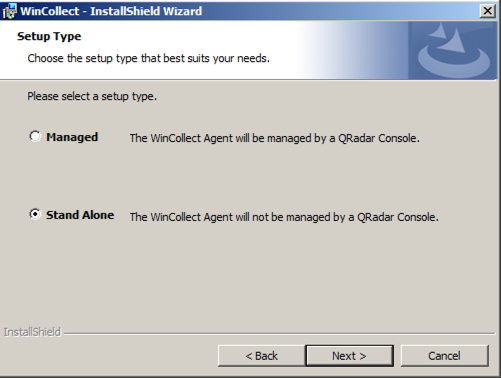
Click "Stand Alone, as shown below, and then click Next.
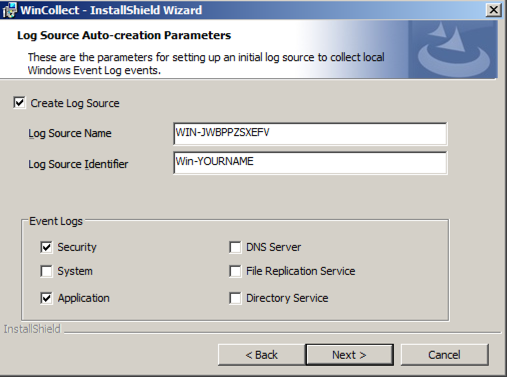
In the "Log Source Auto-creation Parameters" box, make these selections, as shown below.
- Check the "Create Log Source" box
- Enter a Log Source Identifier of Win-YOURNAME (using your own name, not the literal text "YOURNAME"
- Clear the System check box
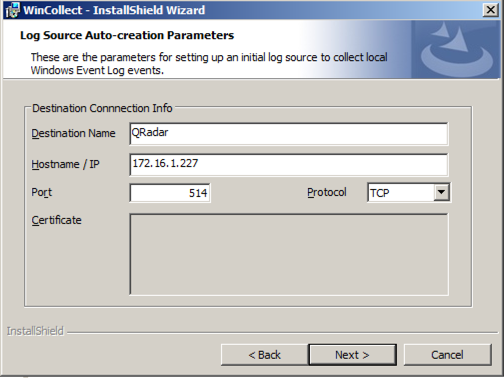
In the next box, make these selections, as shown below.
Replace the IP address with the correct IP address of your QRadar VM.
- Destination Name: QRadar
- Hostname / IP: 172.16.1.227
In the next box, accept the default Machine poll interval and click Next.
In the "Heartbeat Parameters" box, accept the default options and click Next.
In the "Installation Parameters Summary" box, click Next.
Click Install.
Click Finish.
Installing the Patch
Drag the wincollect-standalone-patch-installer-7.2.7-20.exe file into your Windows VM and double-click it.Install it with the default options. If it wants to install .NET, allow it to do that.
Adjusting Local Security Policy
We need to tell Windows what events to collect.From your Windows desktop, click Start, "Control Panel", "Local Security Policy".
The audit policies available are different in different Windows versions.
These are the policies available in Windows Server 2008.
In Local Security Policy, in the left pane, click the + next to "Local Policy" to expand it.
Click "Audit Policy".
In the right pane, double-click "Audit account logon events", as shown below.
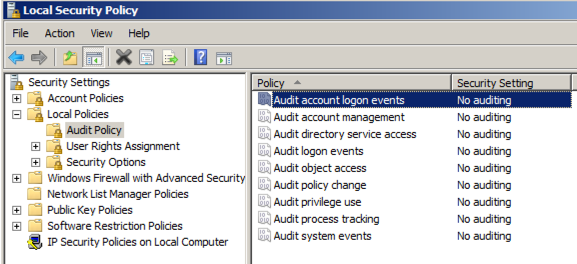
Check Success and Failure, as shown below, and click OK.

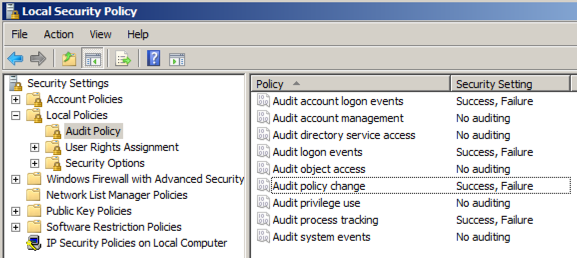
In that manner, configure these options, as listed below. You have already configured the first item.
- Audit account logon events: Success or Failure
- Audit logon events: Success or Failure
- Audit policy change: Success or Failure
- Audit process tracking: Success or Failure
Close Local Security Policy.
Using WinCollect Configuration Console
Click Start. Search for, and click, "WinCollect Configuration Console".In the left pane, click the + next to Devices to expand it.
In the left pane, click the + next to "Microsoft Windows Event Log" to expand it.
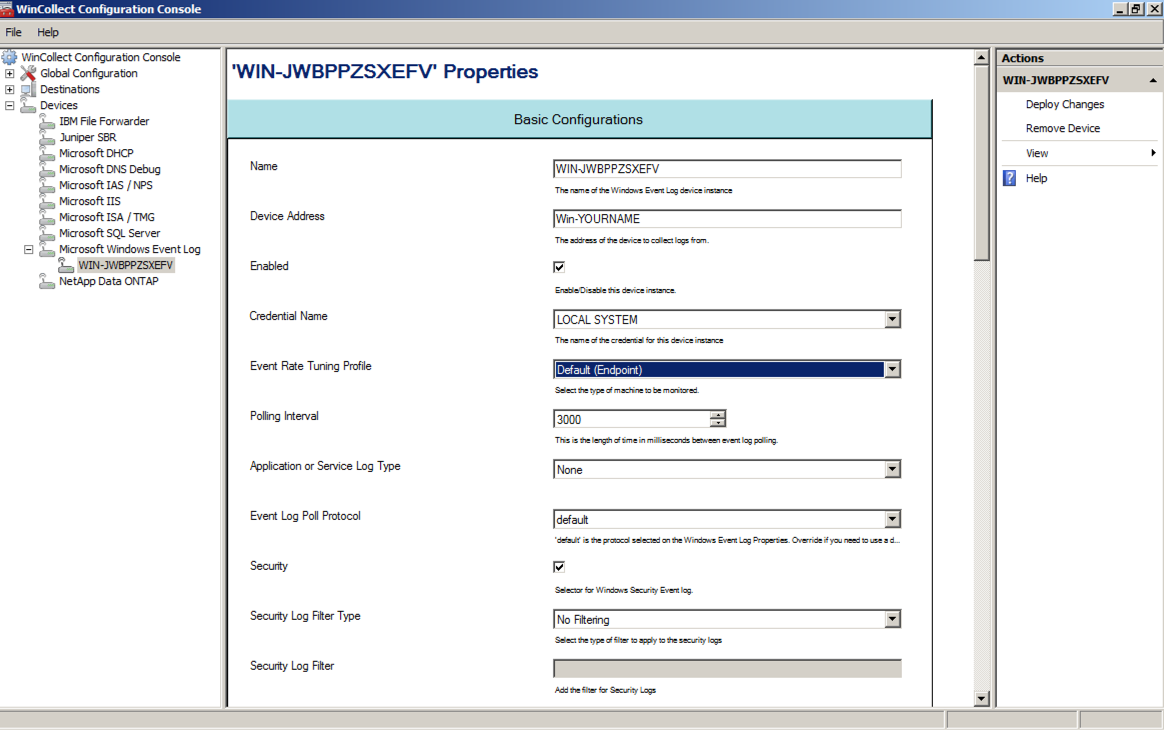
In the left pane, click the name of your Windows machine.
The right pane shows your audit policy selections in a long list, as shown below. You can adjust them here.
Close WinCollect Configuration Console.
Viewing Windows Logs in QRadar
On your host system, in your Web browser, return to the QRadar console.If it has timed out, you need to log in again.
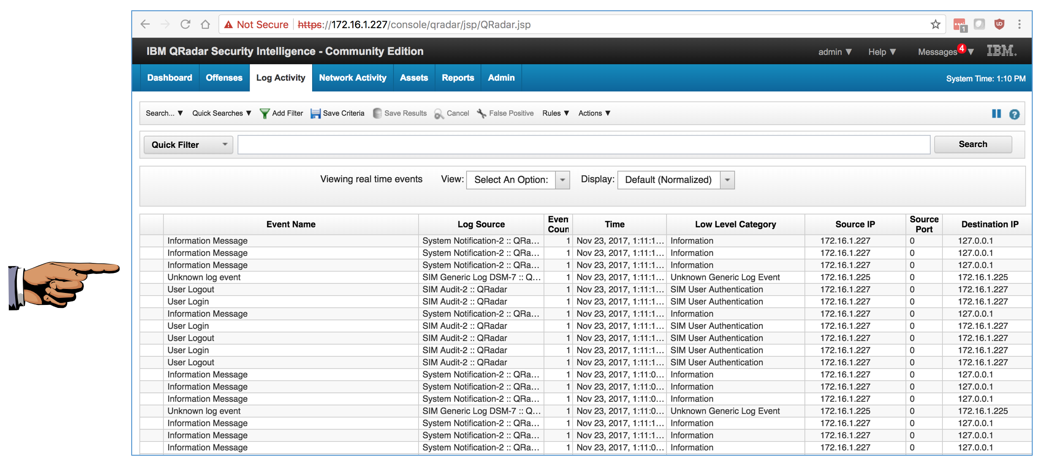
Click the "Log Activity" tab.
Log events should be scrolling by, as shown below.
Capturing a Screen Image
Make sure there are some "Event Name" entries, as shown above.Capture a whole-desktop image and save it as "Proj 5x from YOURNAME".
YOU MUST SEND IN A WHOLE-DESKTOP IMAGE FOR FULL CREDIT
Turning in Your Project
Email the images to cnit.50sam@gmail.com with a subject line of "Proj 5x From YOUR NAME", replacing "YOUR NAME" with your real name.Send a Cc to yourself.
References
QRadar DocumentationDeprecated Linux networking commands and their replacements
CentOS-7 "Minimal Desktop" installation GNOME
QRadar SIEM overview
QRadar: Using the qchange_netsetup command to change the IP address in QRadar
QRadar: Changing the local admin account password
Box folder with QRadar documentation
Security Intelligence Tutorial, Demo & Use Case Videos
Posted 11-23-17 by Sam Bowne