In principle it can be installed on any OS, as both server or client. But the process varies, and I decided only to write instructions for Linux here.
A simple way to achieve that is to use NAT networking on the Client machine, and Bridged networking on the Server machine.
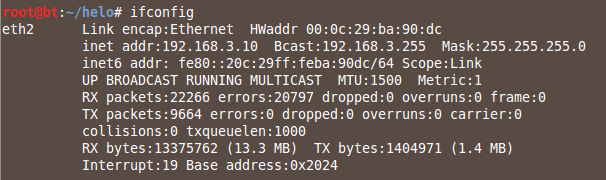
On your Linux Server, execute these commands:
dhclient

ifconfig
On your Linux Client, execute these commands:
dhclient

ifconfig
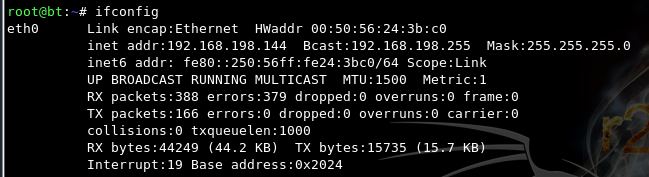
You should see replies, as shown below:

Press Ctrl+C to stop the pings.
On your Linux Server, ping the Linux Client.
You should see no replies, as shown below:

Press Ctrl+C to stop the pings.
sudo apt-get install openvpn -y
sudo mkdir /etc/openvpn/easy-rsa/

sudo cp -r /usr/share/doc/openvpn/examples/easy-rsa/2.0/* /etc/openvpn/easy-rsa/

sudo chown -R $USER /etc/openvpn/easy-rsa/
sudo nano /etc/openvpn/easy-rsa/vars
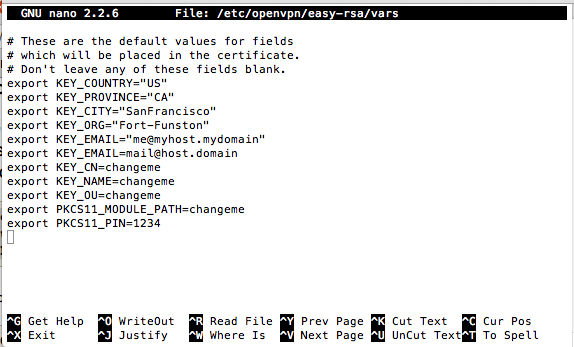
Close the file with Ctrl+X.
cd /etc/openvpn/easy-rsa

sudo ln -s openssl-1.0.0.cnf openssl.cnf

source vars

./clean-all

./build-ca
On your Linux Server, execute this command:
./build-key-server myservername
On your Linux Server, execute these commands:
./build-dh

cd keys

sudo cp myservername.crt myservername.key ca.crt dh1024.pem /etc/openvpn/
On your Linux Server, execute these commands:
cd /etc/openvpn/easy-rsa/

source vars

./build-key client1
sudo cp /usr/share/doc/openvpn/examples/sample-config-files/server.conf.gz /etc/openvpn/

sudo gzip -d /etc/openvpn/server.conf.gz

sudo nano /etc/openvpn/server.conf
ca ca.crt
cert server.crt
key server.key  # This file should be kept secret
In the third line, change "server.key" to "myservername.key" as shown below:
ca ca.crt
cert myservername.crt
key myservername.key  # This file should be kept secret
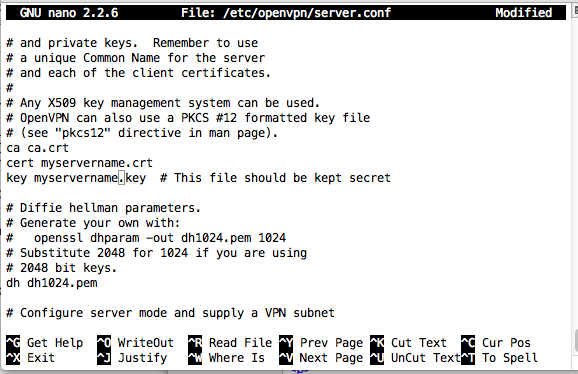
Save the file with Ctrl+X, Y, Enter.
sudo /etc/init.d/openvpn start

ifconfig tun0

If you are using a firewall, open port UDP 1194 on the server.
sudo apt-get install p7zip-full -y

sudo apt-get install apache2 -y
mkdir /tmp/cert

cp /etc/openvpn/ca.crt /tmp/cert

cp /etc/openvpn/easy-rsa/keys/client1.crt /tmp/cert

cp /etc/openvpn/easy-rsa/keys/client1.key /tmp/cert
7z a -p /tmp/client1.7z /tmp/cert
mv /tmp/client1.7z /var/www
sudo apt-get install p7zip-full -y

cd /tmp

wget http://192.168.3.10/client1.7z

7z e client1.7z
sudo apt-get install openvpn -y

cp /tmp/client1.key /etc/openvpn

cp /tmp/client1.crt /etc/openvpn

cp /tmp/ca.crt /etc/openvpn

sudo nano /etc/openvpn/client.conf
client
dev tun
proto udp
remote 192.168.3.10 1194
resolv-retry infinite
nobind
user nobody
#group nobody
persist-key
persist-tun
ca ca.crt
cert client1.crt
key  client1.key
comp-lzo
pull dhcp-options
On your Linux Client, execute these commands:
cd /etc/openvpn

openvpn /etc/openvpn/client.conf
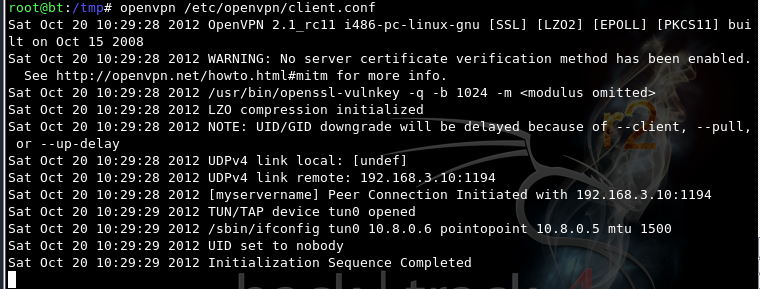
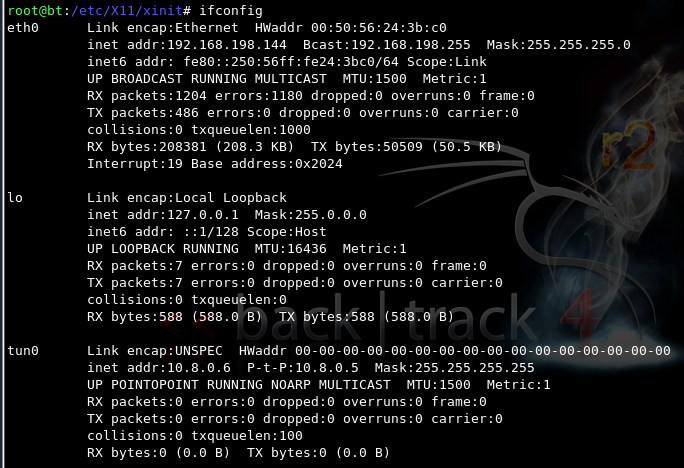
On your Linux Client, open a new Terminal window, and execute this command:
ifconfig
ping 10.8.0.1
ping 10.8.0.6
This is one benefit of VPNs--the two machines are now directly connected, punching through NAT.
sudo cat /etc/openvpn/openvpn-status.log

Save a screen shot of this image with the filename
Proj 13 from Your Name
Proj 13 from Your Name
Last modified 2:40 pm 11-1-12