On the upper right, hover the cursor over the "My Account/Console" link. Click "AWS Management Console"
Sign in.
In the "Amazon Web Services" page, click EC2.
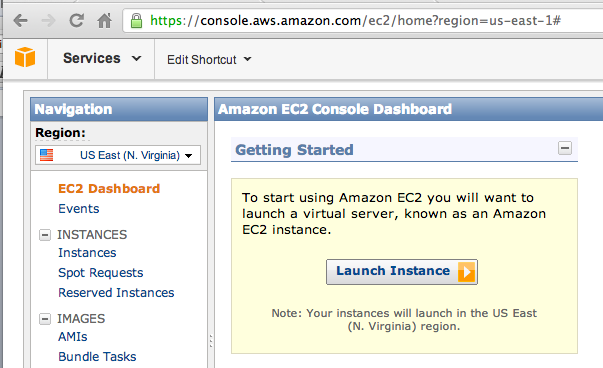
In the "Amazon EC2 Console Dashboard" screen, click the "Launch Instance" button, as shown below:
In the next screen, accept the default selection of "Classic Wizard" and click the Continue button.
In the "Request Instances Wizard", click the "Community AMIs" tab. In the Search box, type vyatta and press the Enter key.
When the list populates, on the "833202017454/Vyatta Core 6.3 rev.11" row, click the Select button, as shown below.
(This isn't the most recent Vyatta version, but the more recent images didn't work when I used them.)

In the next screen, accept the default selection of "Launch Instances" and click the Continue button.
In the "Advanced Instance Options" screen, accept the default selections and click the Continue button.
In the "Storage Device Configuration" screen, accept the default selections and click the Continue button.
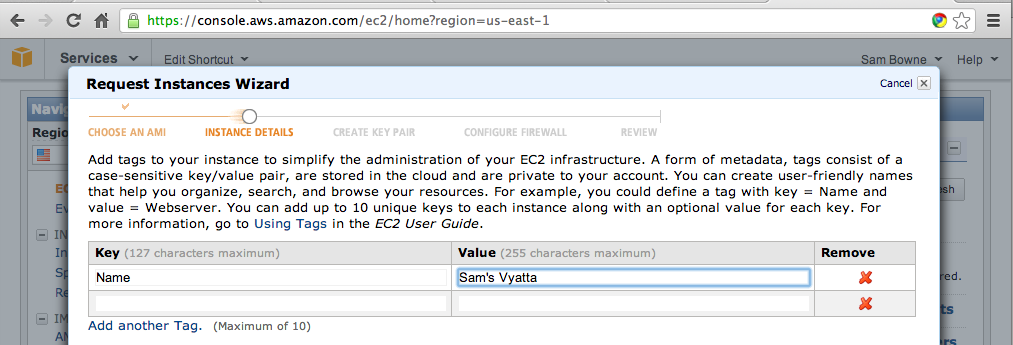
In the "INSTANCE DETAILS" on the right side, enter an appropriate name for your Vyatta machine, as shown below, and click the Continue button.
In the next screen, choose an existing key pair or create a new one, and click the Continue button.
If you have never used AWS before, and don't understand how to work with SSH and keys, look at this project for more instructions:
Project L10: Making an Ubuntu Server on Amazon Web Services
In the next screen, choose an existing security grouop or create a new one, and click the Continue button.
In the next screen, click the Launch button.
Click the "Allocate New Address" button.
In the next box, click the "Yes, Allocate" button.
In the next screen, click the "Associate Address" button.
In the "Associate Address" box, select your Vyatta instance. Click the "Yes, Associate" button.
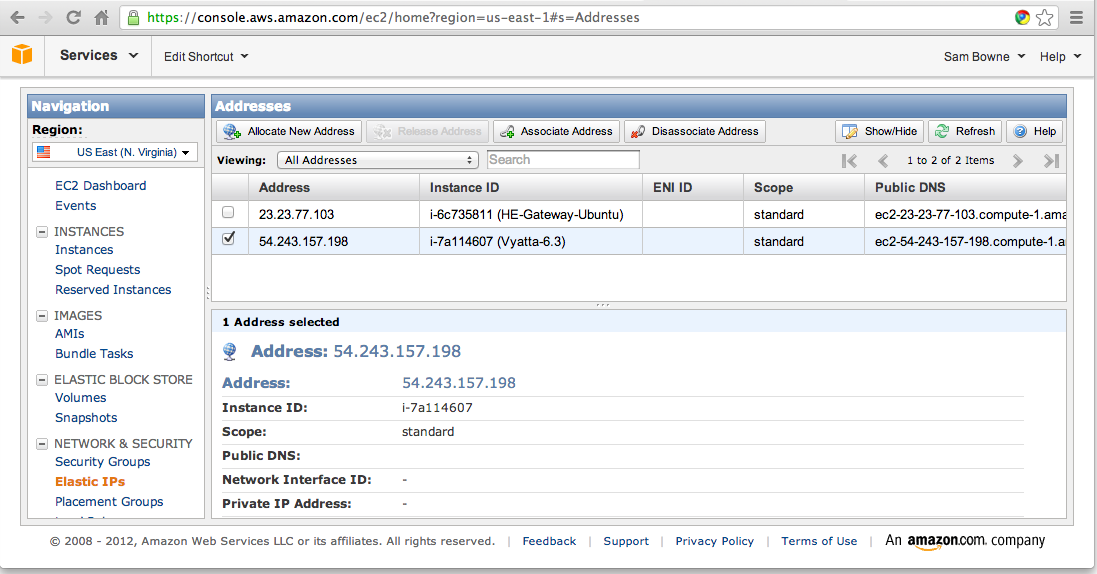
The IP address appears, associated with your Vyatta machine, as shown below:
On the left side, click Register. Fill in the form, get your email, and log in.
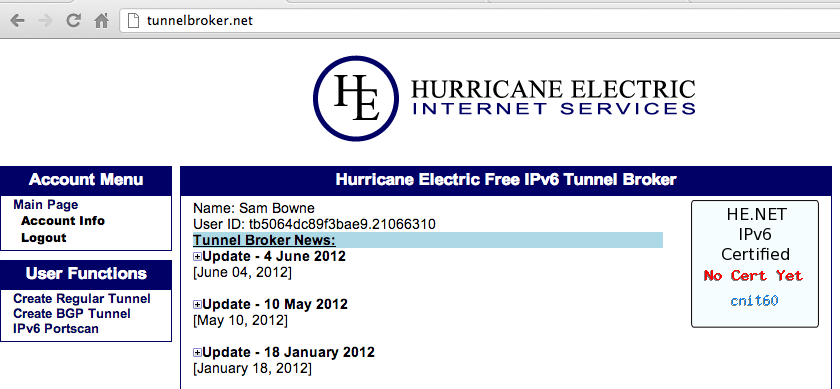
Once you are logged in, you will see a page like the image below:
On the left side, click "Account Info" and change the password to something you won't forget.
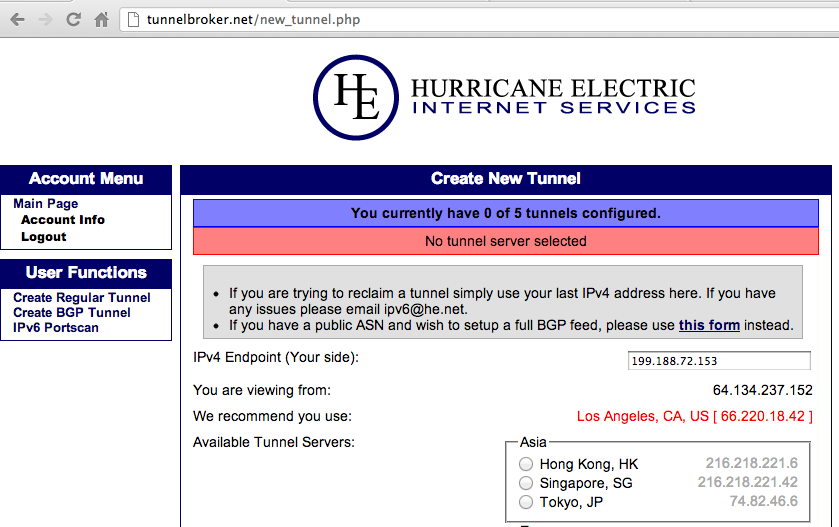
Enter your server's "Elastic IP" address into the "IPv4 Endpoint (Your side)" field and press Enter.
Below your IP address, in red letters, the name of the Hurricane Electric location closest to your server appears.
My server is apparently near Los Angeles, as shown below:
Scroll down to the bottom of the page. The recommended Hurricane Electric location should already be pre-selected. Click the "Create Tunnel" button
Your tunnel information appears, as shown below:
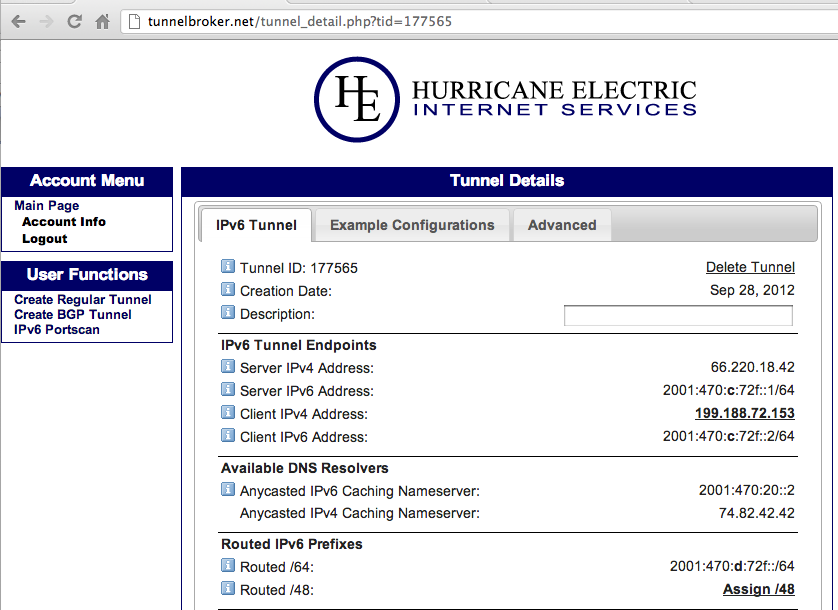
You need all these numbers to configure your server. Here's a brief explanation of the most important items:
I am following the process explained here.
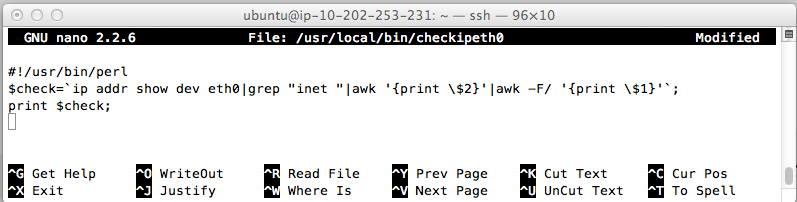
On your Vyatta OpenVPN Server, execute this command:
sudo nano /usr/local/bin/checkipeth0
#!/usr/bin/perl
$check=`ip addr show dev eth0|grep "inet "|awk '{print \$2}'|awk -F/ '{print \$1}'`;
print $check;
On your Vyatta OpenVPN Server, execute these commands:
sudo chmod +x /usr/local/bin/checkipeth0

/usr/local/bin/checkipeth0

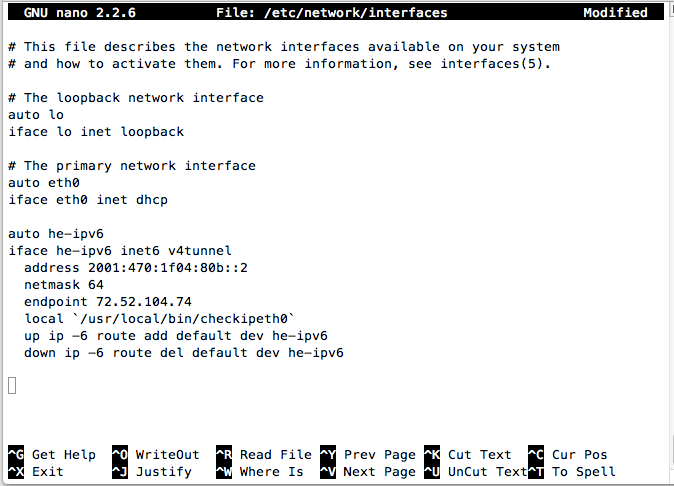
On your Vyatta OpenVPN Server, execute this command:
sudo nano /etc/network/interfaces
auto he-ipv6
iface he-ipv6 inet6 v4tunnel
  address $CLIENT_IPV6
  netmask 64
  endpoint $SERVER_IPV4
  local `/usr/local/bin/checkipeth0`
  up ip -6 route add default dev he-ipv6
  down ip -6 route del default dev he-ipv6
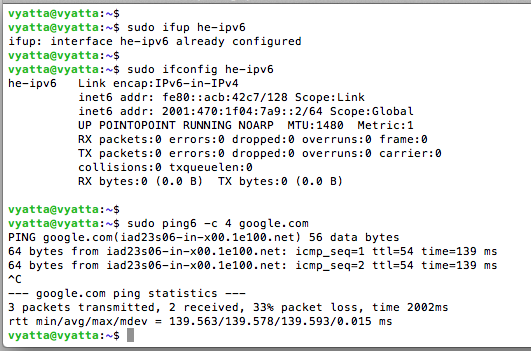
On your Vyatta OpenVPN Server, execute these commands:
sudo ifup he-ipv6

sudo ifconfig he-ipv6

sudo ping6 -c 4 google.com
Troubleshooting
If you do something wrong, and make a non-functional he-ipv6 interface, you need to delete it before you can try again. Otherwise you will see this error:If that happens, delete the old interface with this command:add tunnel sit0 failed: No buffer space available
On your Vyatta OpenVPN Server, execute this command:
sudo nano /etc/cron.d/he-ipv6
*/2 * * * * root ping6 -c 3 -n -q $SERVER_IPV6 > /dev/null
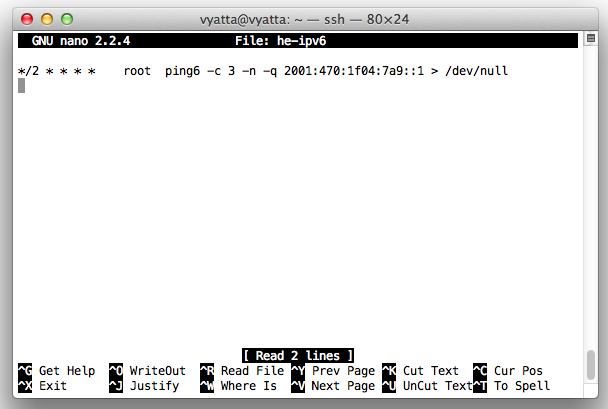
Press Ctrl+X, Y, Enter to save the file.
sudo tcpdump -vv -i he-ipv6 ip6
Now wait two minutes. You should see three "echo request" packets and three "echo reply" packets, as shown below:
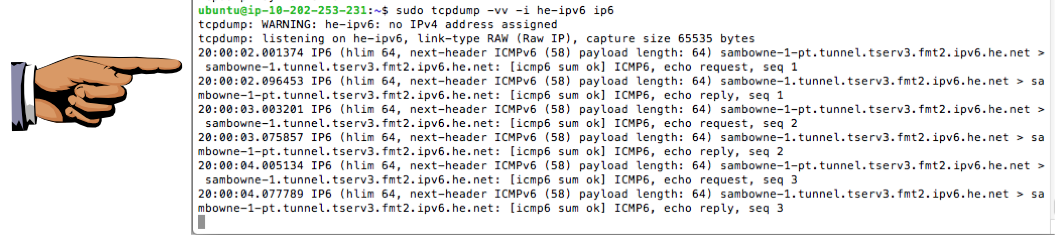
Make sure you see three "echo request" packets and three "echo reply" packets, as shown in the image above on this page.
Save a screen image with the filename Proj V3 from Your Name.
Email the image(s) to cnit.60@gmail.com with a Subject line of Proj V3 from Your Name.
Last modified 5 pm 10-22-12