Its final purpose here is to bring in IPv6 from a Hurricane Tunnel to client machines behind NAT. But for this project, the only goal is to get an OpenVPN server and client working, using IPv4.
sudo mkdir /etc/openvpn/easy-rsa/

sudo cp -r /usr/share/doc/openvpn/examples/easy-rsa/2.0/* /etc/openvpn/easy-rsa/

sudo chown -R $USER /etc/openvpn/easy-rsa/
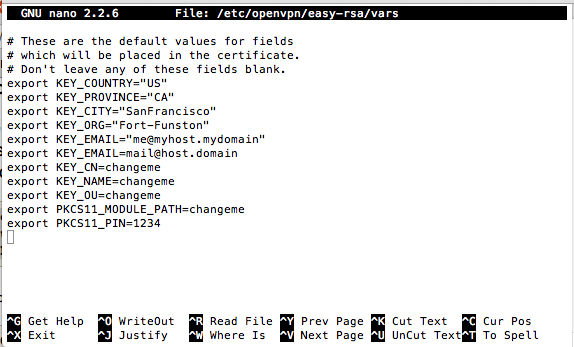
sudo nano /etc/openvpn/easy-rsa/vars
Close the file with Ctrl+X.
cd /etc/openvpn/easy-rsa

sudo ln -s openssl-1.0.0.cnf openssl.cnf

source vars

./clean-all

./build-ca
On your Vyatta OpenVPN Server, execute this command:
./build-key-server myservername
On your Vyatta OpenVPN Server, execute these commands:
./build-dh

cd keys

sudo cp myservername.crt myservername.key ca.crt dh1024.pem /config/auth
On your Vyatta OpenVPN Server, execute these commands:
cd /etc/openvpn/easy-rsa/

source vars

./build-key client1
sudo cp /usr/share/doc/openvpn/examples/sample-config-files/server.conf.gz /etc/openvpn/
sudo gzip -d /etc/openvpn/server.conf.gz
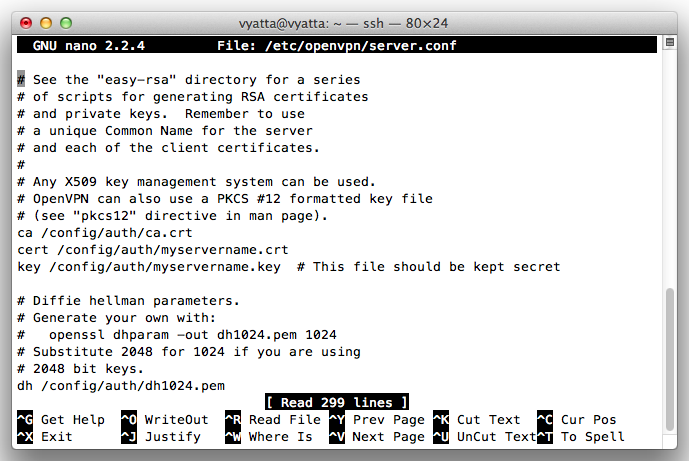
sudo nano /etc/openvpn/server.conf
ca ca.crt
cert server.crt
key server.key  # This file should be kept secret
In the second line, change "server.crt" to "/config/auth/myservername.crt"
In the third line, change "server.key" to "/config/auth/myservername.key"
seven lines lower, change "dh1024.pem" to "/config/auth/dh1024.pem" as shown below:
Save the file with Ctrl+X, Y, Enter.
cd

configure

set interfaces openvpn vtun2

set interfaces openvpn vtun2 mode server

set interfaces openvpn vtun2 server subnet 10.8.0.0/24

set interfaces openvpn vtun2 tls ca-cert-file /config/auth/ca.crt

set interfaces openvpn vtun2 tls cert-file /config/auth/myservername.crt

set interfaces openvpn vtun2 tls dh-file /config/auth/dh1024.pem

set interfaces openvpn vtun2 tls key-file /config/auth/myservername.key

commit
exit
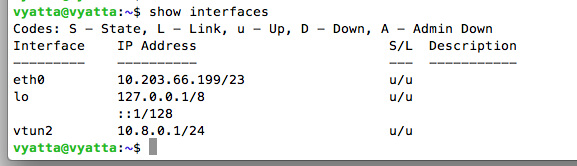
show interfaces
Troubleshooting
If you have problems, you can find detailed messages of openvpn's actions with this command, which works on both the server and client:If you have an openvpn process stuck, and you need to terminate it, try this command first:
If you are using AWS, use the steps below.
In the AWS management console, click E2C.
On the left side, click "Security Groups".
In the top pane, select the Security Group that your Ubuntu machine is using.
Add this rule:
Click the "Apply Rule Changes" button.
Connect to your Vyatta OpenVPN Server.
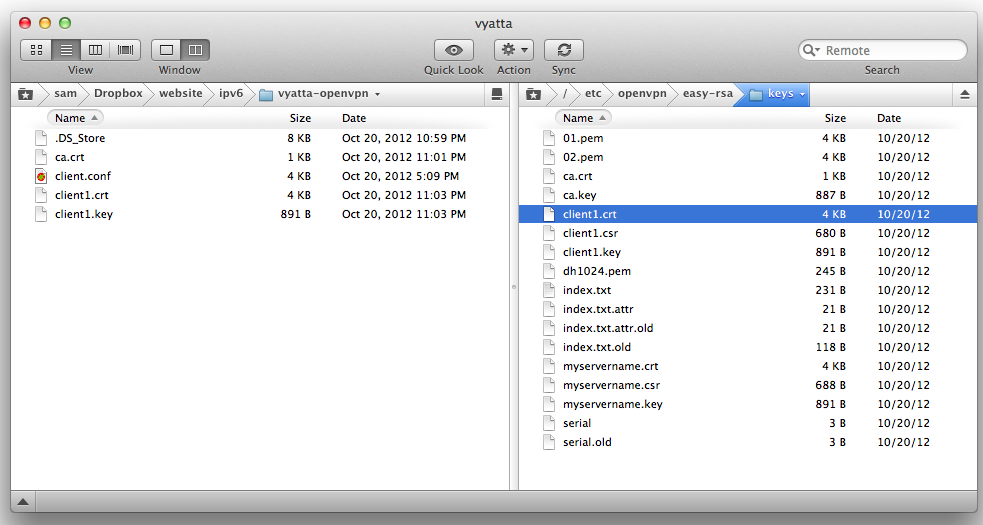
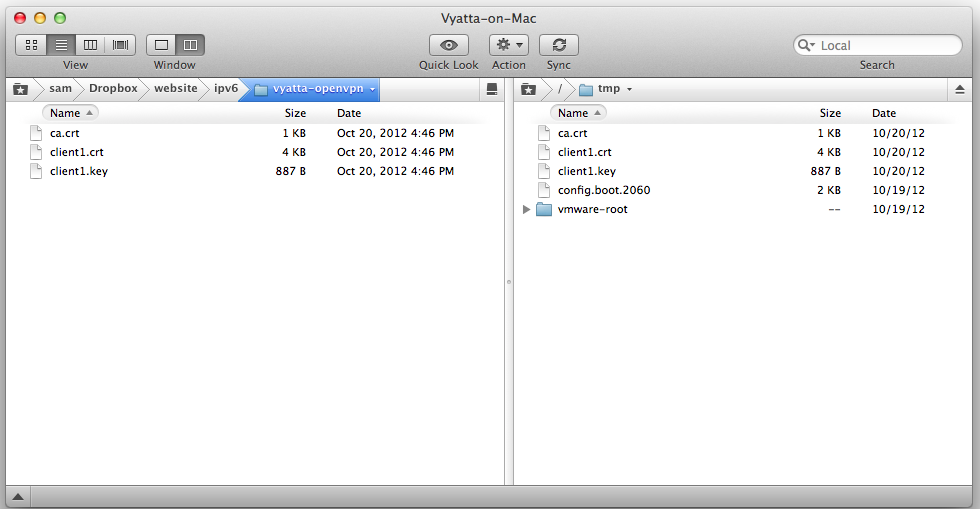
Use SSH to download these three files to your local machine:
Connect to your Vyatta OpenVPN Client, using the username
vyattaand the password
vyatta
Use SSH to upload these three files to your Vyatta OpenVPN Client's /tmp directory:
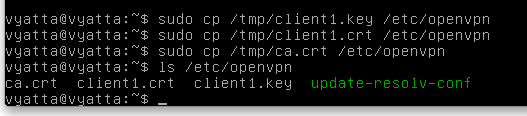
The files are now on the Vyatta OpenVPN Client, but they are not in the correct directory.
To fix that, On your Vyatta OpenVPN Client, execute these commands:
sudo cp /tmp/client1.* /config/auth

sudo cp /tmp/ca.crt /config/auth

ls /config/auth
cd /etc/openvpn

sudo wget http://samsclass.info/ipv6/vyatta-openvpn/client.conf

sudo nano /etc/openvpn/client.conf
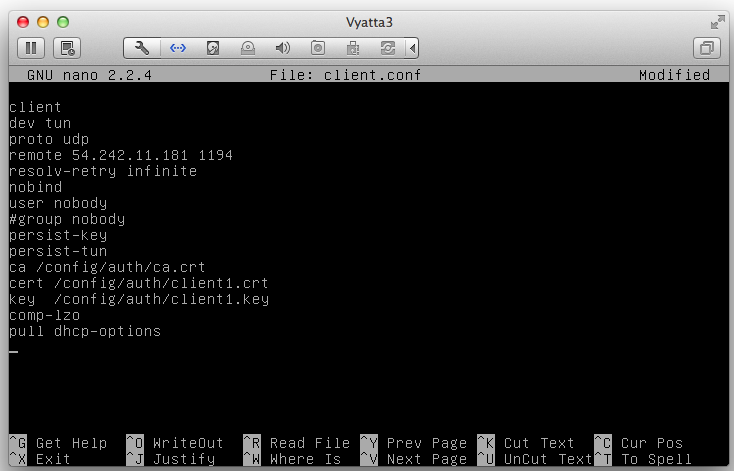
Save the file with Ctrl+X, Y, Enter.
cd
configure
set interfaces openvpn vtun2 remote-host 54.242.11.181
set interfaces openvpn vtun2 mode client
set interfaces openvpn vtun2 tls ca-cert-file /config/auth/ca.crt
set interfaces openvpn vtun2 tls cert-file /config/auth/client1.crt
set interfaces openvpn vtun2 tls key-file /config/auth/client1.key
commit
save
exit
sudo /etc/init.d/openvpn restart
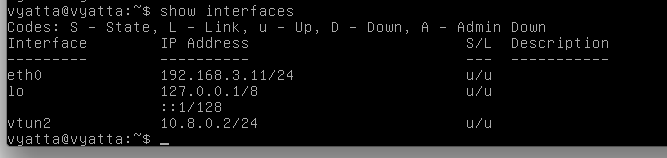
show interfaces
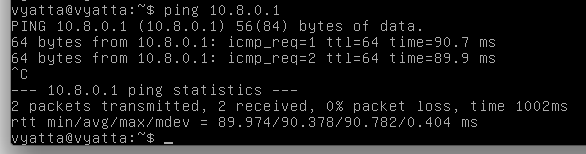
On the Vyatta OpenVPN Client machine, execute this command:
ping 10.8.0.1
sudo cat /etc/openvpn/openvpn-status.log
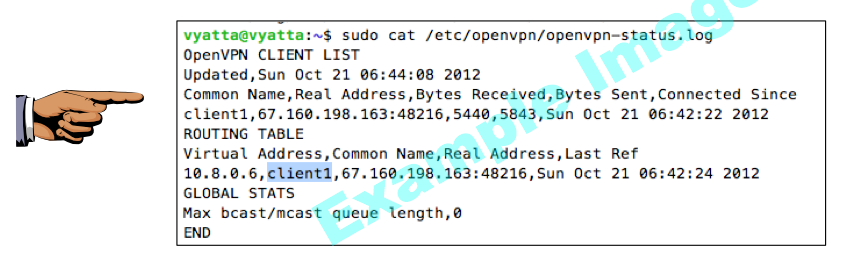
Save a screen shot of this image with the filename
Proj V4 from Your Name
Proj V4 from Your Name
Last modified 6:30 pm 10-22-12