On your Vyatta Router, execute these commands:
configure

set interfaces ethernet eth0 address dhcp

set service ssh

commit

save

exit

show interfaces
On your Vyatta Router, execute these commands:
configure
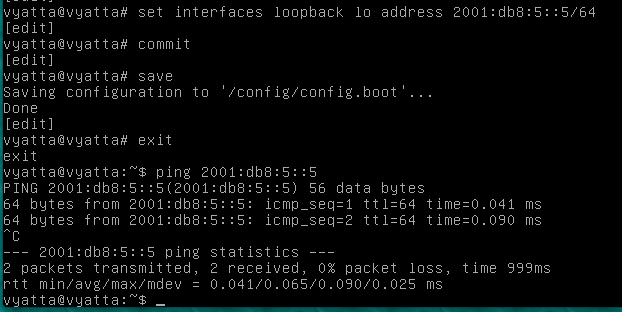
set interfaces loopback lo 2001:db8:5::5/64
commit
save
exit
ping 2001:db8:5::5
Press Ctrl+C to stop the pings.
show interfaces
In my example, the correct interface to use is eth0, as shown below:

To be more specific, we'll use this range:
2001:db8:6::1000 - 2001:db8:6::1999
If you are using a Hurricane Electric tunnel, use subnet from your "Routed /48"--the standard allocation of IPv6 addresses.
show ipv6 forwarding

If it's not on, enable it with these commands:
configure

delete system ipv6 disable-forwarding

commit

save

exit
This technique sets the Autonomous, Managed, and Other bits all to 1, which has these results:
configure

edit interfaces ethernet eth0

set address 2001:db8:6::1/64

commit

save

exit

show interfaces

On your Vyatta router, execute these commands:
configure

edit interfaces ethernet eth0

set ipv6 router-advert send-advert true

set ipv6 router-advert max-interval 10

set ipv6 router-advert prefix 2001:db8:6::/64

set ipv6 router-advert prefix 2001:db8:6::/64 autonomous-flag true

set ipv6 router-advert other-config-flag true

set ipv6 router-advert default-preference high

set ipv6 router-advert managed-flag true

commit

save

exit

sudo tcpdump ip6
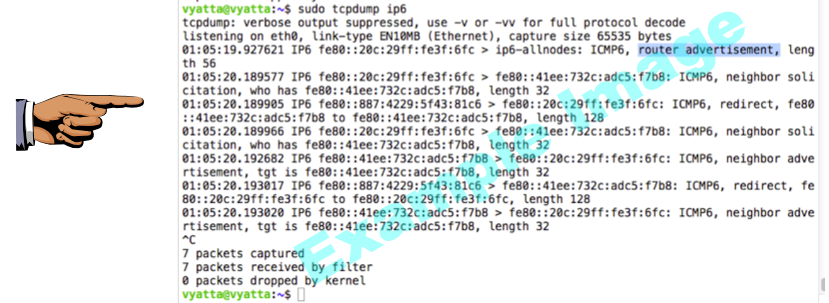
Press Ctrl+C to stop the packet capture.
Save a screen shot of this image with the filename
Proj V7a from Your Name
On your Vyatta router, execute these commands:
configure

edit service dhcpv6-server shared-network-name lan subnet 2001:db8:6::/64

set name-server '2620:0:ccc::2'

set name-server '2620:0:ccd::2'

set address-range start 2001:db8:6::1000

set address-range start 2001:db8:6::1000 stop 2001:db8:6::1999

commit

save

exit

sudo tcpdump ip6 | grep dhcpv6
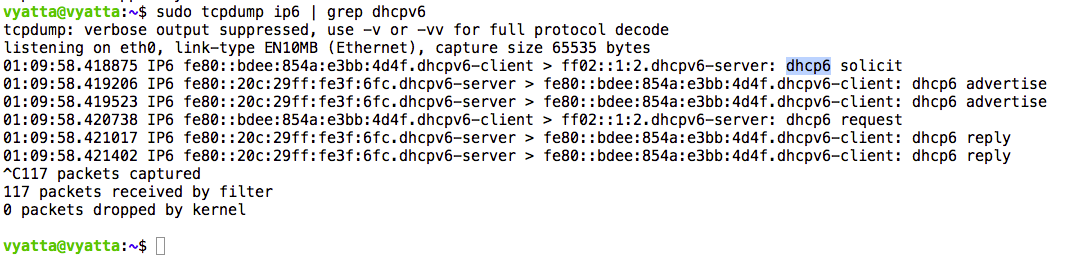
Press Ctrl+C to stop the packet capture.
If you are not using the real Internet, just skip this section.
If your connection to the Internet is through a tunnel to another router, you must add a route to that remote router so it knows where your /48 is.
In my case, I am using an Amazon E2C Vyatta virtual machine.
On that device, execute these commands, using thesr values:
configure

set protocols static route6 2001:470:8273::/48 next-hop 2001:470:1f05:7a9::2

commit

save

exit
So choose the section below for your client.
Connecting a Windows 7 Client
Start a Windows 7 computer, connected to the same LAN as your Vyatta's interface sending out Router Advertisements.
Resetting the Network Stack
On your Windows 7 machine, in case some previous project has messed things up, execute these commands:Restart the Windows 7 machine.netsh winsock reset catalognetsh int ipv4 reset reset.log
netsh int ipv6 reset reset.log
Observing Autoconfiguration
On the Windows 7 client, in a Command Prompt window, execute this command:You should see three addresses starting with 2001:db8:6, as shown below:
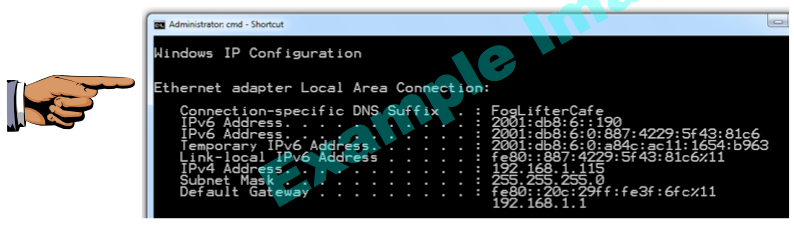
Saving the Screen Image
Make sure you see at least one address starting with 2001:db8:6Save a screen shot of this image with the filename
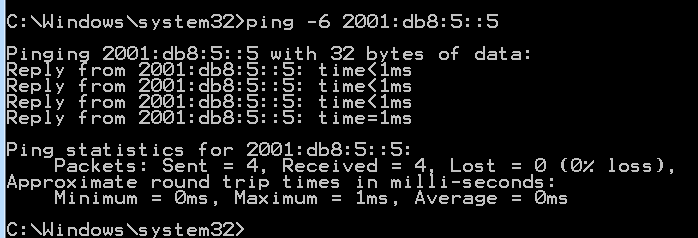
Proj V7b from Your NameOn the Windows 7 client, in a Command Prompt window, execute this command:You should see replies, as shown below:
Connecting a Linux Client
Start a Linux computer, connected to the same LAN as your Vyatta's interface sending out Router Advertisements.I used a BackTrack 5 R2 virtual machine.
In the Linux client, in a Terminal window, execute these commands:
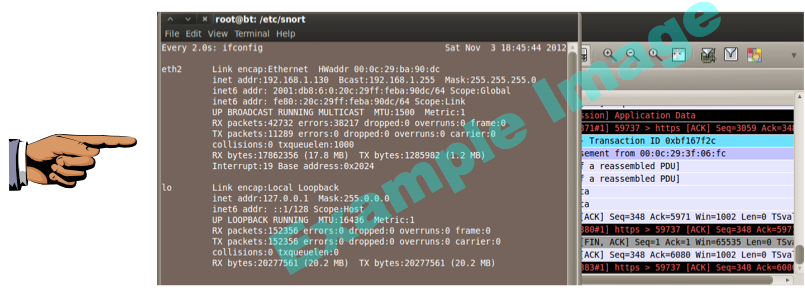
This shows your ip addresses in real-time.Wait ten seconds and see if an address starting with 2001:db8:6 appears, as shown below.
If it doesn't appear, start Wireshark sniffing in the Linux machine. This makes the network card promiscuous, and often makes networking work better.
Saving the Screen Image
Make sure you see at least one address starting with 2001:db8:6Save a screen shot of this image with the filename
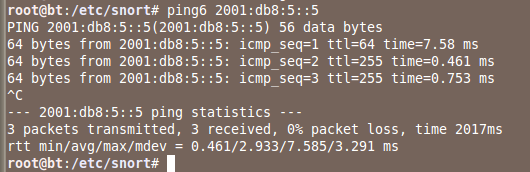
Proj V7b from Your NameIn the Linux client, in a Terminal window, execute this command:You should see replies, as shown below:
Connecting a Mac OS X Client
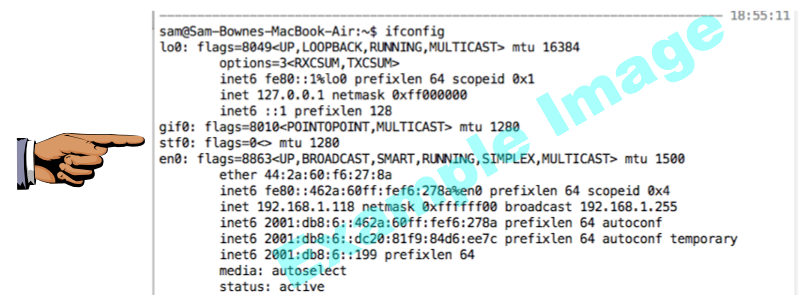
Start a Mac OS X computer, connected to the same LAN as your Vyatta's interface sending out Router Advertisements.I used a MacBook Air running Lion, 10.7.4.
In the Mac OS X client, in a Terminal window, execute this command:
You should see at least one address starting with 2001:db8:6, as shown below:
Saving the Screen Image
Make sure you see at least one address starting with 2001:db8:6Save a screen shot of this image with the filename
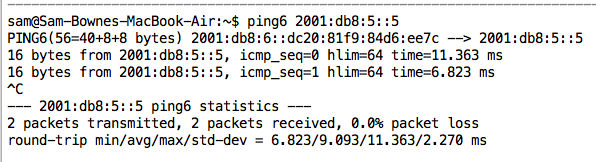
Proj V7b from Your NameIn the Mac OS X client, in a Terminal window, execute this command:You should see replies, as shown below:
Troubleshooting
I had some problems making this work reliably. Here are things that made it work better:
- If the Vyatta is in a VM, use Bridged networking, not NAT
- To clear any old IPv6 configuration and renew it on the Mac's en0 interface, enter these two commands to disable IPv6 on that interface and then re-enable it again:
Proj V7 from Your Name
http://www.howfunky.com/2012/05/north-american-ipv6-summit-advanced.html
http://ebook.cna.ilkom.unsri.ac.id/vyatta/Vyatta_IPv6_R6.0_v03.pdf
Last modified 7:11 pm 11-3-12