Haproxy is in the Ubuntu archives, but we can't use apt-get install haproxy because the archive copy is too old and does not support IPv6.
From the Menu bar, click Applications, Accessories, Terminal. In the Terminal window, execute these commands (When you are prompted to, enter your password):
cd /usr/local/src

sudo wget http://haproxy.1wt.eu/download/1.4/src/haproxy-1.4.11.tar.gz
sudo tar -xzf haproxy-1.4.11.tar.gz

cd haproxy-1.4.11

sudo make TARGET=linux26 ARCH=i386
Wait while a screen or two of messages scroll by. When the $ prompt reappears, in the Terminal window, execute this command:
sudo make install
In the Terminal window, execute these commands:
sudo mkdir /etc/haproxy

cd examples/

sudo cp haproxy.cfg /etc/haproxy

sudo cp haproxy.init /etc/init.d/haproxy

sudo chmod 755 /etc/init.d/haproxy

sudo nano /etc/init.d/haproxy
In the nano text editor, execute these commands:
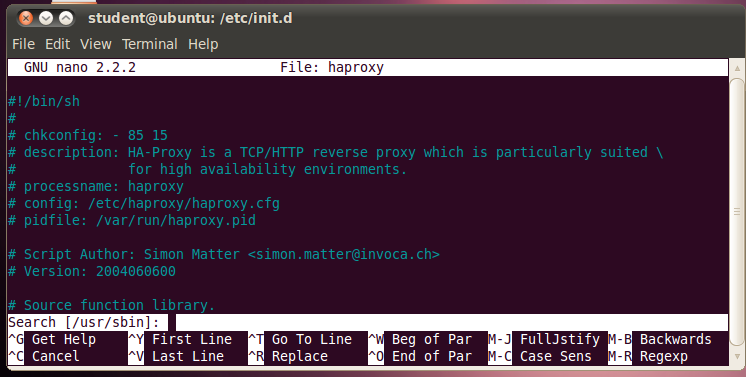
Ctrl+WWhen you start the search, your screen will look like this:
Ctrl+R to start search and replace
At the "Search (to replace):" prompt, type
/usr/sbin
press Enter
At the "Replace with:" prompt, type
/usr/local/sbin
Press Enter
At the "Replace this instance?" prompt, type
A
you should see a message saying "[ replaced 6 occurrences ]"
Save the file with Ctrl+X, Y, Enter
In the Terminal window, execute this command:
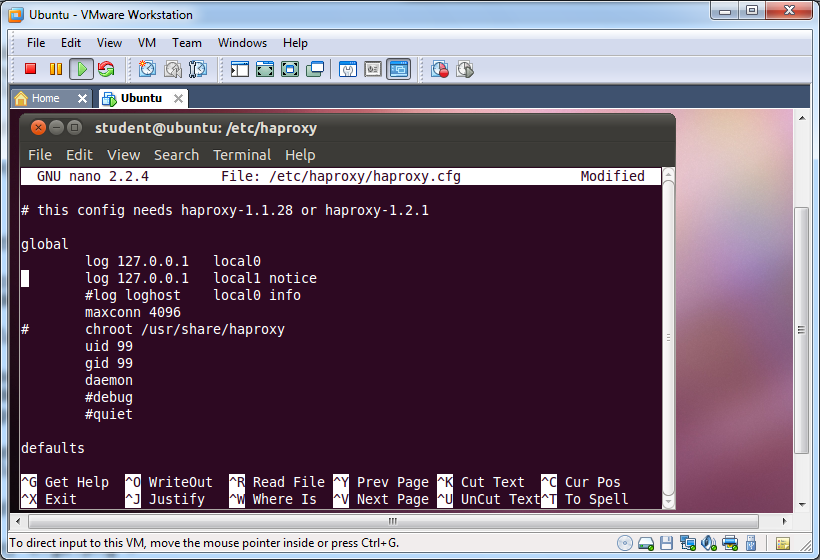
sudo nano /etc/haproxy/haproxy.cfg
In the global section, add a # to comment out this line:
# chroot /usr/share/
Your file should look like the image below on this page:
Scroll down to the defaults section and make these three changes:
Change the mode http line to
mode tcp
# option httplog


# redispatch
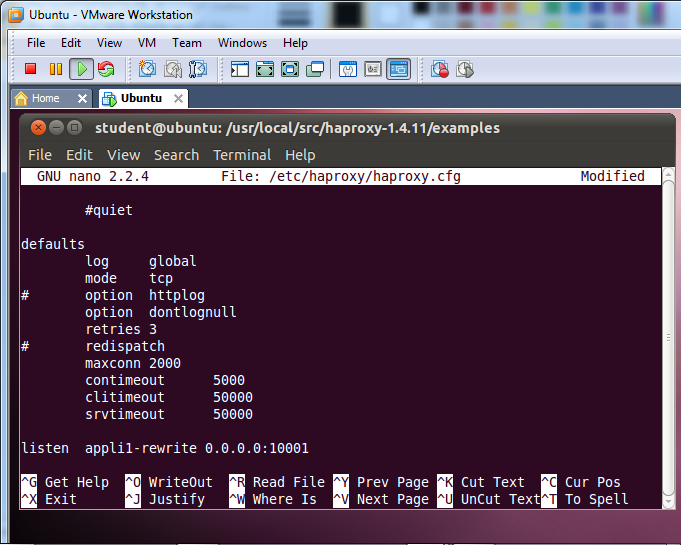
Use the down-arrow key to move to the first line starting with listen.
Press Ctrl+K repeatedly to delete that
line and all the lines below it. Then type in these lines:
     listen ipv6proxy80     0::0:80
            mode    tcp
            server  ipv4server80    147.144.1.212:80
            maxconn 4000
     listen ipv6proxy443    0::0:443
            mode    tcp
            server  ipv4server443   147.144.1.212:443
            maxconn 4000
Save the file with Ctrl+X, Y, Enter
In the Terminal window, execute these commands:
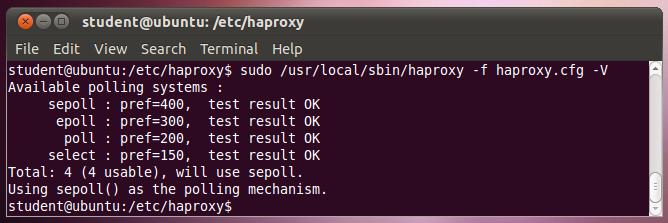
cd /etc/haproxy

sudo /usr/local/sbin/haproxy -f haproxy.cfg -V
You should see four lines ending with "test results OK" and then a line saying "Using sepoll() as the polling mechanism.", as shown below on this page:
In the Terminal window, execute this command:
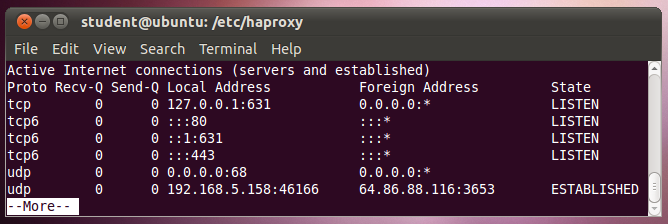
netstat -an | more
You should see local addresses of :::80 and :::443 with a state of LISTEN, as shown below on this page:
In the Terminal window, execute this command:
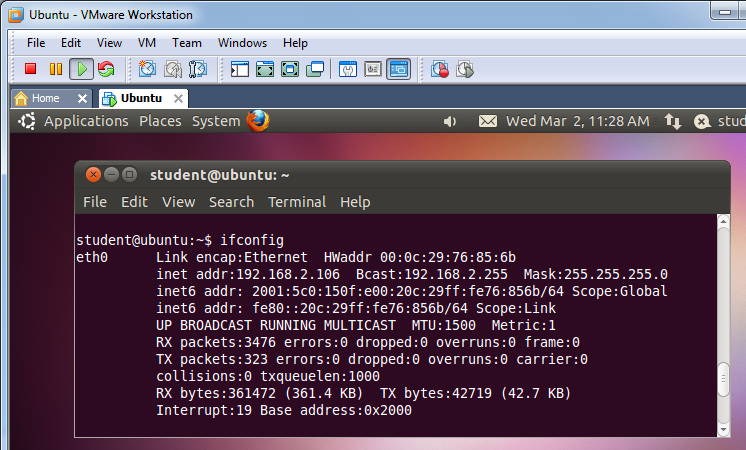
ifconfig
Find the eth0 interface's public inet6 address, as shown below on this page--it will start with 2, not with fe80. If your Ubuntu machine is not connected to the Internet via IPv6, you need to correct that. The previous Linux project explained how to connect a Linux machine through the host Windows machine's gogoCLIENT tunnel.
The CCSF Web page is not currently available to IPv6 clients. But you have just fixed that with your haproxy machine. In the Windows host machine, open a Web browser and put the IPv6 address of the haproxy Linux machine in the address bar, enclosed in square brackets [], like this:
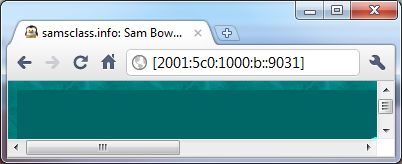
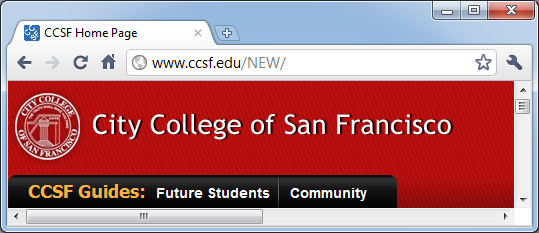
In the browser, press Enter. The CCSF Web page opens, as shown below on this page:
On the host Windows machine, click Start, type CMD, and press Enter. In the Command prompt window, enter NETSTAT -AN and press Enter. You should see a connection to your Linux machine's IPv6 address on port 80--this is where the Web page loaded from!
There is also a connection to 147.144.1.212:80; this was made when the page redirected.
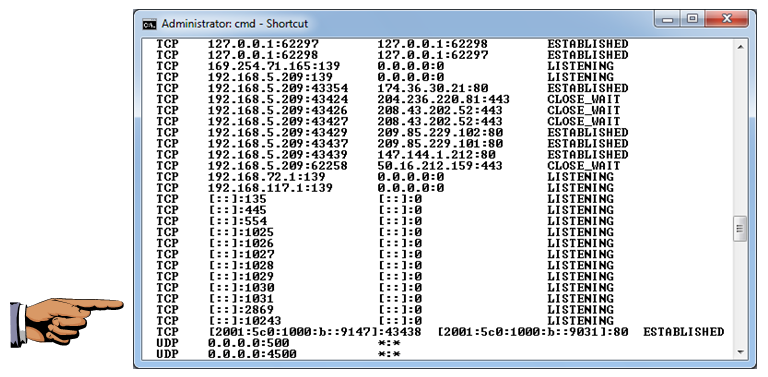
Make sure you can see the connection to the IPv6 address on port 80, as shown in the image above on this page.
Save a screen image with the filename Proj-L2-from-YourName.
Email it to cnit.60@gmail.com with a Subject line of Proj L2 from Your Name.
Last modified: 2 pm 4-22-11